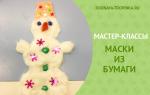
Winter extravaganza in quilling. Winter in openwork paper quilling patterns Winter quilling paintings
Crafts for the New Year always bring joy. And it doesn’t matter whether you make a large panel with a beautiful landscape or give a miniature postcard with an embroidered picture - all the same, the recipient will be incredibly happy that you paid attention to him.
Every person understands that a homemade gift is much better than one bought in a store. In any case, it is several times more pleasant. Today we want to introduce you to one interesting way that allows you to make amazing New Year's gifts in just a few minutes.
Crafts using quilling technique for New Year 2017 will allow you to feel an indescribable calming effect, and will also appeal to all the guests gathered at the holiday.
What is quilling?
For those who do not know what the quilling technique is, I would like to give a short excursion. This type of needlework is considered very simple, but at the same time, very beautiful. Quilling does not require expensive tools and materials. All you need to work is a good mood, an interesting idea and time.
When creating compositions, paper strips with a width of 3, 4, 6 and 10 mm are used. There can be several devices for twisting.
There are professional curling machines that are sold in specialized stores, as well as improvised tools, such as a tapestry needle with a large eye and a round wooden stick 10 cm long.
It is also advisable to stock up on tweezers with flat tips. It is needed to hold the paper blank, apply glue to it and stick it to the surface.
As for other devices that are necessary for working with the quilling technique, they can be found in any home. These are scissors (preferably with sharp ends), a ruler, toothpicks, PVA glue.
If you decide to seriously engage in this type of needlework, then stores sell entire sets that include all the necessary tools and you do not have to assemble them separately.
Ideas for crafts in the style of quilling for the New Year
When deciding to make such a New Year's surprise for someone close to you, you must understand what or who you will glue from strips of paper. There are a huge number of themed crafts on the Internet and sometimes it’s hard to figure out which one you like best.
Among such abundance, you can choose the main “figurants” that you might like - these are Christmas trees, snowflakes and cockerels. The last craft will be not only a wonderful, but also an appropriate gift, because 2017 is the year of the Fire Rooster. So your Petya, made using the quilling technique, will look nice under the Christmas tree.
"Bright Cockerel"

It would seem impossible to create such wonderful pictures and figures from ordinary strips of paper. But as practice shows, the main thing is perseverance and a little imagination, and the rest is a matter of little things. If you decide to make a cockerel for the New Year 2017, then choose the ideal example for yourself (photos are presented below), stock up on all the necessary materials and get down to business.
Examples of how to make a New Year's rooster can be found in any format and size. These can be either free-standing figures or the silhouette of a bird.


There are quite a few basic forms for quilling that help you create real masterpieces from paper. The picture clearly shows how this or that curl should look.
Go for it! You will succeed, and after a while you will be able to present a cute panel or a wonderful picture with a cockerel in the title role.
Original snowflake

The most common decoration for the New Year holiday are snowflakes. We hang them on the Christmas tree, draw or sculpt them on the windows, and make garlands out of them. Why not go beyond the usual boundaries and create wonderful winter compositions using the quilling technique as a basis?! Put in a little effort and you will have beautiful openwork snowflakes at home, which you can also give to friends as souvenirs.
To create a New Year's snowflake you will need:
- special paper for quilling;
- scissors;
- ruler;
- stationery knife;
- toothpick.
Step 1. Cut strips of quilling paper 25-27 mm long and 3-5 mm wide.


Step 2. Take a toothpick - it will be your main tool in this work. Cut off the sharp tip on one side and use a stationery knife to make a small incision - about 1 cm.
Step 3. Insert the first strip of paper into the cut and slowly twist it into a spiral. Make sure that the paper is curled and not just a toothpick. There is no need to rush in this matter, because then the craft may not work out.
Step 4. The finished spiral must be removed from the toothpick and placed on a flat surface so that it unwinds slightly.
Step 5. Apply a little glue to the end of the strip and glue the spiral.
Step 6. To make one snowflake, you must use the same principle to make several similar curls of different shapes and sizes.
Step 7 Fold the resulting spirals into a snowflake, carefully gluing each piece.
Volumetric Christmas tree

This bright New Year's composition can be an excellent table decoration, as well as a wonderful gift for a loved one, colleague or relative.
To create a voluminous Christmas tree you will need:
- scissors;
- quilling paper;
- ruler-pattern with circles of different diameters;
- PVA glue;
- toothpick;
- tweezers.
If you don't have a quilling tool, a regular toothpick with a cut end can easily replace it.
Step 1. To work, take special green paper and cut it into several dozen strips 3 mm wide, and also cut brown paper into strips 7 mm wide.
Step 2. Brown stripes need to be wound into loose curls, for example onto a regular marker. Lubricate their ends with glue and glue them. Brown “barrels” are ready!
Step 3. Now you need to make green blanks. Wrap the paper around an awl (toothpick) and insert it into a size 16 ruler. Let it run free. To remove a curl from a ruler, you need to insert a toothpick into the center, slightly move it to the center and remove it.
Step 4. Glue the end of the spiral with PVA glue. Squeeze the curl slightly so that it takes the shape of a droplet. Prepare 10 of these droplets. Wrap each curl with a white strip of the same width and glue it. This is the first row of your Christmas tree.
Step 5. We make the second row using the same principle, only insert it into the circle numbered 15. Twist about 10 such curls. Glue the first two rows as shown in the photo.
Step 6. Now make spirals for the third row by inserting them into hole number 14. Glue them.
Step 7 For the fourth row you will need a circle of size 13. The same size must be taken for the 5th and 6th rows. Carefully glue all the parts to each other, as can be seen in the photo. Glue another “drop” onto the top. Decorate the Christmas tree with beads and it is ready!
Hello, quilling lovers! Each of us makes decorations for the Christmas tree with our own hands on the eve of the New Year holidays. Again and again we make new, unusual, unique toys for the Christmas tree so that each time it is decorated completely differently than last year. It is for this reason that I want to present you my new quilling master class - a DIY Christmas tree decoration in the shape of a penguin. Using this master class, you will learn how to make a penguin - a Christmas tree decoration - from simple quilling elements, and you will be able to create different New Year's images for your product.
13 DecHello, quilling lovers! I would like to present to your attention a photo of 10 different New Year's decorations made of paper. Different color combinations, different decorations, different motifs. 10 different images of crafts - deer quilling, for every taste! In the article, you can choose your own paper deer and repeat it to decorate your Christmas tree or as a gift.
Published in: Tagged: 12/13/2018 02 But I Published in: Tagged: 11/02/2018 01 But IHello, quilling lovers! Today I have selected a very interesting master class for you. Using it, you will learn how to create a penguin with your own hands from paper using the 3D quilling technique. In addition, you can create penguin couples with your own hands. Or make whole families of penguins with small children. Thanks to the master class, you will have the opportunity to personalize your family as penguins and decorate your home with cute and funny paper crafts. Use my quilling master class with a detailed description and step-by-step photographs of making a craft - a penguin made of paper with your own hands.
Published in: Tagged: 11/01/2018 30 OctHello, quilling lovers! Many times I shared with you ideas for crafts in the form of Santa Claus using the 3D quilling technique (3D quilling) in the section. And I still couldn’t decide to make a flat toy for the Christmas tree in the shape of Santa Claus. After working on the idea a little, I created a whole collection of options on how you can create a Santa Claus toy using just one of my master classes. Using the base template, I created 23 different Santa Claus images. Making a Santa Claus toy is very simple. Use my quilling master class with a detailed description and step-by-step photographs of making a craft - Santa Claus toy for the Christmas tree.

Crafts for the New Year always bring joy. And it doesn’t matter whether you make a large panel with a beautiful landscape or give a miniature postcard with an embroidered picture - all the same, the recipient will be incredibly happy that you paid attention to him.
Every person understands that a homemade gift is much better than one bought in a store. In any case, it is several times more pleasant. Today we want to introduce you to one interesting way that allows you to make amazing New Year's gifts in just a few minutes.
Crafts using the quilling technique for the New Year 2017 will allow you to feel an indescribable calming effect, and will also appeal to all the guests gathered at the holiday.
1:17811:9
What is quilling?
1:52 1:62For those who do not know what the quilling technique is, I would like to give a short excursion. This type of needlework is considered very simple, but at the same time, very beautiful. Quilling does not require expensive tools and materials. All you need to work is a good mood, an interesting idea and time.
When creating compositions, paper strips with a width of 3, 4, 6 and 10 mm are used. There can be several devices for twisting.
There are professional curling machines that are sold in specialized stores, as well as improvised tools, such as a tapestry needle with a large eye and a round wooden stick 10 cm long.
1:1274


It is also advisable to stock up on tweezers with flat tips. It is needed to hold the paper blank, apply glue to it and stick it to the surface.
As for other devices that are necessary for working with the quilling technique, they can be found in any home. These are scissors (preferably with sharp ends), a ruler, toothpicks, PVA glue.
If you decide to seriously engage in this type of needlework, then stores sell entire sets that include all the necessary tools and you do not have to assemble them separately.
5:43035:9
Ideas for crafts in the style of quilling for the New Year
5:106When deciding to make such a New Year's surprise for someone close to you, you must understand what or who you will glue from strips of paper. There are a huge number of themed crafts on the Internet and sometimes it’s hard to figure out which one you like best.
Among such abundance, you can choose the main “figurants” that you might like - these are Christmas trees, snowflakes and cockerels. The last craft will be not only a wonderful, but also an appropriate gift, because 2017 is the year of the Fire Rooster. So your Petya, made using the quilling technique, will become a pleasant symbolic gift for the Christmas tree.
5:1198 5:1208Bright cockerel

It would seem impossible to create such wonderful pictures and figures from ordinary strips of paper. But as practice shows, the main thing is perseverance and a little imagination, and the rest is a matter of little things. If you decide to make a cockerel for the New Year 2017, then choose the ideal example for yourself (photos are presented below), stock up on all the necessary materials and get down to business.
Examples of how to make a New Year's rooster can be found in any format and size. These can be either free-standing figures or the silhouette of a bird.
6:2701


There are quite a few basic forms for quilling that help you create real masterpieces from paper. The picture clearly shows how this or that curl should look.
14:4806


Go for it! You will succeed, and after a while you will be able to present a cute panel or a wonderful picture with a cockerel in the title role.
18:231018:9
Original snowflake
18:68The most common decoration for the New Year holiday are snowflakes. We hang them on the Christmas tree, draw or sculpt them on the windows, and make garlands out of them. Why not go beyond the usual boundaries and create wonderful winter compositions using the quilling technique as a basis?! Put in a little effort and you will have beautiful openwork snowflakes at home, which you can also give to friends as souvenirs.
To create a New Year's snowflake you will need:
18:890- special paper for quilling;
- scissors;
- ruler;
- stationery knife;
- toothpick.
Step 1. Cut strips of quilling paper 25-27 mm long and 3-5 mm wide.
18:1218


Step 2. Take a toothpick - it will be your main tool in this work. Cut off the sharp tip on one side and use a stationery knife to make a small incision - about 1 cm.
Step 3. Insert the first strip of paper into the cut and slowly twist it into a spiral. Make sure that the paper is curled and not just a toothpick. There is no need to rush in this matter, because then the craft may not work out.
Step 4. The finished spiral must be removed from the toothpick and placed on a flat surface so that it unwinds slightly.
Step 5. Apply a little glue to the end of the strip and glue the spiral.
Step 6. To make one snowflake, you must use the same principle to make several similar curls of different shapes and sizes.
Step 7 Fold the resulting spirals into a snowflake, carefully gluing each piece.
26:686326:9
Volumetric Christmas tree

This bright New Year's composition can be an excellent table decoration, as well as a wonderful gift for a loved one, colleague or relative.
To create a voluminous Christmas tree you will need:
27:921- scissors;
- quilling paper;
- ruler-pattern with circles of different diameters;
- PVA glue;
- toothpick;
- tweezers.
If you don't have a quilling tool, a regular toothpick with a cut end can easily replace it.
27:1342 27:1352
28:9
Step 1. To work, take special green paper and cut it into several dozen strips 3 mm wide, and also cut brown paper into strips 7 mm wide.
28:353 28:363
Step 2. Brown stripes need to be wound into loose curls, for example onto a regular marker. Lubricate their ends with glue and glue them. Brown “barrels” are ready!
29:1186 29:1196
Step 3. Now you need to make green blanks. Wrap the paper around an awl (toothpick) and insert it into a size 16 ruler. Let it run free. To remove a curl from a ruler, you need to insert a toothpick into the center, slightly move it to the center and remove it.
30:493 30:503
Step 4. Glue the end of the spiral with PVA glue. Squeeze the curl slightly so that it takes the shape of a droplet. Prepare 10 of these droplets. Wrap each curl with a white strip of the same width and glue it. This is the first row of your Christmas tree.
31:1464 31:1474
32:9
Step 5. We make the second row using the same principle, only insert it into the circle numbered 15. Twist about 10 such curls. Glue the first two rows as shown in the photo.
32:325 32:335
Step 6. Now make spirals for the third row by inserting them into hole number 14. Glue them.
33:1043 33:1053
34:9
Step 7 For the fourth row you will need a circle of size 13. The same size must be taken for the 5th and 6th rows. Carefully glue all the parts to each other, as can be seen in the photo. Glue another “drop” onto the top. Decorate the Christmas tree with beads and it is ready!
34:520 34:530

36:9


The quilling technique as a form of applied art continues to gain momentum. It attracts with its openwork and ease of creating crafts. For those who are not in the know, let us explain: quilling is a technique of twisting strips of paper, shaping them into the desired shape and creating compositions. The latter, by the way, can easily receive a prize and the title of masterpiece.
Most often, the quilling technique is used to create holiday cards; they are decorated with openwork crafts. By the way, curled paper makes wonderful snowflakes for the New Year, so in December the theme of decorating cards is especially relevant.

Crafts using the quilling technique for the New Year
Snowflake
We will need:- glue;
- strips of colored paper (you can use blanks from the store);
- scissors;
- threads;
- matches;
- beads.

1.Twist the strip onto a match
Take a match and use a sharp knife to split the edge. Pinch the edge of the paper strip into the crevice of the match and begin to wrap it around the match. Don't do it too tightly to make the part more beautiful.
2.Make paper blanks
You will need 12 such blanks, so repeat the action 12 times.
3.Make a snowflake
Start forming a snowflake. Gently squeezing the round workpiece, give it the desired shape. Start gluing the parts together, forming them into a snowflake.
4.Glue the beads
Place beads around the perimeter of the entire snowflake. Make a loop from the thread and attach it to the snowflake. This craft will successfully decorate the New Year tree in your home.
Christmas tree. Option 1
We will need:- glue;
- toothpick;
- strips of green paper;
- scrap paper;
- beads;
- glitters;
- printouts-congratulations;
- corner punchers;
- ribbon;
- snowflakes.
Wrap the prepared strips around a toothpick and secure with glue. You should end up with a tight bud.

One Christmas tree requires 10 buds. Glue the buds onto the paper, and then fluff each one with your fingers, and you will see the buds bloom.
Process the corners of the rectangles with a decorative hole punch.
Make a bow from ribbon and glue beads in the center. Cut the paper towel into 1 by 1 centimeter squares.
Using the trimming method, make a snowdrift. For the trunk of the Christmas tree, use a paper bag handle.
Glue a printout with congratulations to the back of the cardboard.

Using green glitter, cover the lush buds of the Christmas tree with glitter. The forest beauty will sparkle, as if thousands of lights have been lit on it.
Christmas tree. Option 2
If you roll the quilling paper not into such tight rolls as in the previous master class, but give them a shape, you will get original Christmas trees.


Volumetric Christmas trees made of paper
If you glue and assemble quilling paper into one piece, you can get a three-dimensional Christmas tree. Decorate the crown of such a beauty with a gilded star. Don't ignore the Christmas tree decorations. Glue beads that will replace the paper Christmas tree with Christmas balls, apply artificial snow and glitter.

Postcard with decor using quilling technique
We suggest you make two cards using the quilling technique: the first one will depict a snowflake with a fir branch, and the second one will show a Christmas tree with gifts.Snowflake with fir branch
We will need:- pin;
- openwork hole punch;
- paper of white, yellow and green colors, cut into strips (the width of each is no more than 0.5 centimeters);
- ruler with circles of different diameters;
- thick card paper.
Take a sheet of paper and cut it into small strips. They are intended for the future snowflake.
Start rolling the strip and then insert the roll into the diametral ruler. The end of the strip must be glued so that the roll does not lose its shape. Then squeeze the edge of the circle - you should get a drop.
Make several of these details. When there are several details, you can begin to select the location for them on the postcard and form the snowflake itself.

Make the same details in green. Make a spruce branch from them.
Similar details are needed in yellow: they will form a candle.

Christmas tree with gifts
We will need:- pin;
- openwork hole punch;
- green and pink paper, cut into strips (each width is no more than 0.5 centimeters);
- thick card paper;
- glue.
Cut the green paper into strips and then roll them as you did in the previous version.
Make a drop by gently squeezing one edge of the piece.
Fold the finished parts into a Christmas tree, first attaching it to a postcard.


Make gift boxes. Use pink stripes for this. Sometimes use a pin to twist small parts.
As soon as all the details of the future postcard are ready, start assembling them into a craft. First, glue the Christmas tree. And place gifts under it.
By the way, use beautiful cardboard, as well as a quilling kit for your crafts. Using this technique you can create many New Year's motifs. Options for postcards and photos will come to your aid.


Tips for beginners in the quilling technique
To get a tight roll, you need to wind the paper tape tightly, and then secure the tip with glue.If you first wind the strip tightly and then loosen it slightly, you get a so-called loose roll. You can give the workpiece the shape of a half-diamond or, for example, a drop; to do this, you need to flatten the part with your fingers. Most often, this technique is used when making flower petals.
For each form, experienced craftsmen use different techniques.
"Eye" shape. You need to squeeze the round workpiece on both sides at the same time. Shape "Square". First, make the “Eye” shape, then turn it vertically and squeeze the part again on the sides.
"Rhombus" shape. Make this part from the “Square” blank, slightly flattening the figure.
Triangle shape. First of all, make the “Drop” part, then grab the corner and flatten the base of the triangle.
Arrow shape. Twist the triangle piece, and then use your index finger to press the middle of the short side inward.
Crescent shape. This part is made almost like the “Eye” blank, only in a curved shape. The corners of the part are pinched with a shift, and not opposite each other.
Open forms:
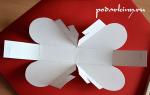
"Heart." Fold the strip in the middle. Bend both free halves inward.
"Horns". Fold the strip in the middle. Twist both halves outward.
"Curl". Mark the middle of the strip, but do not fold it. Twist the ends towards the middle, but in different directions.
"Twig". Bend the strip approximately in a ratio of 1:2. Twist the ends in one direction.
The winter mood can be conveyed not only through emotions, but also expressed in paintings made using the quilling technique. Thanks to this style, they create various paper crafts and decorate them with openwork patterns and snowflakes. Additionally, they are decorated with sparkles, mother-of-pearl beads, ribbons - as your imagination allows.
Working with the quilling technique is quite painstaking and requires accuracy. Therefore, stock up on desire, patience, time - the final result of the work will depend on this.


To begin, prepare: 
- "winter" set of paper for quilling
- special tool designed for this technique
- base for the picture
- scissors, pencil
- pins
- toothpicks
- tweezers
Most often, winter snowflakes are made using this technique, which are then hung on the New Year tree or used to decorate a postcard. For beginning needlewomen, such DIY work will allow them to realize their ideas and potential as an artist.
For best results, follow the step-by-step instructions. The photo below shows the main elements that are used to create paintings using the quilling technique. 
Step by step description


Video tutorial on how to make a card with a snowman
Winter sketches using quilling technique
Mesmerizing winter quilling patterns can be made using just rolls, as shown in the photo below. 
Making winter paintings with intricate patterns yourself using quilling strips is not at all difficult. To do this, take a ready-made picture with a corresponding theme and fill some area of it with different elements and quilling figures. Such work will look original and non-trivial.
- Make the required amount of different colors of quilling elements such as free spirals, eyes, droplets, etc.
- Carry out assembly. Using tweezers, carefully place all the figures on the base with glue. Having finished the work, we will get an exclusive, as in the photo below.


Also for beginners, there are ready-made quilling kits with existing diagrams and templates with a detailed description of the work. You can improve your skills by watching additional video lessons.