How to make an origami bow. Paper bow. How to make a paper bow
When we are faced with the question of a gift, we always wonder how to effectively present it in order to surprise the person for whom this gift is intended. The best thing, of course, is to make a beautiful package for it or a bright bow that will attract attention. In order not to pay a lot of money for such a trifle, you can do it yourself with beautiful paper, or as is now fashionable - from parchment paper, magazine sheets or newspaper. And then also decorate the packaging beautiful bow, which you can also do yourself. Therefore, today we will teach you how to make an origami bow out of paper. This activity will not take you much time, but then this bow will definitely come in handy more than once.
Let's try to start simple
Today we will learn how to make bows for gift wrapping using the origami technique. This is what they are like.


They are all made almost the same, only they have different ends and different colors of paper.
We choose the color that matches our gift or its packaging, just not in the same color so that it does not merge with the packaging, but in a different shade.
Let's move on to the bow assembly diagram:

For this craft we will need a square sheet of paper.
Let's put it down with the main color if it's not solid. Fold it in half only so that the drawing is inside. Now fold it in half again. We fold it back, and now with the pattern facing outward, fold our sheet of paper diagonally, turn it over 90 degrees and fold it again diagonally. And open it back up. Now we need to bend the right and left corners inward as indicated in the diagram. Fold the top corner to form a small triangle. And again we lay out our workpiece, now a small square with folds should remain in the center.

Then we need to straighten the small square that is in the center with our fingers forward so that all sides remain a little behind. Next, we bend the sheet as shown in the photo, only so that this square is inside the workpiece. Now we need to bend the top sides, as in the diagram, and then turn the workpiece over and bend the other top sides in the same way. And again we open our workpiece so that there is a square in the center and smooth out all the folds very well.
Turn the workpiece over so that the colored side is at the bottom. Let's use scissors and make four cuts along the folds. Now you need to fold the top cut fold down, and also fold the two upper corners down to the middle, these will be the tips of our future bow. Next, we bend both rhombuses upward, and again fold only the lower corners to the middle line. Now again we need to lower the double diamond part down. And make a small cut, as done in the photo, and bend these parts.
Now turn the bow over to the front side. We bend the two extreme corners to the center and insert them into the small square that is in the middle. Here is our gift bow and it’s ready. It can also be used to decorate a room, a holiday, or decorate a Christmas tree.

You can also make a bow like this. It is done much easier and faster.

Butterfly shape
Using this technique we can also make a butterfly bow, which we can also decorate any gift with. Let's see what they are like.


Now let's move on to step by step instructions and let's start making our butterfly bow.
Let's take a small rectangular sheet of paper, about 20/8, but you have the right to choose the size yourself. Let's bend it in half and straighten it back, marking the center line.

Now we turn all four corners of the workpiece to the center line, as shown in the diagram.

Fold the top and bottom sides of our rectangle in half towards the center line.

Now we bend the entire workpiece in half.

On the side that remains flat, we outline two corners above and below.

We bend these marked corners inward.

Now we bend this part of the workpiece into left side. And repeat the same on the other side.
Getting acquainted with origami should start with simple products. Regular origami (not modular) is best suited for this. With its help it is easy to make beautiful and cute toys, interior details, and decorations. One such product is an origami bow. It's easy to do in several ways.
How to use the craft
You can use a bow in all the ways your imagination allows. Here are just a few suggestions:
- they can easily decorate gift wrapping;
- can serve as interior decoration;
- It's easy to make a hairpin out of it.
Let's look at a few simple ways make a paper bow with your own hands. To work you will need paper, scissors, glue and a little patience.
To ensure that the product turns out nice and neat, take a responsible approach to the choice of paper and tools. While working, carefully press the folds. It is better for beginners to practice on colored paper.
Incredible trapezoid gift bow
This is more of a paper craft than origami. For such a product you need to make several blanks in the form of a trapezoid with a smaller upper side:
- Fold the workpiece in half (vertically).
- Glue along the long side in the form of a tube.
- Then we glue the tubes together.
The smaller the initial trapezoids, the more elegant the bow will be. You can make a multi-level fluffy bow and decorate a gift with it.
Decorative origami bow
|
 |
|
 |
|
 |
|
 |
|
 |
|
 |
|
 |
We decorate the bow ties ourselves according to taste. You can leave them wide or cut them into shapes.
Additionally, the bow can be painted in a different color or supplemented with circles of colored paper. This product is made using the classic origami technique, so it is more difficult to complete.
Making a very simple bow
To make this bow you need a 13 by 6 cm rectangle, scissors and glue.
We bend the workpiece across the long side and fold it in half.
We make markings on it with a pencil.

Cut out the part. There were 2 of them.
We set one aside, cut the other according to the markings.

Now we glue the parts together along the centers. The first will be the part with sharp ends, followed by the part with round ends. On a round part, bend the ends to the middle of the product.

We cover the middle with a piece of paper, maybe a different color, it will look more interesting. This product is the easiest to make. Even a small child can do it under the guidance of an adult.
Volumetric gift bow made of stripes
To make a gift bow with your own hands, you will need strips of paper and glue.
Prepare 3 long strips, 3 shorter strips (2 cm), 2 strips shorter than the previous ones by 1 cm and one shortest strip.
Make a loop from the strip in the form volumetric figures 8.

Do this for all stripes. Loop the smallest one.
Assembly of the product is simple. It consists of several levels:
- At the first level, glue eights of long strips together.
- On the second of the middle ones and so on.
- Glue the levels together and cover the top with a small ring.

Experiment with different types paper (for example, bows can also be made from gift or rustling paper) and decorate gifts with your own hands.
Conclusion
You can make several types of bows from paper. Not only regular office paper is suitable, but also gift paper. An origami bow is used as a decoration or decorative element. They also decorate gifts for loved ones. The bow patterns are simple, so they are also suitable for beginners. Classic origami requires more perseverance in contrast to simple patterns.
Video master class “Origami paper bow”

Here you will find a master class on how to make a bow with your own hands using the origami technique. Enough simple craft origami is also suitable for beginners. Despite the prostate it will look original on gift packaging. Let's get started with the master class.
First, prepare the paper for the bow. Moreover, it is not necessary to use special paper for origami - you can simply take bright pages of glossy magazines, which will give the design a special flavor. Even ordinary newspaper pages can work for you. Regular colored single-sided thin paper is also good for origami crafts.

How to make a paper bow
We will make an origami bow very simply using the diagram below. It all starts quite standardly - if you have already made some simple origami crafts, then the first steps are all identical.
We take a regular sheet of A4 paper and cut off the excess from it so that all sides of the sheet are equal in size. The resulting square sheet of paper must be folded in half, then unfolded and folded in half in the other direction and unfolded again. Then fold two opposite corners together, unfold and align the other two opposite corners. The result should be a sheet with star fold lines.

Now you need to bend the sheet like a diamond along the fold lines, as if connecting all four corners of the sheet together, with the front part of the bow inward. And then bend a corner at the resulting diamond, where the center of the square sheet passes.

We unfold it and get additional fold lines in the center of the sheet. We begin to bend along these lines, very carefully, the resulting square in the center of the sheet and the folds diverging from its corners. Then, just as we folded the rhombus in the previous step, we fold the sheet back, but we bend the center of the sheet deep into the small square.

We bend the resulting edges as shown in the photo. First on one side, turn over and fold the remaining ones on the other side. Now you can again expand the resulting part. Check the photo, you should get the same thing.

We turn what happened inside out. We need to cut, with a stationery knife, the folded edges marked in the photo with curved lines, to the fold line in the middle. Check the photo.

Now it has become possible to bend the fourth part of the sheet in order to bend the edges that are revealed to us to the line running through the center. Then we bend the opposite side and bend the opposite edges to the line in the center. You will get such corners bent edge to edge tightly.

And those parts that we bent to bend these corners remain bent in one direction. Their edges need to be bent towards each other. And turn the craft over. The edges of the corners need to be bent, placing the corner to the very center of the bow, one and the other. And then hide them under the center of the bow. As a final touch, we simply cut out the edges of the parts under the bow with a corner, just as we cut off the ends of the ribbons on regular bows.
Paper crafts bring emotional pleasure and material benefits, help to decorate objects with taste, and fill the house with a festive atmosphere. A product such as an origami bow is universally applicable. You can construct several variants of models from paper of different textures and colors. One will look like a blooming flower, the other will look like a butterfly or an infinity symbol.
Making and types of origami bows
The bow as a decoration has deep history . It can be seen in the paintings of ancient masters of the Renaissance, depicting noble women in fashionable clothes for that time. Having passed through centuries in almost unchanged form, it still has not lost its relevance and popularity. Now it is an indispensable element of various accessories: handbags, cosmetic bags, hair jewelry, belts, stage costumes. They decorate gift boxes, Christmas trees, Greeting Cards. Multi-colored garlands of bows make the room bright and original.
 There are several types of origami bows. Their schemes are somewhat similar, but there are also differences in execution. For example, a rectangle model is made very simply and quickly, while another is based on a square, and the process is a little more complicated.
The main raw material for origami crafts - paper - is completely different, both in quality and in color. There are no rules and regulations here. For creative solutions, even a narrow strip of photographic film is suitable, which will create a unique vintage packaging style.
It is always preferable to start mastering something with simple option to understand the working principle. Therefore, first we will look at how to make an origami bow-butterfly.
The main stages of creating a craft
The materials needed are limited to just the choice of paper. She may be:
- white;
- color (single-sided or double-sided)
- gift (shiny);
- glossy - from a magazine or advertising brochure;
- newspaper;
- multi-colored office;
- sheet size 22.5 cm by 10 cm.
The main action is production:


The product is ready. With little skill, it will take no more than a minute to complete.
You don’t have to change the color, leaving it in a local form; also, if you have a desire or a specific task has been set, you can simply decorate it or stick on bright appliqués.
The next model is a little more complicated and has a more elegant shape. Using it as a decorative detail will give the most simple item a festive touch.
Step by step, based on detailed description and images, we will learn how to create cute, charming bows.
Here, in addition to paper, you will have to use a stationery knife or scissors to form ribbons.
The key shape of the accessory is a square:

In the photo, the ribbons are left as is, but for beauty it is better to cut off the long tails with curly triangular cutouts.
Other paper bow designs
 The samples presented are the most common, frequently used forms. In addition to them, there are many interesting, unusual design ideas of various configurations.
Such bows and bows can and should be made together with children, involving them in the process of arts and crafts, instilling a sense of beauty and developing artistic and spatial vision.
This style will look elegant:
- prepare 6 small rectangular sheets of blocks office paper different color. Five of them should be small and clearly proportional in length. You will use them to make a bow, and use the sixth one for the middle fastening;
- bend everything one by one in the form of a classic “accordion” so that the edges are the same in width;
- fold in successive layers - from largest to smallest, pinch in the middle with your fingers, fasten with something;
- Cut a strip of any color and apply glue to the ends. Apply glue to the edge of the craft in the center;
- wrap the strip, folded into a ring, around the middle, straighten the wings on both sides, if necessary, trim the edges for evenness.
The bow turns out delicate and elegant. In one evening of joint effort, you can make a magnificent garland for any celebration.
Another option is distinguished by the splendor and luxury of the image. It looks more like a bow-flower, reminiscent of a blossoming peony.
This is done using special double-sided tape (if not, you can join it very carefully with a glue stick) and narrow strips of colored double-sided paper:
- cut 6 or 8 pieces measuring 6-7 by 1.5 cm and one very small one - to decorate the center of the bow;
- fold each one in the shape of a figure eight, connecting with pieces of tape;
- Also, using tape, combine all the folded petals according to the principle of a snowflake - first crosswise, then diagonally. Place a paper ring in the middle as a finishing element.
This is what you should end up with:

This bow is appropriate to decorate both an expensive gift and a box with a cake.
Try and experiment. If the first time it doesn’t quite work out the way you want, be patient and repeat again and again, developing skill and ability.
Having mastered the origami technique, you can easily save money on expensive packaging services and party decorations, delighting yourself and your family and friends.
Attention, TODAY only!
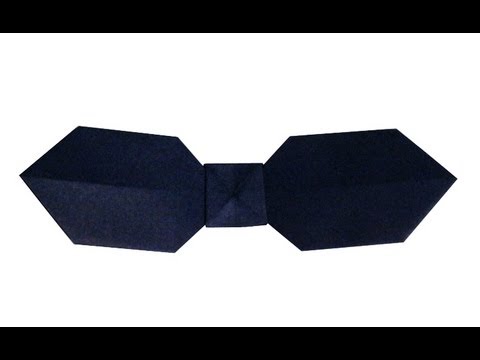
Origami bow is one of the most popular paper origami. If you don’t know how to make an origami bow, then on this page you will find everything you need to assemble this simple paper figurine.
The first photo shows a simple example of an origami bow. Making this kind of origami is not at all difficult, especially if you are armed with the assembly diagram below. A more complex version of the bow can be seen in the second photo. This photo of an origami bow came to our email. If you have examples of origami works, send your photos to us at: This address Email protected from spam bots. You must have JavaScript enabled to view it.

Assembly diagram
Below is a diagram of how to assemble an origami bow from the famous Japanese origami master Fumiaki Shingu. If you strictly follow the instructions, then assembling the origami bow will not take much time, and the result will be the same as in the picture. After doing what is described in the diagram several times, you will understand how to make an origami bow quickly and without looking at the diagram.

Video master class
Assembling an origami bow may seem like a daunting task for beginners. Therefore, we advise you to enter the query “origami bow video” on the largest video hosting site on the Internet, YouTube. There you will find many different videos about origami bows, which clearly show the steps to assemble a bow. We hope that after watching the video of the assembly master class, you will have no more questions about how to make an origami bow.
And here is a video tutorial on how to make a more complex origami in the form of a bow:
If anyone needs a simpler origami bow, here is a video that will teach you how to make it:
Symbolism
Nowadays, a bow is usually associated with a gift. However, it is also an important symbol of style. In ancient times, a bow was a frequent decoration not only for women, but also male image. Also, in some cultures, bows were symbols of love.