How to make drawings on nails with shellac?
The modern world is very dynamic, a woman is constantly on the move, business, because the usual varnish no longer justifies the hopes. It cracks, and after just a few days, it doesn't look as fresh as you'd like. Shellac solves this problem. This is a durable varnish that allows you to create the perfect manicure that will delight you for more than two weeks and will not lose its brilliance and beauty. Drawings on nails with shellac is another opportunity to be beautiful always and everywhere.
Shellac drawings and the reasons for their popularity
Shellac is a hybrid product made from regular nail polish and nail extension gel. Thanks to the resulting composition, it is particularly resistant. The varnish does not chip, even if you wash a mountain of dishes. In addition, shellac is absolutely harmless to nails and is very easy to remove with a solvent or acetone.
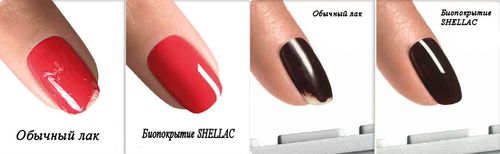
The undoubted advantage is the shine of nails covered with shellac, which cannot be achieved using conventional means.
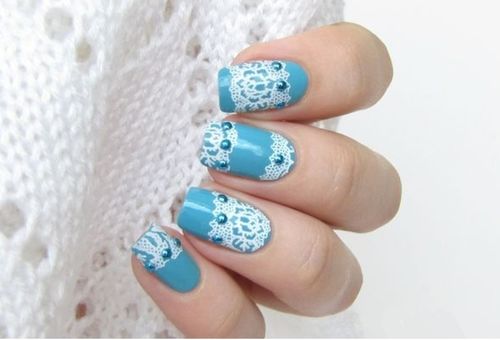
With the help of shellac, masters create beautiful drawings on nails: flowers, stripes, spirals, in a word, you can draw anything you like. This tool can be used not only in manicure rooms, but also at home. It is enough to arm yourself with the necessary tools, imagination and, of course, shellac.
How to paint on shellac?
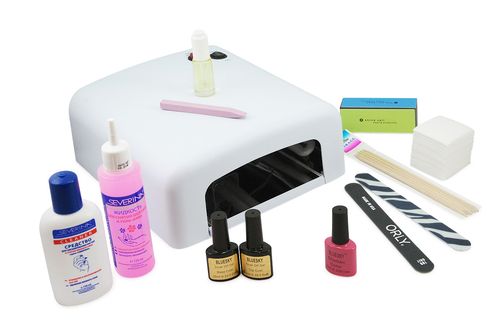
To draw a beautiful drawing with shellac, prepare the tools:
- Take brushes for painting, you will need several types: flat, hair and dagger-like.
- Shellac in the colors you chose for your pattern and base
- Soft nail file
- Top coat
- Ultraviolet lamp
- Cotton pads and alcohol
Once you've got everything ready, sit back and get started.
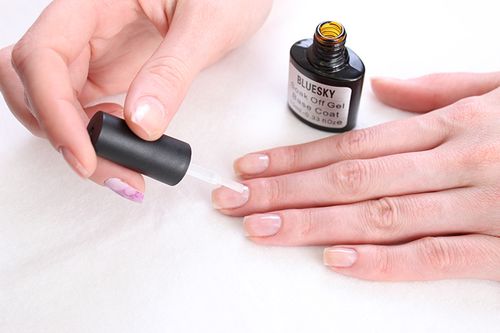
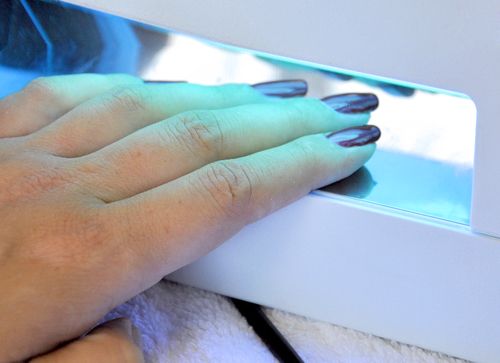
- First of all, prepare your nails. Make a beautiful shape, remove the cuticle. After that, apply the base. Please note that you need to cover the entire nail, including its edge. Don't take too much liquid. Dry the base under a UV lamp for two minutes.
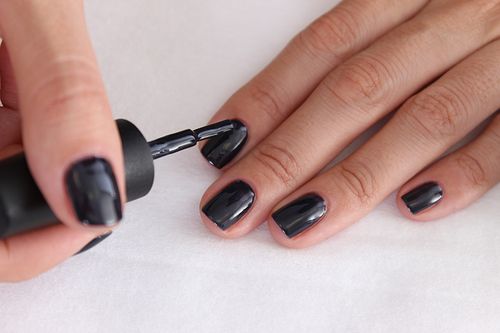
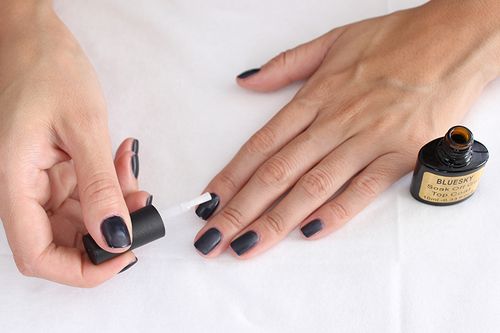
- Drawing can be done on a transparent or colored background. Let's say you chose a color base. Apply shellac to the nail in a thin layer. Dry under a UV lamp. Cover again and dry.
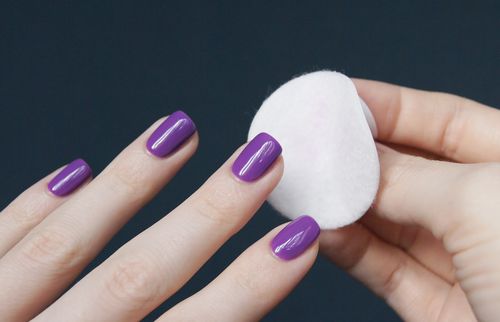
- Gently remove the sticky layer with a cotton pad previously moistened with alcohol. So the drawing will lie more evenly.
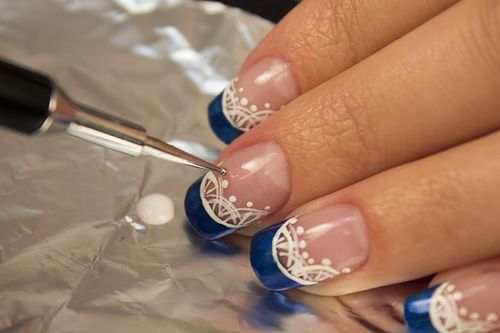
- Now you can start drawing. Start simple. To do this, put a little shellac on the nail and pull in the direction you need with thin brushes. As soon as you practice, move on to more difficult ones.
- Dry your finished nails with a UV lamp.
- Apply top coat in two coats. Dry each application under a lamp.
A few secrets of drawing shellac on nails
In order for the coating to please the eye for a long time, it is important to take into account several nuances. First of all, you need to carefully prepare your nails. If they exfoliate, you will need to work with a nail file to remove all the imperfections.
Do not forget to degrease your nails with a special tool or nail file.
Be careful when working with a UV lamp, do not overdry your nails, two minutes is enough.
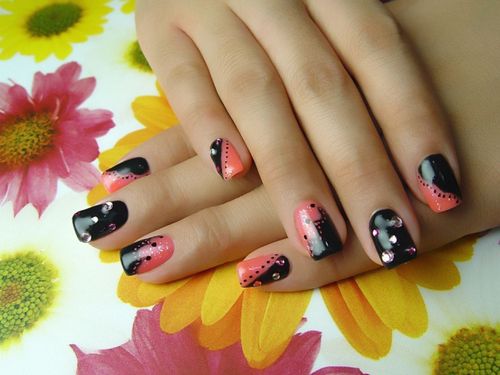
Drawings on nails with shellac look beautiful and original. You can do such a manicure at home, but if you are not confident in your abilities, contact the master. But do not stop training, one unsuccessful experiment is not a tragedy.
How to draw on shellac - video: