How to apply shellac yourself
Persistent manicure, made with the help of "shellac", is practical and convenient. And most importantly - it does not wear off for a long time. That is why many girls are wondering how to apply shellac correctly: they want to learn how to perform this procedure on their own, and not pay substantial amounts in the salon.
What is Shellac
Before telling you how to properly apply Shellac varnish, let me say a few words about what kind of coating it is. This is a hybrid and gel developed by an American company. And this material has absorbed all the best properties of both. Firstly, - we will discuss below) stays on the nails for up to 4-6 weeks. Then you need to change the coating. Secondly, it is applied just as easily as varnish. Thirdly, you can remove the coating with a liquid, and not cut it off, like a gel for building. Fourthly, a large range of colors allows you to choose any suitable shade. Fifthly, shellac allows you to make the perfect manicure, since the material dries only under a UV lamp, which means that the master will be able to work slowly, carefully and carefully, correcting the slightest flaws. Do you want to know how to apply shellac step by step? Follow the simple instructions below.
Tools and materials
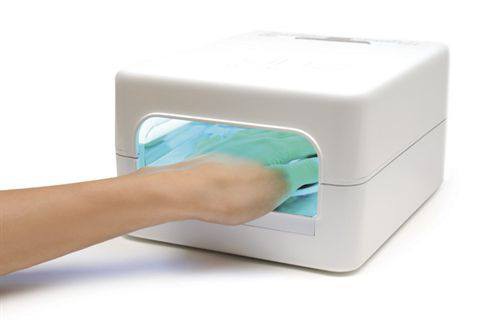
Before applying "shellac" at home, you need to prepare everything you need. What is required for such a manicure? First of all, the base, the bottle of colored gel polish itself and the top coat. But this is not enough. It is necessary to prepare a special lamp - it can be a UV device or an LED dryer. It is worth remembering right away that it dries gel polish much longer. But LED-drying is much more expensive. Depending on the frequency of use, it is necessary to choose a suitable device. Additionally you will need:
- file for natural nails;
- buff for grinding and polishing;
- gel polish remover;
- degreaser;
- orange sticks for manicure.
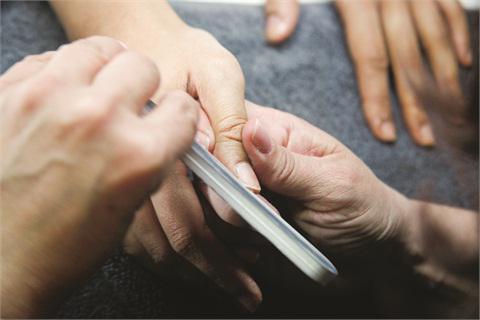
Nail preparation
When all the necessary set of tools and materials are at hand, you can proceed with the procedure. So, how to apply shellac correctly? First of all, you need to prepare your nails. Fortunately, this process is much easier and safer for the nail plates than preparation before building. By the way, many girls, not wanting to expose their nails to aggressive procedures, choose shellac gel. How to apply it according to all the rules? First, push back the cuticles with the help. Then, file the nails, giving them a symmetrical shape. The nail plates are aligned with a buff (movements strictly from the cuticle to the free edge). With the help of a degreaser, shine is removed from the nails. After that, you can start applying the product. Sometimes, when preparing nails, the masters do not file or polish them. But only if Shellac from CND is used, and not gel polishes from other manufacturers.
Stage One: Base for Shellac
Before using a resistant shellac, it does not require too thorough polishing of the nails, which exudes them somewhat. And it is also not necessary to apply the base in a thick layer, as some people are used to doing before painting the plates with varnish. The base for Shellac is applied in a thin film, dried thoroughly in the apparatus, according to the instructions. We do not remove the sticky layer - it is necessary in order for the best adhesion of the material to occur. It depends on how long the manicure will last in perfect condition.
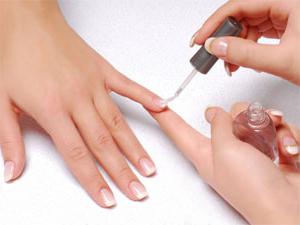
Stage two: color layer
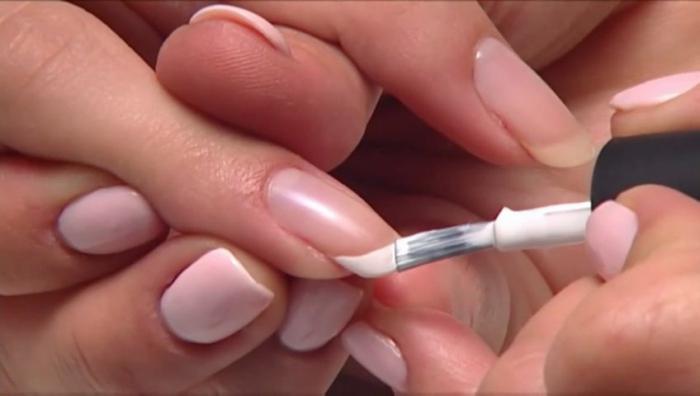
A colored layer of gel polish is applied to the base. Slim and tidy. When wondering how to properly apply shellac, you should immediately remember that the material should not fall on the cuticle or side rollers. If this happens, then the coating will begin to chip off and lag behind the nails. There can be no more than two colored layers. Each is dried in the lamp exactly as long as the instructions require. Only after the first layer has completely dried, the second layer is applied. This is required in order to make the manicure brighter. If there are more layers, the nails will become too dense and thick. Firstly, it is not too aesthetically pleasing, and secondly, the quality suffers. The thicker the coating, the faster the manicure is chipped, cracked and does not hold well.
Stage three: finishing layer
After the colored layers are dried, it is necessary to apply a top fixer for gel polish. It is transparent, protects and adds shine to the manicure. It is applied in one thin layer, dries in the apparatus, according to the instructions. There is a special top finish from CND that gives Shellac a very high shine (ultra gloss). It is applied in the same way as a regular top coat.
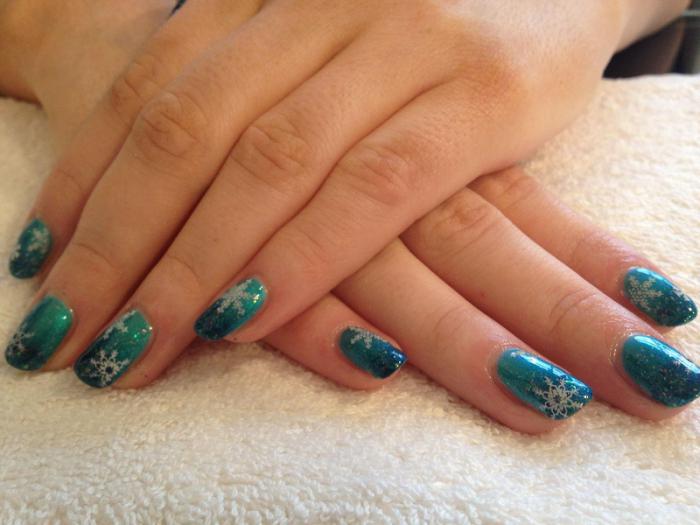
About design
Before applying Shellac gel polish, it is worth considering the design. Dry sequins, rhinestones, sand and other decorative elements for nail art are attached exclusively to the color layer, before the finish is applied. Painting can be done on both color and topcoat (subject to its repetition). Acrylic paints tend to spread over a glossy smooth surface. To prevent this from happening, you just need to take a thicker paint, diluting it less with water. Re-finishing layer is applied only when the pattern is completely dry.
French with Shellac
Considering the question of how to properly apply "shellac", it is impossible to ignore the French manicure. This is a classic. So, we need white and pink gel polish, base and top. When the base dries in the lamp, it is applied (in one layer). It is dried thoroughly. After that, a smile line is drawn with white gel polish (you cannot use special stencils, only by hand). If there is such a need, the action is repeated after drying. The last step is the final layer of gel polish and drying it. The beauty!
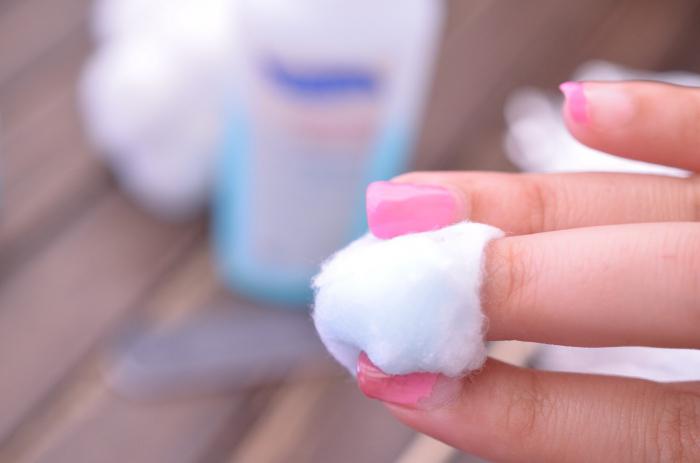
Removing Shellac
Well, how to apply Shellac gel polish is, in principle, understandable. Let's talk about how and with what to shoot it. The advantage of this material is that it does not cut off like a gel. So, the nails are not injured. Shellac is removed with a special liquid called a remover. Apply it in the same way as a regular nail polish remover. That is, a certain amount of liquid is applied to a napkin or cotton pad, then the gel polish is removed from the nail plates.
Material advantages
Shellac's biggest advantage lies in its practicality. There is no need to refresh your manicure often, as it always looks flawless. Another plus is that the nails are significantly compacted. That is, the risk of accidentally damaging them is practically reduced to zero. There is no need to worry about the nail cracking or breaking along the growth line. The third advantage of gel polish is its versatility. You can choose any suitable coating color and design. Even if the nails are too short, it makes sense to try a manicure with gel polish. In 4-5 weeks, the length of the nails will increase, which means there will be more room for imagination. Gel polish is one of the best ways to grow your nails!
Disadvantages of Shellac
Shellac's biggest downside is its price. Yes, the original CND coating costs a lot. On the other hand, for home use, you can purchase a starter kit for two, formed with a friend or acquaintance. And then do a manicure to each other.
Another downside is durability. Yes, this is both an advantage and a disadvantage. Many simply get tired of the monotony for a whole month, wanting something new. If a manicure is performed at home, then there are no problems: the old coating is removed, a new one is applied.
Output
Unlike extensions, the Shellac procedure can be performed at home on your own. There should be no problems with preparation, especially if real American material is used. After degreasing the nail plates, you can immediately start applying gel polish according to the instructions. Removing the coating is also not difficult if you have a "remover" on hand.
Common mistakes and problems
Shellac varnish (we discussed in detail how to apply the product) is a fairly simple material, but sometimes it also causes difficulties in application. So, for example, some are faced with such a problem as the consistency of gel polish is too thick. This usually happens if the tool has been idle for a long time. It is necessary to put the bottle in the refrigerator for 5-20 minutes, then twist it between the palms for a couple of minutes. The consistency will become normal, and the color will be uniform.
If during application the gel polish gets on the cuticle or side rollers, then the excess is carefully removed with a cotton swab, which is dipped in the “remover”. There is no need to completely wash the coating, because until the hands are placed in a lamp or dryer, the material will not harden.