Easy do-it-yourself manicure - step by step instructions for beginners
Most girls pay special attention to nail care. Beautiful hands and neat nails make every look complete. Why you need to undergo a manicure procedure at least once every few days. It is not necessary to resort to the help of specialists, it is possible to perform a manicure within the home. More internship and nails will be flawless. And no one will be able to distinguish your manicure from the salon counterpart.
Manicure at home for the inexperienced
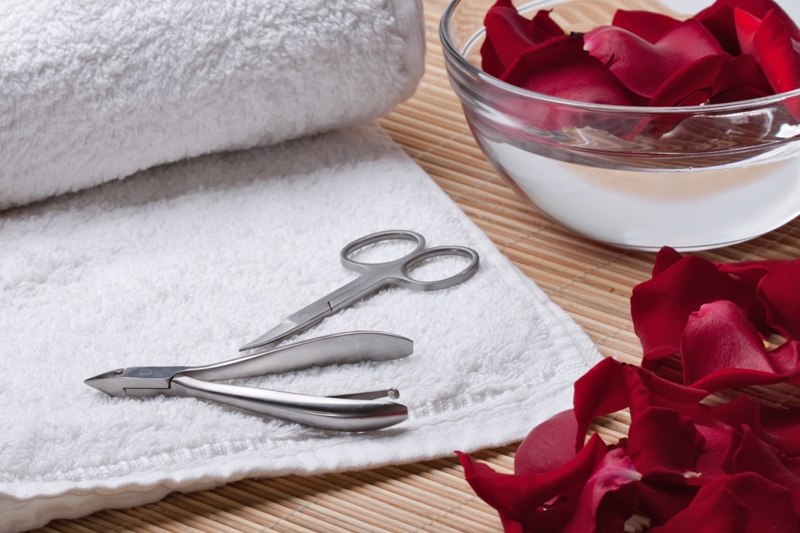
It is not at all difficult to perform an easy do-it-yourself manicure at home for beginners. It's not as complicated as it's supposed to be. First of all, you need to take care of the required fixtures. To implement a manicure you will need:
- nail scissors;
- file;
- metal tweezers;
- spatula or orange cuticle stick;
- nail polish remover;
- cotton pads;
- hand cream;
- initial coating for varnish;
- colored varnish and fixing agent.
Using these devices, you can perform a high-quality manicure.
Easy do-it-yourself manicure
>So, let's move on to the main work. Let's start making a light manicure with our own hands step by step. We clearly follow the following instructions, consisting of 4 points:
- Cuticle softening.
You need to start by steaming your fingers in a container of water. This will soften the cuticle, and remove it without injuring the fingers.
For the bath, you need to take a not very large bowl and fill it with warm water. You can mix two tablespoons of sea salt and olive oil into the water, 2 - 4 drops of essential oil, such as lemon, to lighten the tone of the plate. Completely immerse your fingers in the resulting solution for 10 - 15 minutes. Steaming will make the skin soft and easy to remove. - Cuticle removal.
Everything must be done without excessive effort and haste. On each finger, carefully remove the cuticle from the nail space. Using the sharp side of an orange stick or spatula, push the excess skin out from under the cuticle. If there are uneven edges, use metal tweezers. If you give preference to unedged manicure, the cuticle is removed with a special substance. Then the nail must be given an individual shape. - Nail shapes.
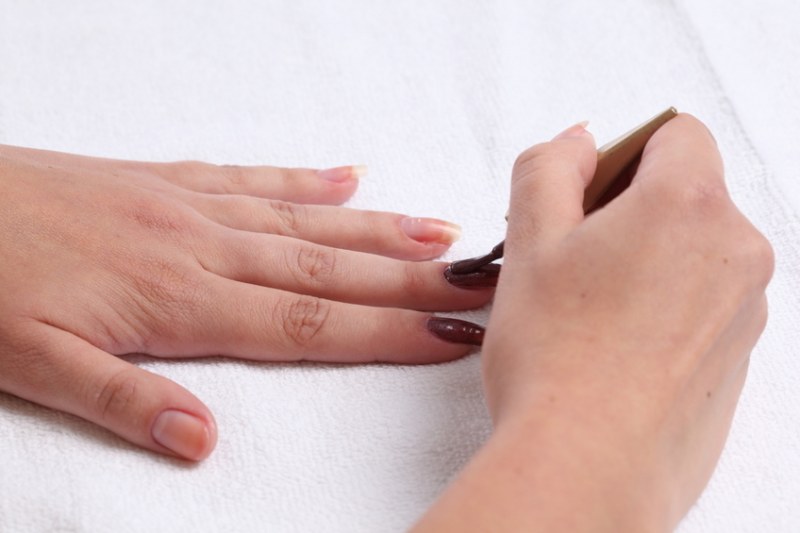
If you prefer short nails, carefully cut them with nail scissors. The choice of shape depends on the characteristics of the nail itself. If they are weak, it is best to stop at a shape resembling a square. Owners of strong nails can give them a pointed look. There are five in total:
- oval;
- round;
- square;
- pointed;
- stilettos are very sharp.
It is necessary to process nails with a nail file strictly in one direction, in order to avoid their delamination. It is necessary to pay attention to the same length of nails and the similarity of their appearance. After the end of these manipulations, the nails are covered with varnish.
4. Painting nails with varnish
This is the final stage of manicure and one of the most difficult. Lacquer must be applied to the nail carefully, without touching the skin around. So the final step of an easy manicure for beginners must be followed by adhering to the following tips:
- degrease the nail plate with nail polish remover;
- cover with a special base for varnish;
- now we paint the nail, with the main color starting to move from its base to the edge in the central part, subsequent strokes are made in the same direction, describing an arc on the sides of the plate;
- we make the finishing layer, for durability and shine of the resulting manicure.
There is a little secret. To make it easy to remove the varnish, lubricate your hands with a regular cream from the skin next to the nail before staining. Next, gently degrease the nail with a cotton swab and paint it. The cream will not allow the varnish to be absorbed into the skin, and it is easily erased from its surface.
Manicure ideas for short nails
In order to perform an elegant and light manicure on short nails, you do not need to spend a lot of time and effort. There are many methods to give uniqueness to your nails. For example, you can make a drawing on all or on one nail. It will look pretty trendy.
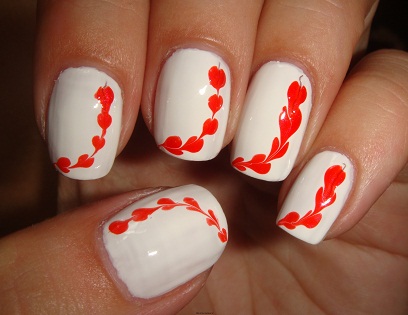
1. simple pattern
To implement it, you will need:
- red, pink and white varnish;
- needle;
- base and final coating;
- gold glitter.
Let's start designing. First, apply white varnish on the nails and let it dry properly. Then, on the surface of each nail plate on the side, draw dots of red varnish. Between the red dots we make small peas of pink varnish. Without letting the varnish dry, we begin to create a pattern with spiral movements of the needle, starting the movement of the needle from the cuticle to the end of the nail. We do this on both hands. After the pattern dries, we make the final coating and apply gold glister (sparkles). It will help to hide the shortcomings of beginners.
2. Drawings with adhesive tape
Even the most ordinary adhesive tape will help to perform a beautiful and easy manicure on short nails. With its help, an interesting and fashionable pattern is obtained without much effort. Consider several options for the implementation of the drawings.
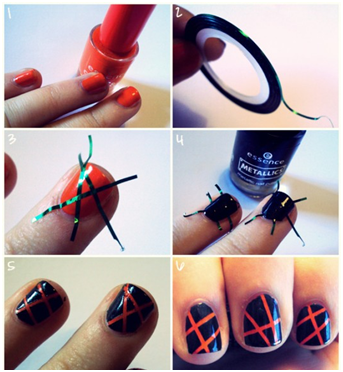
1. To create a print with bright stripes, you need to take:
- a number of multi-colored varnishes (five pieces);
- scotch;
- scissors;
- top coat for nails.
Paint all your nails with varnishes in different colors, to each his own color. Let them dry well. Then cut thin strips of adhesive tape and stick them on the nail in different directions, after which apply black varnish over the colored layer. After complete drying, it is necessary to remove the adhesive tape and make a top coat. The result is a bright and original drawing that can complement any image.
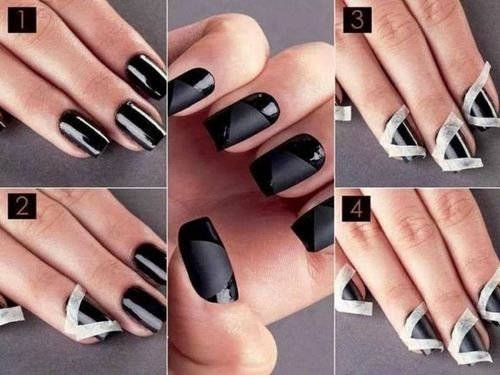
Another expressive type is a manicure with a diagonal. It will require:
- glossy and matte varnish of the same color;
- scotch;
- scissors.
Apply matte polish on your nails and let it dry. Then cut the tape into strips and stick on the nails diagonally. After that, paint the top with a glossy varnish and let it stand up. Next, remove the adhesive tape and the stylish design is ready. It looks very interesting due to the combination of different textures of coatings.
Advantages of short nails
Now short nails have come into fashion and this has a number of undeniable positive aspects:
- no need for specialized care;
- appropriate appearance in any situation;
- dark shades are better combined with them;
- practicality;
- do not require strengthening procedures.
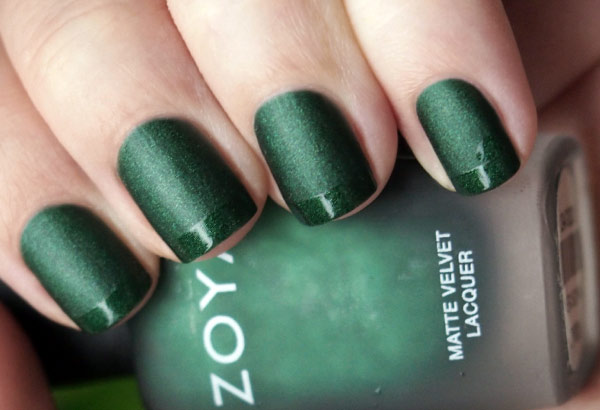
Leading designers, presenting their collections to the public, prefer short nails and simple, concise designs. This season, shades of white (matte, pearl), bright red, gray and marine shades are very relevant.
As for prints, various lines and geometric shapes are very relevant, a smooth flow of color from almost black to a color tone, in the form of waves. These are, in principle, unpretentious and spectacular drawings. It is very fashionable to combine different textures in one design. Matte shades and textured varnishes with various fillers look pretty good.
The article provides a detailed guide to performing a manicure, which describes in detail all the steps for its implementation. For beginners, examples of simple and at the same time fashionable nail prints are given. For their execution, you do not need special devices, simple improvised means are enough. Scotch tape, a needle and scissors can be found at any girl's house.
Following the advice of the article, each girl will be able to perform a manicure on her own at home, choosing an individual design. He will be able to emphasize her originality and become an integral part of any image. The biggest positive of home care is the significant budget savings. Do not be afraid of anything, more practice and you will master the art of manicure impeccably.