DIY textile angel dolls. Do-it-yourself dolls made from tights with step-by-step instructions An angel for every home made from nylon tights
Creative people do not stop at mastering already known types of needlework - they constantly develop new ones. creative ideas. Many needlewomen already know how to sew a tilde doll with their own hands, and from the moment products made from thin nylon became cheap and accessible to everyone, ideas appeared on how to create a doll from nylon tights.
Tights dolls: main varieties
Since master classes describing how to make a doll from nylon tights appeared relatively recently, there is no clear classification of toys for this type of creativity.
However, soft dolls made of nylon and padding polyester can be divided into several types, depending on their appearance and manufacturing methods.
Tumbler dolls
To create a doll, not only nylon tights are used - stockings and socks are also great for this. At the end of the work process, the master receives small soft toys, round or oval shape with conventionally designated limbs.
Simple master classes on creating this type of doll are great for teaching novice handicrafts.
DIY butts
Another simple way to create a doll from nylon tights. From the name you can understand the peculiarity of the doll - the face and butt are especially prominent in the work process. Masters jokingly call this toy a fortuneteller - which side it turns to you in the morning, such a day awaits you.
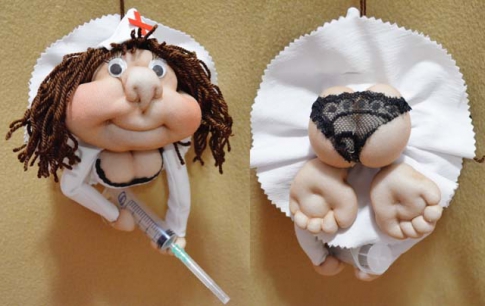
The doll needs to be made in parts: first make all parts of the body (head, hands, feet, butt), and then sew them to the clothes.
Frame doll
Frame toys take longer to make than previous types; they become taller and take appearance, close to human.

The main material for the frame is considered to be rigid wire wrapped with filler, but in addition to it, plastic bottles can also be used.
Nylon dolls - master class for beginners
If this is your first time deciding to make a nylon soft toy, take note of the method of creating a product from stockings. Such a master class will not take you much time at all - after practicing several times, you will learn how to make a cute tumbler doll in just an hour!
- Take a nylon sock middle length and fill it tightly with white filler, like padding polyester. Pull the edges of the product together with thread.
- Mark the neck as follows - in the right place, sew the sock with the seam forward with a needle in a circle and tighten. Wrap the thread several times and tie to secure.
- Make the legs in a similar way - use an overcast stitch to mark two small circles at the bottom of the product from different sides and pull them together.
- From below, in the area of the seam of the sock, stick a needle, take it out on the stomach and stick it again next to it. Lightly tighten the small seam. You will get a belly button. Return the needle to the bottom seam and use it to secure the thread.

After preparatory work With the body finished, the doll made from nylon tights needs to be endowed with emotions, giving conventional facial features.
- Shape the nose in the same way as the legs, but use a circle with a smaller radius.
- The ears can be made as follows: pinch a small area on the side of the head with your fingers and pull it together with thread once.
- In the right place, make three black stitches - eyelashes.
- Under the eyelashes, stick a needle with an eye bead threaded through it and bring it out in the place where one of the corners of the mouth should be, and pull it slightly. Repeat the same action on the other side. This way you get both eyes and cheeks at once.
Use red thread in one fold or a permanent marker to designate a smiling mouth.

- Cut off the tied tail on the baby doll's head - the excess material will be useful for sewing the arms. Cut it in half and sew it up to create two fabric “sausages”. Stuff them soft material and sew to the body.

Sew to the head if desired long hair from yarn so that the baby turns into a girl. To finish a doll from nylon tights, you need to make her into toy clothes at your discretion.
Control the tension of the working thread and nylon yourself: for example, the cheeks need to be tightened more in order to better highlight, and the navel can barely be defined. But do not overdo it, otherwise you may tear the working material.
Do-it-yourself frame dolls made of nylon: step-by-step instructions
If the previous master class seemed too simple to you, try making a doll from nylon tights on a wire frame. Thanks to the rigid wire, the toy's limbs can take different positions.
Head
Typically, the most time spent on creating the head and shaping the facial features.
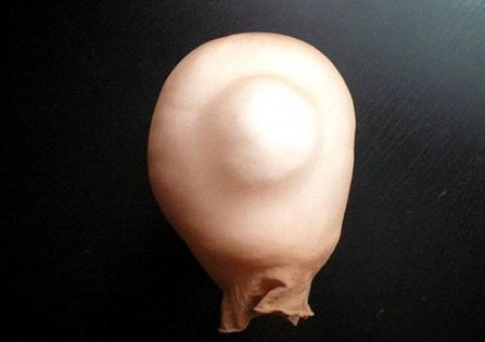
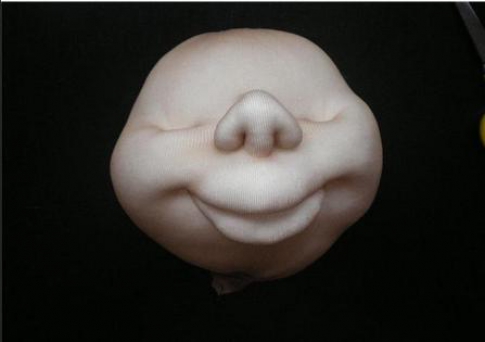
- Take a piece of padding polyester and squeeze it into a tight ball the size of a fist. Place the soft ball into the nylon compression bag. Form another smaller lump and stick it on the side - this is the future nose. Tie the opening of the nylon bag, but not tightly.
- Insert a needle into the side of the upper part of the nose, pull it out from the other side and pull it a little, forming the bridge of the nose.
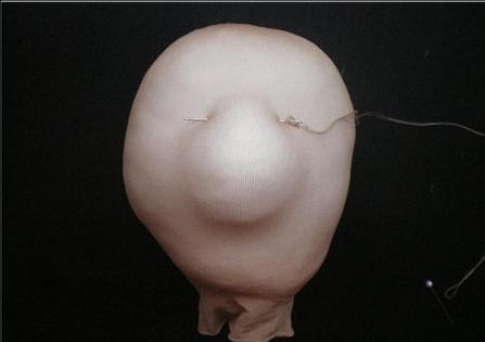
- From below, form the nostrils in a similar way.

- Make thread loops around the nostrils.

- Pull the loops together to clearly outline the nose.

- Through the hole at the bottom of the head, add 2 more identical small soft lumps in the places where the cheeks should be, and an oblong piece in place of the future mouth.

- Insert the needle into the place where the left corner of the mouth should be, and bring it out at the place of the left eye - tighten until the cheek is formed. Repeat the same on the right side.
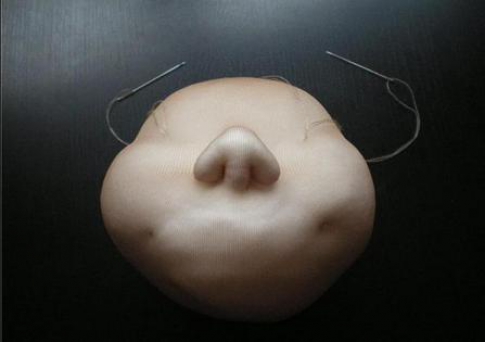
- Stretch a tight thread between the corners of your lips—a smile.

- Pull another thread under the first, forming the lower lip. With each lip manipulation, bring the needle into the eye sockets to gradually form the sockets for the eyes.
- Insert the needle in the middle of the smile and bring it out in the center of the upper lip.

- Tighten the thread, forming the lips into a bow.
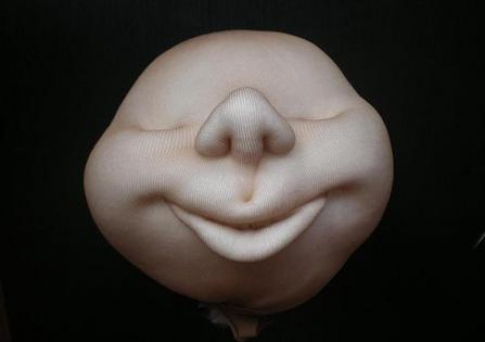
- Using a few back and forth movements of the needle, lengthen the bridge of your nose.

- Glue the eyes in the right place - you can buy them at a special craft store or borrow them from an old unnecessary doll. Color your cheeks, lips and eyebrows with acrylic paints.
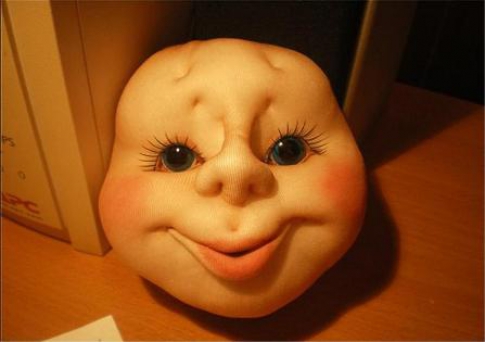
For hair, put an old toy wig on the doll or buy a new one at a specialty store.
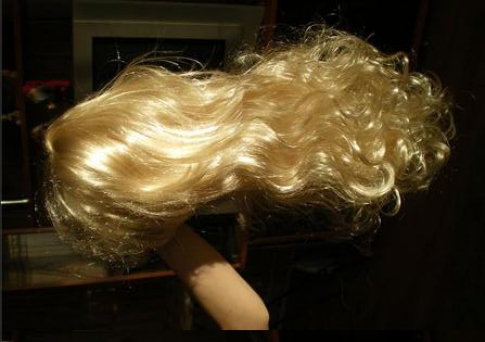
The hair can be made from yarn and floss in the same way as for a Waldorf doll.
Torso
After working on the toy head, the doll needs to be equipped with a wire frame. Take as a basis a ready-made diagram with the approximate dimensions of the limbs.

Even a novice needleworker can easily make a wire base, but it will take patience to calculate the length of the limbs and bend the proportional sections.
- Make a frame of the palms - connect together 5 short pieces of wire, proportional to human fingers. Wrap the wire tightly with filler.
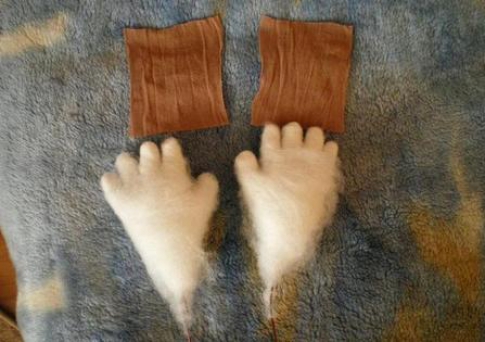
- Cut out small square pieces of nylon and cover your palms with them.

- Treat your hands in the same way as your face, giving your fingers relief.

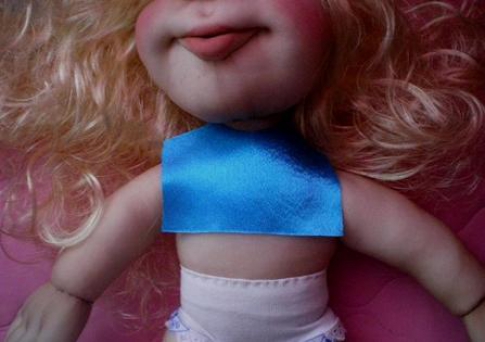
- Cover the body frame tightly with padded material. Screw the head and hands in the right place.

- Finish processing the frame by wrapping it with nylon.
This doll made from nylon tights can be dressed up in any doll clothes that suit her size, or you can sew a costume yourself. Thanks to the fact that the toy suits many different outfits, you have the opportunity to complement her look in any way - braid her hair, decorate her with beaded bracelets or a hairpin with flowers made of cold porcelain.

In conclusion, watch the video tutorial that will tell you how to make a cute brownie doll from nylon tights.
Widget from SocialMart
Take it for yourself and tell your friends!
Read also on our website:
show more
Not long ago, needlewomen found an unusual use for old nylon tights. They started making incredible things out of them. beautiful toys. Unusual nylon dolls have become a decoration for many homes. And children also enjoy such crafts. After all, they have the opportunity to create the doll that they want most.
Not long ago, needlewomen found an unusual use for old nylon tights
The simplest stocking doll made of nylon or nylon socks with your own hands: master class country
To please your baby new toy, will require a minimum of time and costs. A cute baby doll made from stockings can also be presented as a small gift to someone close to you. This way you can make New Year's dolls or for any other holiday as a gift. This craft will definitely find a special place in the house. Let's look at the course of action step by step.
What is necessary:
- nylon tights;
- padding polyester;
- yarn;
- scissors;
- threads;
- wire;
- needle;
- fabric and ribbons;
- thimble.
Work progress step by step:
- Take the padding polyester and divide it into a couple of parts.
- Stuff and twist the stocking, thereby dividing it in half.
- Roll an additional ball from padding polyester or foam rubber and insert it into the stocking - this will be the spout.
- Secure the spout to the stocking with thread.
- Also use thread to highlight the mouth.
- Add expressiveness to your lips with lipstick.
- Embroider the eyes in this way.
- Form the eyelids from the remains of nylon, and use bristles for the eyebrows.
- Make hair from yarn.
- From the second part of the blank, form the butt of the baby doll. For this purpose, sew a longitudinal notch with thread.
- Form a frame for the arms from the wire.
- Wrap it with padding polyester and cover it with nylon.
- Make the legs and be sure to highlight the toes with dimples in the area of the feet.
Sew suitable clothes.
Gallery and posts: DIY nylon dolls (25 photos)


Doll made from tights: all the secrets of tightening the face and creating facial expressions (video)
Toy made from nylon stockings: step-by-step instructions and diagram for beginners
A small toy can easily be made in an evening. These mini-dolls can then be given to all your friends on the eve of some significant event and even during a regular trip to a bar or beauty salon. And the kids will be incredibly pleased to receive such a gift from their mother.

A small toy can easily be made in an evening
Progress:
- Cut off the sock from the tights and stuff it with padding polyester.
- Tie it into a tight knot.
- Outline the areas of the head and body, and then tighten the workpiece with threads.
- Tighten the neck area as well.
- Form the arms and legs of the baby doll by sewing a circle, making a basting stitch.
- Pull the thread and end up with round limbs.
- Additionally, shape the toy’s navel and butt by tying these places with threads.
- Glue the hair to the top of the head.
- Embroider or draw eyes and mouth.
Wrap the baby doll in a piece of fabric or sew clothes for him.
How to sew a face for a nylon doll
The most important part in the work process is sewing the face future doll . It depends on him how good the finished craft will look. Naturally, this process must be approached as responsibly as possible.
What is necessary:
- tights;
- padding polyester;
- needle;
- threads

The most important part in the work process is sewing the face of the future doll.
Progress:
- Place the synthetic winterizer into the prepared nylon.
- Pull it at the top and pin it with a pin.
- Fold a small piece of padding polyester into a strip, make it a little thinner at the top, and tuck it at the bottom.
- Place the formed nose in the center of the face being made.
- Form eye sockets by slightly pressing these areas with your fingers.
- Use pins to pin the places where the tightening will be done (the area of the bridge of the nose and the middle of the nose).
- Insert a needle with a thread folded in half where the first of the pins is secured and bring it out at the second mark.
- Go back and repeat the same steps, pass the thread through the loop that has formed.
- Go through each segment at least three times.
- Make nostrils in the nose area, initially marking these places with pins.
- Pull the lower edge of the workpiece at the base, pull the needle through the entire head and bring it out at the back of the head.
- Grab a little padding polyester with a thread to form lips.
- Additional stitching on the bridge of the nose.
- Peel off the top edge and add a little more padding polyester to the workpiece.
- Shape the cheeks.
- Twist small rollers and form eyebrows from them.
- Draw out the ears.
- Bend the workpiece from above and stitch it.
Attach eyes made from buttons and painted with paint to the face of the future doll.
Doll made from a bottle and a nylon sock
From plastic bottles and nylon, unusual and incredibly beautiful frame toys are created. The method of their manufacture is as simple and clear as possible. Children can also be involved in this process if desired. They will find completing such a task exciting and uncomplicated.
Progress:
- Make a small hole in the bottle and then cut off the bottom part.
- Wrap it completely in padding polyester and place it in the part cut off from the tights.
- Roll the filler into a ball and place it in a bottle to further shape the face.
- Using a thread and a needle, make a nose for the doll.
- In order for the toy to have cheeks, chin and forehead areas, put a little more padding polyester into the blank.
- Attach the eyes to the blank and form a neat mouth.
- Tie the neck area with threads.
- Slowly pull the bottom part of the tights up and pull it straight through the neck.
- Secure the material at the top.
- Sew up your hair.
- Make a reliable frame for future hands using wire.
- Wrap the frame with padding polyester and stretch the nylon over it.
- Stitch each finger.
- Sew the finished parts to the main workpiece.

Unusual and incredibly beautiful toys are created from plastic bottles and nylon
Sew clothes.
MK - DIY policeman doll
The method of sewing such a toy is in many ways similar to making a baby doll. The only difference is that you must first make the frame. Thanks to this, the policeman will become mobile and will be much more interesting to play with.
Progress:
- Make a wire frame, the length of which should be about thirty centimeters.
- Separately wrap your hands with electrical tape.
- For shoes, small loops are twisted on the legs.
- After that, make the head and draw the face.
- Using yarn, sew on hair.
- Make fingers from small pieces of wire and immediately wrap them with padding polyester.
- Sew fingers and even nails.
- Screw the finished palms to the main frame.
- Wrap the entire structure with filler and place it in tights.
- Sew on the head.

«, how to sew an angel from nylon with your own hands.
Master Class New Year's gift "Fairytale angel" designed for those who are just starting to sew, children 9-10 years old. We created this work during classes in the “Puppet Master” club, which I lead.
Materials:
- white tights (can be of different densities);
- fabric scraps (in our case it was curtain fabrics);
- white calico (any cotton fabric can be used);
- padding polyester;
- threads, needles, pins;
- black, gray beads;
- colored pastels, maybe cosmetic blush.
Equipment:
- sewing machine (optional);
- scissors.
Progress.
1. Cut out a square of about 9-10 cm from tights and make a circle out of it (remember cutting a circle from a square in origami). If your tights are thin, then reduce the size a little.
2. We tear off the padding polyester and make a fairly loose lump out of it, a small lump for the nose.
3. We sew a blanket stitch along the edge of the circle (you can use a simple basting stitch).
4. Insert the padding polyester: first the small one in the center, then the large one and tighten the fabric.

5. Use pins to mark the eyes, nose and corners of the mouth.

6. From the back of the head, insert a needle with white thread into one of the eye sockets, lifting the pin. ATTENTION! We try not to move the needle further into the back of the head, only to secure the thread so as not to flatten the head. We remove the needle from the other eye socket and perform this operation 2-3 times, tightening the thread.
7. From one eye socket we take the needle into the nostril 2-3 times and tighten it. We move to the other side of the face through the eye sockets and repeat the operation.

8. Do the same through the nostrils into the corners of the mouth.

9. Use red thread to highlight the mouth. We insert the thread with a separate needle from the back of the head.

10. Highlight the chin. We insert the thread from the nostrils. You don't have to do this. 
11. In my case, I highlighted the eyebrows and dimples on the cheeks. The students did not perform this operation and, it seems to me, their angels turned out nicer and prettier. 


12. We insert a black thread from the back of the head into one of the eye sockets, put on a bead, remove the needle from the other eye socket, repeat the action (do not tighten the thread). We embroider eyelashes and eyebrows.

13. Pastel different shades rub it on sandpaper, or on a simple piece of paper, and tint the face. (Blush or eye shadow will work too). And here your imagination can play. My children love this process very much, and I never disturb them, if only to slightly remove excess paint.

14. For hair, you can use any white knitting thread. In our case it was weed. We wrap 3-4 circles around 3 fingers and remove them. We pull a separate thread in the center of the mug, making bows. We sew or glue bows to the head.

15. Place the head on a sheet of paper. (Everyone can do it different sizes, depends on the density of the material, so there is no clear pattern.) Draw the body. Cut it out, straighten it, folding it in half. We calculate the circle using the formula r = D: 2P (the radius is equal to the diameter divided by 6.3).


16. Cut out the body from cotton fabric, do not forget about the seam allowances, first sew the side seams on sewing machine. If she's not there, it doesn't matter. The seams can be sewn with a simple stem stitch, or with a needle stitch back or forward. The amount of work is small. Leave the neck open. Sew on the bottom. We stuff the body with padding polyester or holofiber, but not as tightly as tilde. Sew on. The needle should run parallel to the seam. Seam: body-head, body-head. The first circle - large stitches, the second - smaller, pull the thread. If the threads are still visible, it doesn’t matter; we’ll decorate the neck with lace, braid or a scarf. The hardest part of the job is over!

17. Now fantasy works! We make a selection from pieces of fabric. You can use any, if the seamstress is a baby, help her. Treat the edges of the fabric so that the fabric does not fray in a zigzag or overlog.

18. The length of the fabric is 2 times the volume of the body, make the width as you like, you can vary it. We fold the fabric along its length, sew it on a machine or by hand, you can use a simple basting stitch, or iron it. Fold the fabric widthwise and use a fine basting seam to sew 2 layers along the edge. We put it on the doll, tighten the fabric, distributing the folds, and sew it in a circle using the same basting stitch. Use thick fabric for the bottom layer so that your doll can stand up well.


19. And so layer by layer. We get to the neck. We decorate the neck with lace or a scarf.
20. We cut out arms and hands, imagination works again. If you are tired, then you don’t need to make your palms out of knitwear. We sew the fabric, cut it out, turn it inside out and stuff it a little. Do any finishing. We put the handles into the folds of the dress and glue them or sew them to the body.

21. Wings can be anything you want. If you don't understand how to sew them, watch Tilde Angels' master classes. I draw the wings myself. (If you don’t want to sew, remember that you have new shoes, and they have liners - also a good material for wings.) We sew or glue the wings.
My students turned out so wonderful!

Happy creativity!
Did you like the product and want to order the same from the author? Write to us.
More interesting:
See also:
Little Mermaid doll (crochet)
Another master class on knitting toys from Anna. Fairy-tale characters always attract with their...
It’s easy enough to make a beautiful angel from nylon. To do this, wrap the cotton wool in nylon and then tie a small knot. In the area where the spout will be, you will need to invest small ball from padding polyester. Using a thread of the desired color, we tighten the angel’s nose - from top to bottom or from bottom to top.
We look at the resulting shape of the head; if it is small in size, then it is possible to untie the knot and add the required amount of padding polyester.
The mouth is best embroidered with pink thread, we make eyes, the angel’s cheeks can be slightly tinted with different colors. Then we glue the hair.
We perform the little body
We cut out a small piece of tights, stuff it tightly with the padding polyester we have on hand, create the body of our angel in the form of a small roller and then tie it with a strong thread. Then we sew the head to the resulting body.
Clothes for an angel are very convenient to make from a variety of laces, because there is no need to process the edges and waste time.

Making beautiful legs
First we perform the feet. To do this, we make 2 small balls, which are made of padding polyester, securely wrap them and tie them with strong thread. We do the toes, and we also do the second foot.
Cut out 2 small pieces of rope, approximately 12 cm each (this will be the length of the leg). Then we tie a knot in the area where the knee will be. We securely glue a rope to the resulting foot, and connect the other end of the rope to the body. The nylon angel should now be ready.