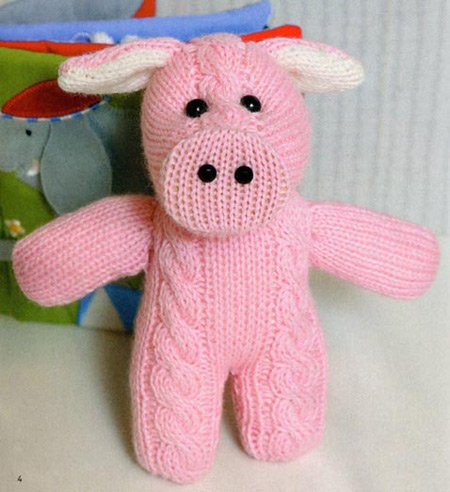
Paper applique for children pig. How to make a paper pig. Multilayer applications made of colored paper
In this tutorial I will show you how to make a paper pig with your own hands with unique step by step photos graphs. Such crafts will be very interesting for children to make. younger age, and schoolchildren. They are very bright, require little time to complete, but the result will be a wonderful, funny craft - a paper pig.
Before the New Year, we all need to make a small symbol with our own hands that will bring good luck to the whole family. There is work to be done to create a pig, since it is she who will patronize us throughout 2019. What to make such a talisman from? You can use absolutely any materials if you model crafts with your children.
Well, today we will create cute pigs from paper - this is the most accessible and beloved material for creativity by everyone.

By spending your free time with your children, playing or being creative, you help them develop fully!
How to make a paper pig
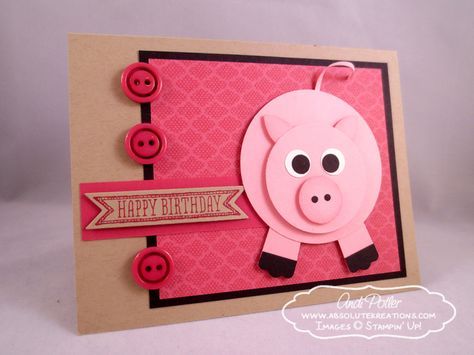
A voluminous pig with a movable head - a simple craft for children
To create the small and colorful pig shown in this tutorial, you don't need complex templates. Usually to do volumetric craft, you have to carefully cut out complex elements, then glue them together, trying not to wrinkle the parts. Here everything is different.

Even the smallest children can perform the proposed figure, since it is based on simple details. This is a little pig. It is not for nothing that it is made in yellow color. Such a craft can be considered a New Year’s craft, because it is precisely such an unusual animal that is declared as a symbol of the next year. Volumetric applications allow you to develop spatial imagination, so you can start lessons with such simple examples.
What is needed to create a children's craft:
- yellow paper and cardboard;
- ruler;
- drawing pencil;
- scissors;
- a compass or any round piece for tracing a small circle;
- glue in a pencil, silicate or PVA;
- black marker (decorative eyes or beads for making them optional - not used here);
- a piece of red paper.
The body of the animal will be simple, made on the basis of a simple paper ring. Draw a rectangle measuring 15 cm by 3 cm on yellow (preferably double-sided) paper (these parameters can be changed at your discretion). Cut out the drawn strip.

Coat one edge of the strip with your chosen adhesive. Twist the ring, press the opposite side to the edge with the glue applied. When the glue has dried, you can continue working with the initial part.

Press (make 2 folds) the resulting ring to form a semicircle. Smooth out the folds so that the paper remains in this position. The pig's body is already in front of you.

Using a compass or other method, draw a circle on yellow paper. Cut it out for the future head. Prepare a small pink coin

Glue 2 ears to the circle, also cutting them out of yellow paper. Add a pink coin to the center. Using a marker, draw a smiling face that will not leave anyone indifferent. You can also glue running plastic parts instead of eyes.

The semicircle obtained earlier will become the body. First glue the head to it. But the proposed figurine will also be unusual in that it will have a moving head. To make such a design, cut a rectangular strip from yellow cardboard, glue one end to the back of the head, the other to the body. Bend as desired.
When the glue dries, you can try to press on the head, it will spring back. This effect can be achieved precisely through the use of an additional gasket. But you can also glue the head circle directly to the body, but in this case it will remain motionless.

Make 4 legs using yellow sticks and red hooves. Glue a curved strip to the back of the body as a tail. 
Glue the legs from below to the body. Now the figurine is completely ready. 
New Year's crafts can be planted under the Christmas tree - the most prominent place on the pedestal near Santa Claus and Snow Maiden is perfect as main symbol 2019. 


Paper applique with a yellow pig - a symbol of the new year 2019
The proposed application depicts a yellow pig. Perhaps he is performing in a choir and is going to sing a wonderful song to Santa Claus under the Christmas tree, or he is an artist who has come to wish the guys a Happy New Year. The fact is that we have an application in front of us New Year theme, there is no need to doubt it. Firstly, it features a Christmas tree and rhinestone confetti. And most importantly, it depicts a yellow pig.
The yellow pig is the patroness of the next year, which is why a similar theme was chosen. A pet is kind and harmless, so its purpose is to bring only success, good luck and prosperity to the family. We hope that such a craft will cheer you up and allow you to have fun with your children. Before the New Year, holiday chores are always exciting and funny.

To create such an application, prepare:
- cardboard;
- paper;
- marker;
- watercolor paints;
- rhinestones;
- scissors;
- glue.
How to do New Year's craft with a picture of a yellow pig with your own hands
Use scissors to cut the cardboard to the desired size. On top, creating a background is easy using simple watercolors. The coating will be uneven and interesting, and painting the canvas will be very interesting for children.

Choose a paint color, such as green, and cover the cardboard with a thick layer. While you do the rest of the details, the base will dry quickly. This kind of uneven spotty coating is just right for a future rich pattern. 
Take yellow cardboard. Draw on it the outlines of the pig's muzzle and ears, cut along the contour. The head should widen towards the bottom to be able to show off the plump piglet. All children know how well-fed they are.
Since we plan to depict an artist, we can make a bright bow. Cut out a blank from pink paper and color it with a marker. The bow will be more realistic if you use fabric, felt or ribbon to make it.

While you were preparing the pig's head, the base was probably already dry. Cut out thin branches from green cardboard, make them fluffy with scissors, carefully cutting them in the form of a fringe. Glue at the top of the picture.

Below in the center stick the pig's head. Make the assembly separately: immediately glue the ears to the central part. And then grease with glue and press down in the center. Also cut out a yellow circle. Draw two holes on it and glue it as a nose

Glue a bright bow at the bottom. 
Use a marker to draw a face, make it positive. Draw smiling eyes, make a mouth, eyebrows. If you manage to find an image of a pig of a suitable type and print it out, then all that remains is to cut it out, color it and stick it on

Multi-colored rhinestones will help turn your applique into a bright and sparkling New Year's one. Stick small pebbles as Christmas decorations at the top of the card, leaning it against the spruce branches, and also distribute it over the free space on the card

Wonderful New Year's applique ready with your own hands. This is a New Year's gift for parents or friends
Pig made of colored paper
Let's create a craft together that will delight the kids with a funny look. Let's make it from bright colored paper and complement it with the most important elements. If desired, you can add flowers and other auxiliary details. So let's get started!

Materials and tools:
- half cardboard Pink colour several shades;
- paper white;
- liner or thin black marker;
- office glue;
- Ruler and pencil;
- scissors;
- stapler

We use light-colored pink half-cardboard to make the base of the craft. We mark 14 cm horizontally and 7 cm vertically.

Cut it out.

We fasten the resulting rectangle on the sides with a stapler or glue to get a tube.

Then we create the paws. We use a light shade to get two stripes, and a dark shade of pink for the hooves.

Glue the hooves to the light pink paws. We attach the finished elements to the sides of the figure. We will also glue two hooves onto the lower part of the pig's body.

We begin to design the muzzle. To do this, cut out a circle from dark pink paper and draw nostrils. We will also make eyes from white paper and draw in the pupils.

Glue the finished elements.

We also cut out the ears and tail.

Glue the tail to the back of the craft so that it sticks out a little. We bend the ears in two places at an angle. Glue on the inside.

So we get a craft made from colored paper in the form of a funny pink pig.


DIY paper applique “Cute Pig”
If you are just starting to introduce your child to applique or have decided to make a craft with him or her New Year's theme, I propose to make an applique with a funny pig with funny ears sticking out! And by doing this craft, you can fix the names of geometric shapes.

For this craft you need to prepare the following materials:
- colored paper;
- colored cardboard;
- glue and scissors;
- several round objects or compasses;
- felt-tip pens and a simple pencil.

The piglet will consist of a head and legs. You will need a large circle for the head and another smaller circle for the snout. Find a round object, such as a saucer for the head and a lid for the spout. Now you need to circle with a simple pencil selected items.

Then we carefully cut out all the resulting circles. You also need to outline the cheeks; to do this, fold pink paper of a different shade in half.

The piglet's ears can be made in the form of an elongated triangle so that they can be bent later.

Let's move on to the legs. They can be drawn as follows. Fold a rectangular piece of pink paper four times like an accordion. Draw the hooves and cut them out.

Let's take care of the pig's face. For her we need eyes, nostrils and a smile.

Now that all the parts are ready, we will assemble the pig. Attach the cheeks to the large circle and trim off the excess paper. Then you need to attach the ears to the top of the head.
For beauty, we add orange elements to the ears - the inner ears, they need to be cut so that they repeat the shape of the main ear, but are slightly smaller.

You need to glue on the eyes, snout and smile. After all the elements, we attach the legs.

Now the cute pig is ready! Attach with wrong side loop and then the craft can be placed on the Christmas tree.


Working with applications, kids learn to correlate parts, apply glue carefully, and also remember the names geometric shapes, body parts of animals and plants.
Bookmark - yellow pig
How to make a bookmark like this in the shape of a yellow pig’s face - watch the master class.

After all, it can be made from any banknote - as far as your wallet allows).


These completely different and undoubtedly beautiful pigs can be made from paper with your own hands. Many have heard that it is necessary not only to develop the child in general, but Special attention devote fine motor skills. It is closely related to thought processes, memory and attention.
If your child likes to play with paper, then offer him interesting and exciting activity, which will not only be a pleasant pastime, but will also help him creative development. Paper is an accessible, inexpensive, pliable and unpretentious material that allows you to carry out any manipulation.
Together with your child, you can make a lot of interesting things out of paper with your own hands, for example, various objects or figures that will be useful to you later for acting out fairy tales or for home theater. So don't forget to make them mandatory characters, including a pig.


Paper extravaganza or what options are there
Even the most ordinary white sheet of paper is not as simple as it seems, because in your hands it can turn into any product - you just need imagination and a little patience.
If you are planning to make piglets out of paper, then you must first decide on their future image and desired purpose:
- Even the smallest children can make paper crafts with their own hands (of course, they will need your help) - you just have to find beautiful templates piglets, print them out, cut them out and paste them onto the prepared base - and you will have a beautiful applique. If you don’t have a color printer, print in black and white, then after gluing the template the child will color the craft himself. If the template is immediately colored, you can further decorate the applique: sprinkle it with sparkles, glue sequins, beads or other decor;


- if your kids love specific cartoon characters, for example, Peppa Pig or Piglet, invite them to make them. This way, it will be much more interesting for the child to craft from paper, and then the crafts can be used for various games: play out plots from cartoons, come up with new adventures for your favorite characters. Templates for making Peppa and her friends, as well as images of other famous piglets, can also be downloaded and printed, and then cut out and pasted on some thick base;
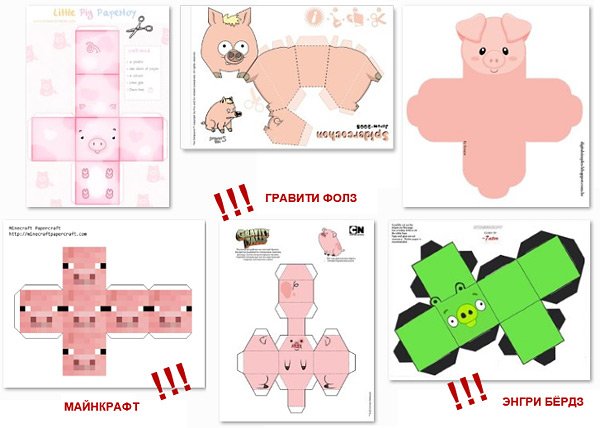
- do it yourself quite easily and three-dimensional figures from paper - for this you will need to either print out the model you like or draw it by hand, based on the example. Then all that remains is to bend the paper in the right places along the indicated dotted lines, assembling the figure into a single whole (some stencils need to be glued for strength);
- for older children, techniques such as quilling or origami are suitable - an origami pig can be either very simple, folded from one sheet of paper according to the usual pattern, or complex, made from many individual modules using the modular origami technique;
- What child doesn't want to play fashion designer? ‒ cut out a paper model of Peppa Pig and items of clothing for her, glue the pig itself onto cardboard, and for clothes, leave small strips of paper on different sides so that you can bend them onto the doll’s body, thus attaching these items of clothing (it is better to print on thick paper );


- a pig can also be made from papier-mâché, and pasted over with newspaper or wrapping paper an empty tin can and making a hole in it, you will get a real piggy bank;


- Even rolls from toilet paper, egg trays and other waste materials.


With the help of detailed master classes and video tutorials, you will definitely be able to make many beautiful and interesting crafts with your own hands together with the children. See example simple master class, which shows how easy it is to make a 3D applique.
- Cut out a flesh-colored rectangle from colored cardboard and glue its edges together so that you get a cylinder - this will be the body of the pig.
- According to the size of the holes at the edges, cut out two circles from paper of the same color (make them jagged edges) and glue them to the body.
- Make the pig's head in the same way, just take a slightly smaller size. Connect your head to your body.
- Now cut out four small rectangles and roll them into cones or tubes - these will be the legs, which also need to be glued to the body.
- Make small ears and attach them to your head.
- Additionally, cut out a thin ribbon from dark-colored paper, cut jagged edges on it and cover each leg with this ribbon along the bottom edge.
- In the same way, only from flesh-colored paper, cut out and glue a patch in the shape of a cylinder.
- Then, to create a tail, cut a circle of paper in a spiral shape. Using small black circles, make the eyes of the pig and the nostrils in the snout.
- You can decorate it with a chic shirtfront with a bow tie (half a white oval with a jagged edge and a black rectangle folded like an accordion) and plant it on the lawn with flowers.
New Year 2019 is the Year of the Pig. If you suddenly thought that this animal couldn’t be beautiful or at least cute, then... it seemed to you! While this article by Krestik was being prepared for publication, I personal experience I was convinced how charming a hand-made pig can be! Very soon, countless souvenirs will fill this world) So let the piglets, pigs and pigs be magnificent! A traditional exclusive for Krestik readers - a SUPER SELECTION of the most best ideas and master classes on creating the symbol of 2019 with your own hands!
DIY paper pigs
Applications in the form of piglets
The easiest way to create a craft with the symbol of 2019 is to glue an applique out of paper.
Cut out hearts of different sizes from pink paper and glue the pig together:

To glue the chamomile pig, print the template, cut out the parts from colored paper/cardboard in the desired shades and glue to the base:

Pig is a quite popular character, take Peppa Pig for example :) If your child likes the characters of this cartoon, then let them make an applique out of paper!
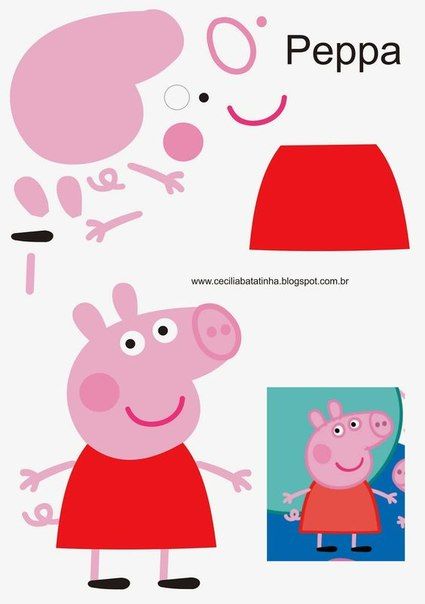

The templates can be printed on a black and white printer, cut out all the details, and then put them on sheets of colored paper and trace them.
See how it's done:
The easiest way is to glue the finished applique onto a square or rectangular one:
which allows you to insert a banknote into a postcardThe same application can be used in different ways:
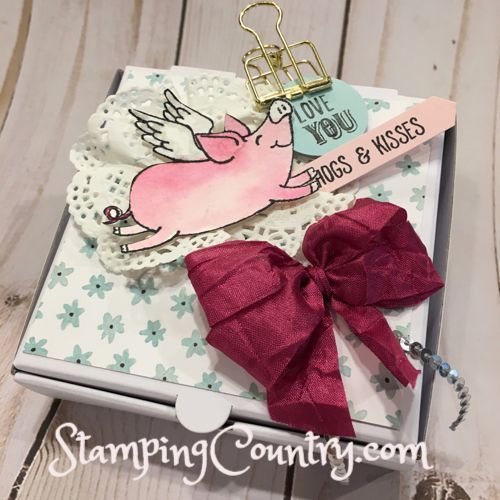
Decoration with a pig for a large paper clip
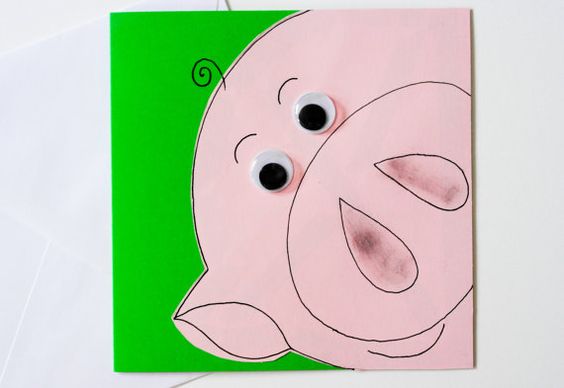
Even part of the face looks good on postcards:
Half of the face is made of paper and glued to the postcard
The outlines of the pig are completed with a black marker (author - SamfireGreetingCards)
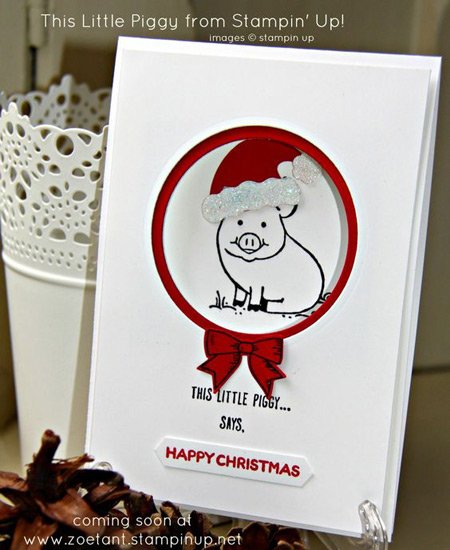
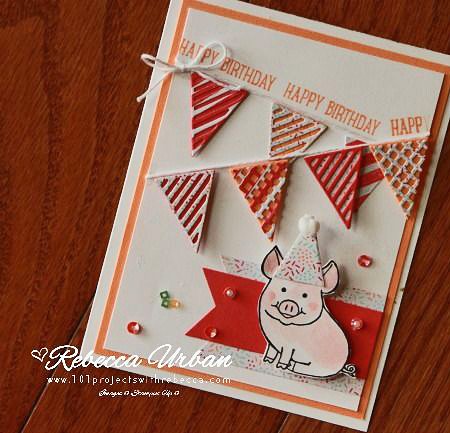
By the way, about painted piglets! They are very suitable for postcards:
There are ready-made sets for sale, so-called stamps. They can be color or black and white:
With their help you can make many different New Year cards:
If you can’t find ready-made stamps, you can draw the pigs yourself.
Fancy smth in his video he shows how to do 5 simple cards, including with PIG (see video from 6:40)
Don't want to draw at all? Then print out these painted pigs, color and cut them out:
Children will definitely love them, especially fans of cult cartoons and video games!
Having made the base, decorate it with a pig's snout:
This is also possible!)
A primitive family of piglets is also very simple to make:
Photo from www.redtedart.com
And these 3D pigs are easy to make, watch the video from the channel ChucAnh's Hobbies:
Let’s complicate the task and make a more realistic pig with our own hands using the Origami technique:
Channel Child's world makes a similar pig:
Do you want to surprise someone at New Year? Make a piggy bank out of a banknote like this Julia Miers:
The most difficult thing to assemble is modular Origami. To assemble an Origami pig with your own hands, you will need 345 triangular blanks! If you are no longer new to this type of creativity, then you can probably handle it. To help - video from the channel papermagia.com.ua:
If we talk about pigs made of paper, then we must definitely mention the protruding pigs.
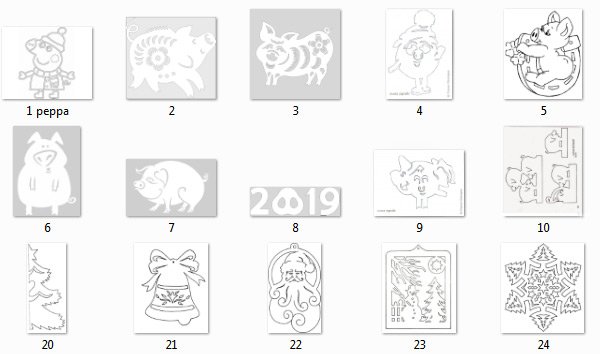
Openwork piglets cut out on paper will be very useful among lace trees, snowmen, bells and snowflakes.
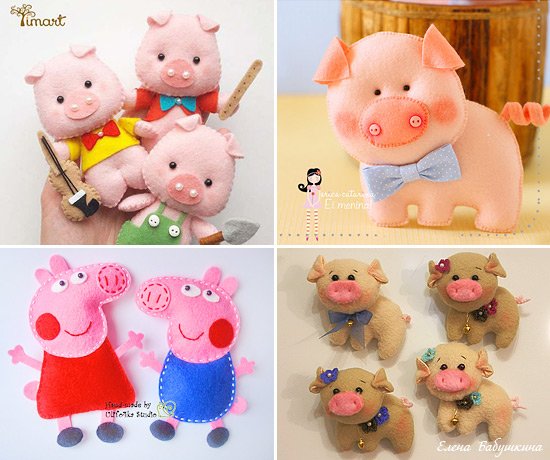
You can cut out the silhouette of a pig on gift paper and pack a New Year's present. You can cut it out of felt, make a backing underneath from contrasting fabric and sew a pillow.
Stitched pigs
A few illustrative examples of where to “place” a pig you made yourself:
We complicate the level a little and sew a patchwork Piggy with our own hands using this master class.
You can sew clothes for Piggy, so it will be more interesting for girls to play with it)
No less adorable piglets are sewn on Territories of Creativity Elma-toys:
More complex toys are ideal as interior dolls:
Workshop ElizaKittenShop sews a tilde pig:
Fairy's Gift Workshop sells Tilda style Christmas pigs:
If you want to sew them yourself, then a master class from Valentina Svetlova:
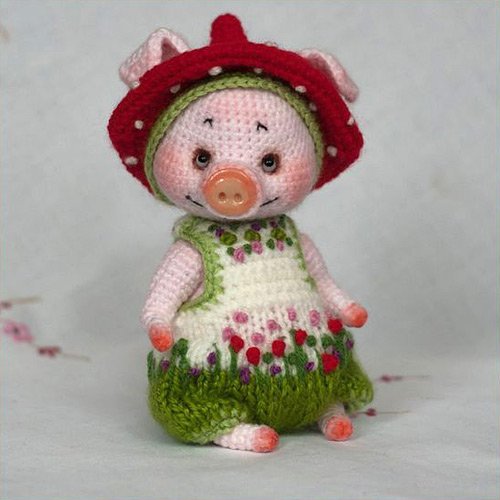
From year to year good master classes There are more and more symbols of the coming year in knitting, and the toys are becoming more and more beautiful!
According to the master class "" this miracle fits in:
Zaikina Ksenia knitted this couple according to the above MK - take note of the clothing ideas!
Master Class)
Cross stitched piglets
Traditionally, we don’t ignore embroidery fans! You can embroider a small pig and decorate it, an apron or.
Look for more than 76 different patterns for embroidering cartoon piglets, as well as quite realistic ones, in a special album our VK group :
Author's embroidery patterns for piglets are more interesting; they can be purchased from girl designers. For example, at Maria Nechaeva The “Embroiderer” pattern is ready:
Three schemes with wonderful New Year's piglets have been developed Antonina Tretyakova :
Anna Petunova :
Ekaterina Nemshilova :
Scheme of the ball "Pigs":
It was once created by Vera Kondratieva, and now it is ready to be born again for everyone)
Cool pigs on wheels and rocking chairs for decoupage and painting can be purchased at the store “Everything for creativity (dljatvorchestva)”
Pigs can be used as an accessory for dolls, Teddy bears and their friends
Look for napkins for decoupage with images of pigs in handicraft stores in the city or in online stores. They are also available at the Masters Fair:
New Year's humor 2019
Let's end this article on a cheerful note and may the New Year 2019 be positive, joyful and inspiring!!!
And no one objects!
You won't get bored with these!
What a look!
We are all like that)
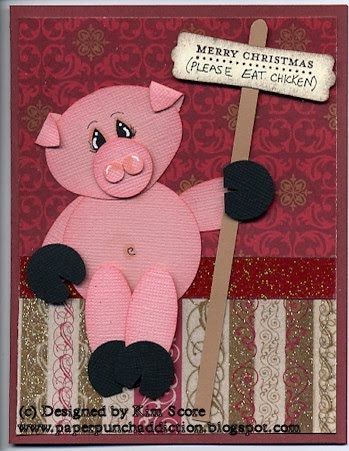
"Merry Christmas (Please Eat Chicken)"
The latest offer for New Year's Eve
A-ha-ha-ha-ha!!!


According to the eastern calendar, the symbol of 2019 will be the Yellow Earth Pig (boar). Children are familiar with this animal, because the pig is often found in children's fairy tales and cartoons. We invite you to make an applique of a pig from paper or felt together with your child. We have selected photos, stencils, patterns and templates for you that can be downloaded and printed for free. And then use it for joint creativity.
How to make a Pig applique from paper?
Paper is a simple and affordable material that even a child can use. You just need to choose a template or stencil and get to work, showing all your imagination.
- Scissors,
- colored paper,
- Pen-pencil),
- White paper,
- Glue,
- Markers.

Choose a template and print it on white paper.

Then cut out the pieces with scissors and place them on the back of the construction paper. Trace them with a pen or pencil and cut them out with scissors.
Glue the snout, ears, arms and legs to the main part, and draw eyes with a felt-tip pen. Eyes can be made from buttons, circles of black paper, or special eyes sold in craft stores.
The paper “sticker” in the shape of a pig is ready. You can decorate a card with it or use it as an independent decoration. For example, hang it on .


New (New Year 2020 totems) are already waiting for you at this link.


![]()

Felt and fabric applique
They turn out very soft and pleasant to the touch. To interest your child, you can take a template with a character from your favorite cartoon for children. For example, with Peppa Pig, Piglet and other famous heroes.
What you will need to make a paper applique:
- Thin colored felt
- Scissors,
- A needle with a thin tip,
- Polyester threads,
- Paper,
- Pen (black or blue), tailor's chalk or disappearing marker,
- Beads (buttons).

- Print the template you like on paper and cut out all the details with scissors.
- Place the cut out shapes on the felt and trace them with a pen, chalk or marker. Don't forget to set 1-2 mm for allowance.
- Fold the paired pieces and sew them so that a small hole remains. For sewing parts together, a “forward needle” seam or a regular buttonhole stitch is suitable. Fill the parts with your chosen material.

- Do not use cotton wool or cloth for filling. Products with cotton wool are more difficult to wash, and applique with fabric can turn out uneven and heavy. For filling, it is advisable to use comforter, padding polyester, padding polyester, foam rubber or holofiber.
- Sew all the pieces to the end and connect them to each other using seams.
- You can use 2 buttons or beads to represent the pig's eyes.
- The felt applique is ready. Now you can give it to your grandmother, take it to kindergarten or use as a decoration for the New Year.
If it is difficult to sew the parts together, you can cut them out and simply glue them with glue (PVA, a glue stick or a glue gun).
For decoration, use buttons, beads, or special eyes, which are sold in stores for handicrafts.


Lyubov Koval
Lesson notes on modular application in senior group"Happy Pig"
Program content:
Continue working on modular application.
Improve the skills of cutting out circles along the contour, folding them in half.
Teach children to make a fold in the center of the circle.
Improve your scissor technique.
Strengthen the ability to carefully glue parts.
Develop creative imagination and artistic abilities.
Cultivate interest in artistic creativity.
Materials and equipment:
Glue, brushes, oilcloth, napkins, black felt-tip pen.
Circles different sizes : 8 cm; 5 cm;
2 cm; 3 cm – 6 pcs.
Illustrations for the fairy tale “Three pig, envelope with riddles, soft toy pig.
Progress of the lesson
Guys, do you like fairy tales?
What fairy tales do you know? (answers)
But Grandmother - Riddle has sent you riddles. We need to answer what fairy tale this is from!
Gobbling up rolls
A guy was riding on a stove.
Rode around the village
And married the princess
("By magic").
Alyonushka has sisters
The birds carried away the brother
High they fly
They look far away.
("Sister Alyonushka and brother Ivanushka").
The granddaughter went to her grandmother
Brought the pies to her
The gray wolf was watching her
Deceived and swallowed.
("Little Red Riding Hood")
- “The fox is carrying me through the dark forests, over the high mountains, the cat - brother help me out.” (Cat, rooster and fox)
- “I’ll go and look, maybe I’ll find it. I really want to have a loud voice."(“Like a chicken looked for glos”)
- “Sit on my tongue, sing one more time”("Kolobok").
Well done, you guessed it.
What animals live in fairy tales? (fox, wolf, bear, bunny, cockerel).
But one animal came running to us class and hid under my napkin. Who do you think this is? You will guess when you solve the riddle.
Who has a piglet
Not clenched in a fist.
There are hooves on his feet
He eats and drinks from a trough.
This pig.
What fairy tale does he live in? pig? ("Three pig» ).
What was your name piglets?
Who wanted to eat them?
Which house did they hide in? piglets, was he the strongest? (in Nuf-Nuf's house).
- The piglets lived happily in the forest, played, tumbled. Let's play a little too.
Physical education minute.
- The piglets lived in the forest
They turned their heads
Like this, like this
They shook their heads.
They were looking for acorns
They rocked the tree together.
They walked on their toes
And they drank water from the puddle.
And then they danced
And they raised their hooves.
Guys, we played with you, but the pig Nuf-Nuf did not play, he is sad, he lost his brothers.
When the wolf ran away, Nif-Nif and Naf-Naf ran out into the clearing and were playing somewhere.
Let's help Nuf-Nuf.
Let's do it funny piglets and many friends for Nuf-Nuf.
Close your eyes and imagine pig, that he has? (torso, head, ears, legs, snout, tail).
Guys, what about the torso? pig what shape and what color?
(oval, pink)
We will make the body from a large pink circle. But it needs to be turned into an oval. To do this, you need to make a fold in the center of the circle. Then we take glue, spread it and glue it.
What shape is the head? (round).
A slightly smaller circle was glued to the body. Ears were made from two small circles. The circles must be folded in half. Spread one half with glue and glue. Look at pig They turned out like real ears.
They glued the patch.
We will also make the legs from circles that need to be folded in half.
Using a felt-tip pen, draw in the eyes, mouth and other pig There is a curled tail, we will also draw it with a felt-tip pen.
Look what it turned out to be a funny pig.
Now get to work and you will also get the same funny pigs.
Independent work of children
Exhibition of works. I hang my work on the board. Several children analyze and say which works they liked and why.
I'm summing it up general analysis. Well done boys. All of you appeared in the forest clearing funny pigs, among them there are Nif-Nif and Naf-Naf. You correctly made a fold in the center of the circle, correctly folded the circles in half. The work turned out neat. Nuf-Nuf was very happy that you helped him find his brothers and he made many friends. He thanks you all.