Flowers made of small beads. Beading flowers for beginners: patterns and useful tips. Beaded flowers: weaving patterns
Master class “How to make a rose flower from beads with your own hands step by step with photos.”
Topic: “Beaded flower “Rose”.
Vango Maldyune Vesakovna, teacher at the Seyakha boarding school, Seyakha village, Yamal-Nenets Autonomous Okrug, Yamal district.Description: I offer you a master class “How to make a rose flower from beads with your own hands step by step with photos”, intended for children 12 years old and older, technology teachers and creative parents.
Purpose: flowers - this is what no ceremony or celebration takes place without. They are the most charming and extraordinary creation of nature. The craft is not difficult for lovers of beadwork, the main thing is to understand how much beads to put where. You can make similar roses from beads a whole bouquet and, for example, decorate your room with it.
Target:
- teach children to weave flowers from beads.
Tasks:
- teach techniques for working with beads, wire, threads;
- to develop interest in creativity;
- cultivate accuracy when working with beads.
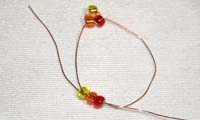
To make a rose from beads we will need: beads of white, green, red colors; wire for weaving; scissors; green threads.

1. Weaving petals from red beads.
The parallel weaving technique is used to make the petals.

To get the first two rows, place 3 beads in the middle of the wire.
We pass the right tail of the wire through 2 beads located on the opposite side.
We tighten the wire. In this case, we get two rows: in the first there is 1 bead, in the second - 2.
Important: when tightening the first row, we make sure that the rows do not slip from the middle; the left and right tails of the wire should be approximately the same in length!
In the third row, according to the diagram, there are 4 beads. It is this amount that we put on one of the tails of the wire, the second we thread towards and tighten.
Using the same principle, we put the required number of beads on one tail and thread it through the second. We make sure that loops of poorly tightened wire do not form on the right or left side, which will give the product an untidy appearance.
If such a loop is formed, then it is necessary to tighten the wire on the side opposite to the formation of the loop.

Threading it towards each other and tightening the wire well, we weave a total of 8 rows.
To get the side edges of the petal, we collect 10 beads on both tails, and then pass each tail with the collected beads through the first row, consisting of one bead, and tighten it.

We twist the wire tails together.


The first petal of the future rose is ready.
The length of the wire for a large petal is at least 60 cm, for a small one - 50 cm. With the specified wire length, the height of the finished rose stem will be only 7-8 centimeters.
2. Making the middle.

Place 4 beads in the middle of a wire 30-40 cm long white. Move the last 3 beads aside and thread the wire through the remaining 4 in the direction of the beads that were added first. Then add 4 white beads. We tighten and get the first stamen. You need to make at least 5 stamens, to do this we repeat the same combination each time.
3.Assembling the flower.
We give a concave shape to the three smaller inner petals.

We put the stamens inside one petal and twist all the tails together.

By adding one petal at a time, we form a rose flower.
4. Making sepals.
The weaving technique is parallel.
Weaving sepals from white beads.


We weave five sepals from white beads.

Do not forget to twist the remaining length of the tails between each other after finishing weaving each sepal.
To connect the sepals to each other, we use an additional piece of wire 15-20 centimeters long, onto which we string all 5 woven sepals through the last row, consisting of one bead.

We twist the tails of the wire together, closing the sepals into a circle.

Insert the finished rose flower into the center of the resulting circle, twist the tails tightly to form a stem.

The rose with sepals is ready!
5. Making leaves from green beads.
The rose has a complex leaf consisting of three small leaves.

To make our leaves look fluffier, to make one complex one we will weave 3 small leaves using the parallel weaving technique.
Leaf weaving pattern.


Since we used copper wire for weaving, we wrap the stems with green thread.

We connect the leaves together.
After we have prepared the required number of roses and leaves, we decorate the stems. If the leaves were woven from green wire, then we do not take any action, we leave everything as it is - our stems are already green. If we used copper wire, then carefully, turn to turn, wrap the stems with green thread, gluing the beginning and end of the thread with PVA glue.

The most enjoyable part of the work remains: we assemble a composition from all the woven elements, making an elegant bouquet that will always delight us at any time of the year.

The flower is ready!
In any form of art, beginners should start with the simplest products. Beginning needlewomen who want to master the beading technique must learn how to work with large beads. Finished decorations often look no worse than the assortment of fashion stores. It is better to start beading flowers from glass or plastic crystals, which will shimmer in the sun, striking with their beauty. Having mastered the simplest technique, you will subsequently be able to make entire compositions and large bouquets.
Beading for beginners: color schemes from large beads
To make it, you will need silver or gold wire, 5 large translucent beads, and a small dark-colored bead. Along with these materials, you will need scissors or wire cutters for working with metal. Cut a wire 30 cm long, make a knot on one side, start stringing one large bead at a time, securing them at the base. This manufacturing method is the simplest in the art of flower beading. The schemes consist of six step by step photos, which demonstrate how to string beads correctly. When all 5 elements form a flower, make the middle, secure the wire and cut off the excess. Use the resulting flower as a hair clip or insert it into a common bouquet with roses or other buds.
Beadwork

The next step you need to master is working with a needle. Bead embroidery looks no less wonderful than three-dimensional compositions, but it is much easier and faster to do than beading. For beginners, color schemes may seem too complicated, so experts recommend starting with a simpler type of work. To embroider a picture, in addition to beads and a needle, you will need canvas or thick fabric, hoop and thread of the corresponding color. If possible, use thin transparent fishing line, which will be perfectly camouflaged under the beads.
Draw the embroidery design yourself or use ready-made sketches. To make it easier for you to navigate, make notes with the location on the fabric and start embroidering the pattern. The knots should be on the wrong side.
Rose using the parallel weaving technique

Most beginners who want to learn the craft of making flowers from beads start with this weaving method. You will need red and green beads, wire and scissors - a standard set without which flower beading is indispensable. The diagrams demonstrate how simple the technique is to weave a rose. The first two rows consist of three beads, the number of which increases from row to row. Having finished the last, tenth, stretch the wire with beads to the base of the petal and secure.
The sepals and green leaves are made in a similar way, only from fewer rows. You don't have to guide the wire with additional beads to the base. Beading of flowers ends with assembly, which occurs as follows: the petals are twisted one after the other, then the sepals, then a stem is formed, to which green leaves are attached.
Features of the CCR technique

It is impossible to imagine beading flowers without a weaving method called “frame with a central row.” This is one of the most difficult, but wonderful weaving techniques, thanks to which you will be able to make buds that look like living analogues. This skill is achieved through the ability to tightly weave small beads and give the finished petals any shape.
First, cut the required piece of wire and tie a knot at one end. Make a central row of several beads, then make a large loop on top. Turn the workpiece over so that the knot is on the bottom. String the beads and braid them around the central row so that round loops are formed around it. Continue doing this until the desired petal size is achieved. Once you master this technique, you will be able to make thousands of different color options, and beading will not seem complicated to you.
Flowers: master class on making orchids from beads

Mosaic weaving is not made from wire, but from fishing line or strong thread. A product made from this material is much cheaper, but this does not deteriorate the result. With the correct selection of the color palette, your small works of art will practically not differ in appearance from their living counterparts - this is what attracts beginning beadworkers.
An orchid flower is made using the technique mosaic weaving using fishing line and needle. The product consists of six petals of two different sizes. In the diagram, the orchid is made of dark blue and purple flowers, but if you wish, you can choose a different palette. To make the middle you will need one large bead. To avoid mistakes, follow the diagram exactly, which indicates the number of rows and beads. To weave the first row, string one bead at a time, passing both ends of the fishing line through it. Subsequent rows are performed using a needle. String one or two beads depending on the type of row. Do not forget that the edge of the petal is made of a dark color, and the middle is made of a light color.
Red rose

Using the “frame with a central row” technique, you can make any flowers, including those that women love most in the world. Let the scarlet rose be the first product with which you begin to master beadwork. Schemes of rose flowers using the KCR technique are carried out according to a single instruction: the central row is made of seven beads, and the number of rows depends on the size of the flower part. The large 5 petals consist of six loops, the middle 3 - of five, the small 3 - of three. Three green leaves are made according to a similar principle. To make the middle, you need to twist a small petal.
Flower beading is an art that requires creativity. How you bend the resulting product will determine its appearance. Try to disguise the wire under the floss threads, choose natural colors and their shades. Admire living vegetation and reproduce their true beauty in your work, and then you will be able to fully master the craft.
Flower making is a special section of beadwork, in which it is important to follow a few simple rules so that the product looks decent and your work is not in vain.
In the first stages of learning, follow the diagram exactly and practice on small compositions.
Buy high-quality beads that will not subsequently lose their original beauty. Make flowers from several shades of red, pink or blue so that the product does not differ from its living counterpart.
Use thin wire, sold in specialized stores. Braid the legs of the product with green threads or floral ribbon - another material without which beading is unthinkable.
The flowers, the making master class for which was presented in the article, are well preserved thanks to proper care. Wipe the dust off them with a small brush or brush once a month, and then they will not fade even after many years.
Even a novice needlewoman can weave beautiful flower from beads. Variety of shapes and colors, various techniques- all this allows you to create flowers that are very similar to living plants, except that they do not fade after a while. We offer you to weave several beautiful flowers from which you can make original compositions, brooches, hairpins and more.
Materials required for weaving a flower
The main material is, of course, forms. But fresh flowers are so multifaceted that to create artificial flowers similar to them, you can use glass beads, beads, jewelry stones and even rhinestones as decoration. By skillfully combining all these things you can create a beautiful flower from beads.
There is one more material without which it is impossible to make a flower - this is a thin nylon thread (lavsan or silk), you can also use copper wire or fishing line. In addition, you should purchase very thin needles.
How to weave a forget-me-not
To begin with, here is a diagram of how to make a flower from beads for beginners. The easiest way to start is with forget-me-nots.
The technique is simple. We take a wire 10 centimeters long and begin to string beads on it in the following sequence: yellow, then five blue. After this, the end of the wire must be re-passed into the second (that is, blue) bead. Then according to the scheme - to the third, fourth and first (that is, yellow). All that remains is to twist the ends of the wire under the first bead.

Forget-me-not weaving pattern
Several such flowers need to be made. They will look very beautiful in a lush bouquet. If desired, it can be supplemented with a green leaf.
How to weave a daisy
Chamomile is also easy to make - just follow the diagram of a beaded flower.
We select beads of three colors - yellow, white and green. The color of the wire is also important - ideally silver. In any case, it is better to give preference to light.
First we create the chamomile petals. To do this, we cut the wire into 9-centimeter pieces - you need 10-12 pieces. Next, we string the beads according to the pattern, directing the ends of the wire towards one another.

Pattern for weaving a chamomile from beads
Using the same technique for making forget-me-nots, you can make the core of a chamomile. You just need to string six beads first yellow color(ideally raise the first bead). There is another way - to string 7-8 pieces of beads onto a wire, and then roll it into a spiral.
All that remains is to make a green leaf to complete the daisy. Dark green beads are used for it. The easiest way is to draw the outline of a leaf on paper, and then fill it with rows of beads according to the template. In any case, you need to weave from the top of the leaf, not forgetting to twist the edges of the wire to the stem where the flower will be attached.
How to weave a lily
We select white beads that have a light pearlescent tint for the flower itself, yellow beads for the stamens and bright green for the leaf. You also need silver wire or very light wire.
After this, you need to weave the flower in the same way as a daisy, only increasing the number of beads during casting. To make a lily, you need to weave 5 petals, a pistil, a leaf and 3 stamens. You need to twist the pestle into a spiral, then press the beads tightly together.

Using this pattern you can weave a lily
How to weave a bell
By understanding how to weave a flower from beads, you can make a beautiful and delicate bell. To make it, you need to select green and blue beads, as well as yellow ones for the stamens. The wire for the bell should be dark in color.
Based on the diagram, you need to weave 5 flower petal blanks. Also, according to the diagram, you need to make a pistil, stamens and a leaf.

Pattern for weaving a bell from beads
When cutting the wire for the pistil and stamen, you need to leave the longer end as this will be the base of the stem for the flower. And it is to this wire that the leaf and petals of the bell will be attached.
How to weave gerberas
Experienced craftswomen can try weaving gerberas. In fact, it is not that difficult, since weaving flower petals is very similar to making daisy petals.
So, first you need to select beads. You will need white beads, peach beads, salad beads, orange color. A little brown or you can replace it with black. You also need wire, thin fishing line, 30 cm thick wire for the rod, 3 cm in diameter round mesh and floral tape for decoration.

Bouquet of beaded gerberas
And then you need to weave 27 larger petals (you can make a flower of any diameter), the same number of smaller petals, and also create a dark core by stringing brown beads on a thin fishing line.
A round mesh should be used to secure the petals when collecting the flower. In this case, it is necessary to pull them tightly with fishing line so that the flower does not fall apart.
Video of a master class on making a basket with flowers
Watch the master class and you will learn how to weave flowers from beads with your own hands.
Order a set of composition materials at.
Composition "Summer Mood"
Watch the video tutorial on the channel "Melody of Beads" on YouTube.
For work we will need:
- Beads for flowers and leaves;
- Wire 0.3mm in the color of the beads;
- in the color of beads;
- Wire 0.5mm in the color of the beads;
- Floral tape;
- Gerbera wire;
- Wire cutters and pliers;
- Sisal;
- Pot;
- Foamiran;
- Scissors;
- Ruler.
For each flower there will be a more detailed description of the beads and wire.


The composition consists of the following elements:
- Lily branches;
- Two calla flowers;
- Two gerbera flowers;
- Leaves different shapes and sizes.
Lily from beads
To make a lily sprig we will need:
- beads of primary color - 50 grams;
- beads for edging the petals - 5-10 grams;
- light green beads for stamens and buds 10-15 grams;
- brown beads for stamens - 5 grams;
- beads Green colour(about 6 shades) 10 grams each;
- gerbera wire for stem 35-40 cm


An open lily flower consists of three small petals and three large ones.
Small petals (3 pieces)
On the central axis there are 27 beads (about 4 cm) of the main color and we make five pairs of arcs (on the fifth pair of arcs we add an edging color), on 2/3 of the petal we make a step on both sides.

Large petals (3 pieces)
On the central axis there are 30 beads (about 4.5 cm) and five pairs of arcs (like the small petal).

Making a pestle
.JPG)
.JPG)
.JPG)
Stamens

Two unopened buds
The larger bud consists of three petals: on the central axis there are 30 beads of the main color and 4 pairs of arcs with the addition of light green beads at the base.

From the leftover beads you can make loops like these, twist them together and put them in the bud so that it does not show through.

The smaller bud also consists of three petals: on the central axis there are 20 beads (5 green and 15 light green) and three pairs of arcs with the addition of green beads at the base of the petal.

Lily leaves can be made different sizes and use different combinations green shades.
For example, four sheets - 4 pairs of arcs.

And one - 3 pairs of arcs.


The long leaves (three pieces) used in the composition are woven in a similar way. Such leaves must be stitched in 3-4 places.

When all the elements of the lily are ready, you can begin assembling the branch.

.jpg)
.jpg)

.jpg)

Beaded calla lilies (two pieces)
To make one calla flower we will need:
- beads of primary color - 25 grams;
- yellow beads for pestle - 5 grams;
- light green beads for pestle - 5 grams;
- wire 0.4 mm in the color of the beads;
- 0.5 mm wire in the color of the beads for the central axis of the petals;
- wire for stitching;
- gerbera wire for the stem.

Petal
For the central axis of the calla lily, we twist two pieces of 0.4 mm wire 17-20 cm long (or take the same piece of 0.5 mm wire), twist it with a working wire (0.4 mm). We string 6.5 cm of beads and make two pairs of arcs (sharp top, round bottom).


Next, we make 15 turns of the wire around 4 fingers of the hand (thus measuring the required length of wire for weaving a petal with an extension). Before reaching the top of the petal there are 7 beads, we pass the wire with wrong side to the front.

We go with the wire with the beads down.

We make one turn at the bottom - if there are excess beads, remove them, and pass the wire from the inside to the face between the expansion arcs. We make a symmetrical step on the other side of the petal (we step back from the top of the petal by eye, parallel to the first step).

We return with the wire with beads and make the second step, retreating again 7 beads.

We make 4 such steps (indented by 7 beads).


Then we continue to make steps, but retreat 6 beads. There should be a total of 8 steps on one side of the petal and 8 on the other.


We sew the petal from the wrong side with thinner wire (0.2 mm) in two places.

Give the petal the desired shape.

Pestle
We take the wire for the stem (it must be decorated with white or yellow floral tape, or it can be painted). We collect light green beads on a 0.3 mm wire, then we make a transition, alternating yellow and light green beads, after which we collect yellow beads.

We wind the working wire to the stem, leave two yellow beads and lower the wire without beads a little down, then go up again, grasping the above two beads.


We insert the pestle into the petal and secure them together.

We decorate the stem under the petal with green floral tape. We string about 20 cm of light green beads onto a green wire. We wind the working wire to the stem from bottom to top, not reaching the beginning of the petal by about 0.5-0.7 mm.

We continue to wrap the stem with beads, rising upward with each turn. We make about 7 turns to cover the joint.

We reach the central axis of the petal and pass the wire through the petal several times, fixing the wire.

After this, we go down with the wire through the turns of light green color.

The calla flower is ready!

Similar to the calla petal, large stepped leaves are woven.

Except that instead of the first two pairs of arcs, we make four pairs of arcs, retreating from 7 to 15 beads (in random order).


Beaded gerbera (two pieces)
To make one gerbera flower we will need:
- primary color - 50 grams;
- edging beads for large petals - 20 grams;
- beads for the flower core, 3 shades (green), 5 grams each;
- wire 0.4 mm in the color of the beads;
- - you can do it yourself
- gerbera wire for the stem;

For one gerbera flower you need to prepare 6 types of petals.

Petal 1 (loop of 9 beads) – 7 pieces.
Petal 2 (loop of 11 beads) – 12 pieces.
Petal 3 (loop of 15 beads) – 18 pieces.
Petal 4 (loop of 17 beads) - 24 pieces.
Petal 5 (11 beads on the axis, two pairs of arcs, sharp top, sharp bottom) - 24 pieces.
Petal 6 (15 beads on the axis, three pairs of arcs (the third - edging - in a different color), sharp top, any bottom) - 24-26 pieces.
Cut off the side of the nylon lid. We make holes (with an awl or a nail) in rows in a circle - according to the number of petals in each row, for petals 1-4, and holes in two rows - for petals 5-6 (that is, 4 more rows for these two types of petals).
Let's start assembling the gerbera
We take petals 1 and thread the tails of the wire into the holes in the center, and on the reverse side we twist the wires together.


Then in two rows - petals 5. We insert the petals of the second row in the spaces between the petals of the first row.


Insert a stem wire into the bundle of wires formed from below and wrap it tightly with wire for assembly.

Take green foamiran and cut out three circles of different diameters from it. Cut the petals.

We cover the lower part of the gerbera with these petals (glue it if necessary).

We wrap the stem with floral tape. Gerbera is ready!
.JPG)
Now all the elements of the composition are ready. We form a single structure from them, arranging the elements of the composition at our discretion.
First you should try on the arrangement of the composition in an empty pot. And only after that we fill the pot with gypsum solution and plant the composition there. We wait until the plaster sets (15-20 minutes). Leave until completely dry (about a day). We decorate the surface of the plaster with sisal.
The composition is ready!

Leave your comments, ask questions and suggestions! We will be very pleased!
Today at step-by-step master class we will tell you how to weave a very beautiful, but at the same time the simplest flower from beads using detailed diagram for beginners with photos.
Tools and materials Time: 1 hour Difficulty: 2/10
- thin wire for working with beads;
- thicker wire for the stem;
- beads of different colors;
- floral tape.
Even a novice craftsman can make such a beautiful flower from beads! Go for it! 😉
Bright juicy flowers do not please the eye for long! Photographs and drawings, as well as, of course, beads, help us preserve the memory of flowering plants. Other interesting schemes and master classes on beaded flowers for beginners can be found in a special section of our website.
Weaving pattern
In total we will need 5 petals made using the parallel weaving technique.
Step 1: make a petal
To form one petal, we string one bead onto a piece of wire, move it to the center of the piece, and cross both tails of the wire in the next two beads. In the next row we cross the threads in three beads.
In this way we continue to weave until the number of beads for one row increases to 6 pieces. After this, you can already reduce the number of beads for each row.


As a result, you get a narrow thin petal, which we put aside. In total, as already mentioned, you will need 5 petals.
Step 2: weaving leaves

Next we form the leaves.
- To do this, string 6 beads onto a piece of wire, and cross the threads in the next string of 6 green beads.
- We tighten all this, and string 4 more beads onto the upper tail. We insert them into the center of the resulting circle.
- Carefully twist the tails of the wire together and set the resulting sheet aside.


We collect five ready-made leaves, twist them, and set them aside.

Step 3: making the stamens
Now you can work on the stamens of the flower. They are carried out according to the scheme. As the upper part of the stamens, you can use small 4 mm beads or bicones of the same size.


Step 4: collect the flower
When all the details are ready, you can assemble our simplest beaded flower. We simply twist the petals together, with the stamens in the center, and wrap it all around a stem made of thicker wire. We screw our leaves to it.
Floral tape is used to hide the twists and decorate the wire. It wraps the trunk and petals, giving the product uniformity.
So, we just managed to weave a flower from beads quite easily. Did you succeed? Share examples of your work in the comments!
A great activity for at least 2 reasons:
1) We protect nature and preserve it in its pristine beauty, because plants are alive and how you and I feel pain! Therefore, let's be aware and sensitive to the world around us.
2) And just you can object, how can you admire flowers if you don’t pick them, because you can’t always go into nature. This is where weaving flowers from beads will come in very handy, which you can admire endlessly and gain energy from the memory that you created such a creature with your own hands.
Dear friends, do you agree with our reasons? Tell us why you like to weave flowers from beads? Be the first to start and let the others follow and we think it will be a great discussion!