Tilde dolls with hand-made hare patterns. Tilda style: rabbit patterns and detailed master class. Tilde hare: step-by-step manufacturing instructions
Materials:
thin sheet felt or thick cotton;
synthetic fluff or holofiber for filling toys;
cotton fabrics different colors and shades (for suits);
lace;
satin ribbons;
buttons (for attaching paws);
reinforced threads (for attaching paws);
multi-colored floss or iris sewing threads for embroidering noses;
4 beads (for eyes);
felt (for shoes);
buttons for decorating suits and shoes;
paper flowers for bouquets and boutonnieres;
scissors;
sewing needles of various sizes (if you have special needles for sewing soft toys, this will greatly simplify the work);
stick or tweezers for stuffing toys;
iron;
glue gun or any other glue;
a simple pencil, pins for chopping;
sewing machine.


How to sew dolls.
Fold a piece of felt 4 times, attach it to upper layer pattern, trace it and pin the layers (2 each) with pins.Without cutting, sew the parts on a machine, leaving holes for turning inside out. Do not cut off the tails of the threads; you will need them later.

Cut out the parts, leaving allowances and making cuts with scissors in the bends.

Turn out the parts, stuff the paws, legs, and torso with synthetic down and sew up the holes. Make sure that the padding is not too dense where the paws attach to the body.

There is no need to stuff your ears. Just turn them right side out, sew up the hole and iron them with a not very hot iron. Pay special attention to the tips of the ears - they should be as flat as possible.
Embroider the nose with floss threads and make eyes from round beads.

It is better to sew the paws on the hares directly with the clothes, which we will model.
How to sew a suit for a hare groom.
The groom's suit consists of a jacket, shirt and trousers. Fold the fabric from which you will sew the trousers in half with the right side facing inward and trace the pattern. Pin, place side seams and cut, leaving a slight seam allowance.Process the bottom edge of both parts with machine stitching or “plant” it on adhesive web.
Re-pin and sew an inner seam. Trim excess threads, turn inside out and iron thoroughly. Place the trousers on the hare's legs and sew them to the body with a button fastening. Putting trousers on already sewn legs is inconvenient.

Pin the top of the trousers to the hare's body and sew.
The shirt can be made from a rectangular piece folded in half. Carefully wrap the fabric around the body, pin, trim off the excess and sew to the body.

Decorate the shirt with a satin bow, attaching it with a couple of stitches.
Queue for the jacket. Fold the fabric in half with the right sides facing in, trace the pattern, cut, sew, turn inside out and iron.
Decorate the still sleeveless jacket with decorative buttons and put it on the hare, securing it with a couple of stitches.
Trace 2 sleeve pattern pieces and 2 mirror pieces onto the fabric, cut them out, leaving 0.5 cm seam allowance. Process the bottom edge of each piece with a machine stitch or “plant” it on a glue web.
Fold right sides inside and stitch along the outline. Turn out, iron and insert the hare's paws into the sleeves. You can attach the paws using buttons or simply sew them to the body, hiding the seams under the collar of the jacket.

We make boots. Fold a piece of felt of the appropriate size in half with the right side inward, stitch along the outline, leaving the top unstitched. Cut, turn and shoe the groom. Decorate your boots with threads, making a decorative seam or imitating lacing.

All that remains is to sew on the hare's ears and attach the boutonniere to the jacket.

How to sew a suit for the bride.
Fold the fabric in half, right side inward, place the bodice pattern (top of the dress) on the fabric, trace, pin and cut, leaving a little allowance.Sew only the top seam, turn it inside out, trim the threads and press.
For the skirt you will need a rectangular piece of fabric - the longer it is, the more magnificent the dress will be. Let's say, if the length of the bodice is 20 cm, then the cut length for the skirt should be at least 40, and the width about 15.
Machine the bottom edge of the rectangle, attach lace to it (40 cm of fabric is 80 cm of lace), gather it into beautiful folds, baste and stitch. Make the second row of lace in the same way.

Gather the future skirt, stitch it to the bodice and trim off the excess.

All that remains is to sew the back seam. Fold the dress in half with the right sides facing in, stitch, iron and turn inside out. Put the dress on the bunny.
Sleeves and shoes are sewn in exactly the same way as the groom's. Decorate your shoes with buttons, make a veil from a piece of tulle or lace, collect a bouquet of paper flowers, and decorate it lace ribbon and glue it.

The bride is ready for the wedding!
Tilda dolls were released thanks to the Norwegian designer Toni Finnanger. First of all, the tilde is not just a toy, but an interesting interior detail that will add zest to any home. In this article you will find a pattern for a tilde hare with long ears - this toy is sewn very simply and even a novice needlewoman can do it.
Getting ready for the process
Half the success of sewing tilda dolls is the correct selection of materials. And in order to choose them correctly, you need to know what the main features of the tilde are, what exactly distinguishes it from other toys.
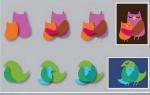
So, first - smooth lines. Tilda dolls are always chubby. If the tilde depicts some kind of animal (a cat, a dog, an elephant or a bunny, as in our case), its silhouette in any case should be soft, cozy, without sharp lines.
The second is the convention of the face. Or faces. Dotted eyes are usually embroidered with “knots” or drawn with a marker; the nose is also small, can be flat or voluminous. And of course - blush. Blush, by the way, is done using real “human” cosmetics or watercolors.
Third - color scheme. The colors used for the tilde are usually bright but calm. Toys made from pastel-colored fabrics look very impressive. If you choose fabric with a print, make sure that the pattern is not too large - the pattern should correspond to the size of the doll. And it is advisable not to overload the toy with excessive diversity. If you are not sure, you can use just two different fabrics- one for the body, the second for the clothes of the toy.
Now that we are a little savvy in theory, it’s time to start practicing.

You will need:
- The fabric from which the bunny's body is sewn. Typically, tildes are sewn from natural fabrics such as cotton or linen; calico can be used. It is very convenient for beginners to sew a hare’s body from fleece; it is a very soft fabric that will hide all your flaws, if any. There is also a special fabric for sewing tildes, but it is quite expensive.
If you take unbleached linen or cotton, you can tint it yourself if desired. To do this, prepare strong tea or coffee and add table salt to it at the rate of 1 tbsp. l. per 1 liter of solution. Salt acts as a color fixer. Then place the fabric in this infusion and “cook” it over low heat for 15-20 minutes, stirring constantly. After “cooking” the fabric should be rinsed well in cold water, dried and ironed. Be careful - you need to dry the fabric without kinks, otherwise the color at the fold will be more saturated than on the rest of the fabric.
- The fabric from which the hare's clothes will be sewn. You can use the same linen, cotton or fleece. It would be good if the fabric had a small pattern.
- Threads of the same tone as the fabrics. You also need threads to embroider the nose and eyes (floss).
- Padding material. The easiest and most reliable way to stuff toys is with padding polyester or holofiber.
- All kinds of buttons, beads and other cute little things.
- If you plan to make the tilde of the hare standing, the pattern will also require the presence of wire. The wire should not be too thick and should bend easily. If desired, the bunny's ears can also be made erect using wire.
Sew a body
Below is a pattern from Tony Finnanger's book.

- If you are interested in tilde hare pattern in life size, you can use mouse scroll to “adjust” the pattern to the desired size, and then copy it directly from the monitor by attaching a sheet of paper to it. Very comfortably.
- We cut out the patterns from paper and place them on the fabric, previously folded in half. You can trace the patterns with a pencil, but then the fabric will need to be washed after stitching so that the pencil marks are not visible. For the best option, use a special marker; its marks on the fabric disappear the next day after use. This marker is sold in specialized sewing stores.
We need to transfer the body, arms (2 pcs.), legs (2 pcs.) and ears (one common part) onto the fabric. The ears can be made from different fabrics, that is, one part can be made from fabric of the same color as the body, and the second from fabric for clothing the toy. It turns out that the inside of the bunny's ears will be different in color from the body, it looks very beautiful.
If you want the bunny's ears to stand up and not hang down, you need to cut the part in half (to then sew them to the head) and insert wire into them.
- Be careful - the pattern is given without seam allowances, so you need to “add” 5-10 mm. When cutting parts from fabric, make cuts at the folds.
- We sew the parts by hand or sew them on a machine. To prevent the fabric from moving, you can secure it with pins.
- We turn out the stitched parts. This is convenient to do with a pencil or sushi stick.
- We stuff the parts with padding polyester or holofiber. Stuff the legs and arms loosely so that they can be bent.
- If we are making a standing hare, we need to insert wire into the legs.

- Carefully sew the legs and arms to the body.
We have a blank, to which the most interesting thing is to add details and, of course, sew clothes.
Tilde hare: clothing pattern
If your bunny is a boy, he will need pants:

In addition to panties, the girl hare also needs a dress:

The pants are cut out of colored fabric, stitched and sewn to the body. To sew more accurately, first you need to pin the panties to the body. You can also sew the bottom edge of the panties to the girl hare’s legs:

For boy's pants, it is more convenient to use a pattern that also has a bib and straps:

It will turn out very nicely if you make cuffs on the pants for a boy hare from fabric of a different shade of the same color (more saturated or lighter, as you please).
The straps are sewn to the bib. You can add buttons for beauty:

A girl's skirt is also first pinned to the body to prevent fidgeting, and then sewn on.
In addition to the dress and pants, you can sew sweaters and hats from soft fleece or wool.
Sweater pattern for the hare tilde:

By the way, a sweater can also be decorated with beads, buttons or embroidery. Just don't overdo it - all the details should be small.
Now we sew a hat. To do this, take a small rectangle from soft fabric and sew it along the edges.

To make a pompom for a hat, you need to take a pencil and wrap a woolen thread around it. Then the “ring” of wool threads removed from the pencil, sewn to the top of the cap and cut in half.

Now we make a lapel at the cap and sew it on so that it does not unfold. The hat can also be decorated with embroidery, a small applique, a button or a bead.
Finishing touches
Well, the tilde hare is almost ready (the full-size pattern was given at the beginning of the article). All that remains is to “draw” the bunny’s face and sew on the ears and cap.

This is the kind of beauty you will get if you do everything correctly, carefully and with pleasure:
If desired, the bunny's ears can be made erect. To do this, you need to stick a wire into the hare's head and sew on first one ear, then the other. After this, the ears become flexible - you can leave them “standing”, or you can bend them.

To make the head of a hare with erect ears look neat, you need to sew them on with a hidden seam. If you didn’t succeed, don’t be upset - remember how to make a pom-pom and add a mischievous, disheveled forelock to your bunny.
Tilda the hare is the easiest doll to make. However, if you nevertheless take up sewing such a toy and complete the job, most likely, such needlework will become your hobby. It’s so nice to watch how a real miracle is born from pieces of fabric under your hands!
The hare is one of the most popular characters in the tilde family. What’s noteworthy is that each tilde doll has its own character: even if you sew identical characters using the same pattern, they will definitely come out different, at least with a different “facial expression” from each other. And it’s not difficult to verify this, just try to sew a tilde hare with your own hands using the pattern presented below and a detailed master class.
Lop-eared hares with long ears are unusual gift for anyone, and an extremely appropriate interior animal (you can’t really say that this is an “interior decoration”, these toys are so “alive”) - for Easter and not only.
In this master class we will try to reveal all the secrets of making tilde hares, so that beginners can repeat the entire process easily and with pleasure.
Do-it-yourself tilde hare: preparing the fabric
First, let's prepare the fabric for cutting. The easiest way is to take white cotton fabric, preferably calico (it is denser) and dye it, since it is pure White color not typical for tilde-style toys; they usually have a coffee or honey tint.
The dye must be natural, and therefore for this purpose we will take coffee or tea. Let's brew the cheapest ground coffee or thicker black tea (you can get by with instant coffee and tea bags). For you, the main thing is color. Add a couple of spoons of PVA glue to the strained drink and mix everything thoroughly. Without waiting for the solution to cool, feel free to soak a piece of calico in this liquid - let it remain there until the dye has cooled.
We take out the fabric, wring it out lightly and, straightening it, hang it to dry. Carefully iron the dried but still slightly damp fabric with a hot iron. And only now you can start cutting.
How to sew a tilde hare: materials and tools
To make a cute tilde hare you will need:
calico dyed in the manner described above;
colored cotton fabric with small patterns (checks, stripes, flowers) for eared clothing;
padding polyester or other suitable filler;
threads to match the fabric for stitching and floss for embroidering the nose and eyes;
tools: sewing machine (you can also sew by hand), needle, scissors, a long thin stick with a rounded end for turning parts inside out, tracing paper for a pattern.

Below are patterns for our life-size tilde hares, i.e. for two bunnies - larger and smaller. To open a pattern in full size, click on it with the mouse. This way you can save the picture and print it. Another option is to open the pattern in A4 size, attach tracing paper or a sheet of white paper to the monitor and carefully, without pressing too much, trace the visible contours.
We transfer the details of the hare patterns onto tracing paper.


Cutting fabrics for toys and clothing
Having folded the fabric (calico) along the grain thread in half, put the patterns cut from tracing paper on it and trace them with a pencil. At the same time, do not forget to take into account that when cutting out we will have to allow seam allowances (0.5-0.7 cm, ideally the width of the foot sewing machine), so be sure to leave space between the pieces on the fabric.


Cut out the clothing pieces for the bunnies. They will be dressed in sundresses, cropped pants and Panama hats. The sizes of sundresses are very arbitrary, but we focus on the following numbers:
– 20*11 cm – for a large hare;
— 12*7 cm – for a small bunny;
- bibs and straps of sundresses can be tailored during the work process, trying them on directly on the hares themselves.
For the inside of the ears we select a delicate pink fabric, maybe polka dots or checkered.
Tilda hare: sewing master class
Now you can start sewing. To prevent the parts from moving relative to each other, we use pins. We grind the parts, leaving holes for turning.


Let's fold the bottoms of sundresses and trousers, finish the edges, stitch the panties (first the seat seam, then the step seam).


Before turning the stitched parts inside out, you need to either thoroughly cut off the seam allowances or make notches in the convex and concave places. We turn out the stitched parts using a thin stick or any other suitable tool (you can use a thick knitting needle or scissors with narrow blades).
We begin to fill the inverted parts with pieces of padding polyester, pushing them first with the sharp tips of scissors, and then with a wooden stick. We stuff it tightly so that there are no uneven spots or bumps. When filling the arms and legs, we mean that there should be 1.5-2 cm left from the padding polyester to the hole for everting. This is necessary so that the finished arms and legs bend freely and the tilde bunnies can sit.

We sew the legs to the body, trying to make the seam invisible.

We put the pants on the hare, bend their top edge inward and sew the edge to the body, making small tucks of the excess fabric.

Now it’s the turn of the hands.

And then the ears, the ironed parts of which need to be sewn to the head from the inside.

After this, you can put on a sundress, sew the straps onto the buttons, and sew the back with hidden stitches.

There are only a few touches left: we embroider the tilde hares with black thick threads for eyes and dots (this can be done using knots), and with brown threads for noses. Lightly brown the bunnies’ cheeks (an almost indispensable touch for all tilde dolls): powder cotton swab with crushed red pencil lead.

We put hats on the tilde hares, carefully folding the ears into folds. When finished, the height of the large and small doll is 22 cm and 16 cm, respectively.


Did you know that there are never too many hares in a house? You definitely need to check out the master class on. He will make wonderful company for our newborn tildas.
We hope the master class on sewing tilde hares was clear and interesting. Happy creativity!
Marina Kurnosova specially for the site
Many people think that Tilda is just a peculiar style in which they sew various toys, pillows, carpets and even blankets. But in fact, “Tilda” is also a brand that was invented quite a long time ago by the world-famous Toni Finanger. She not only sews interior decorations herself, but also publishes many books where you can find ideas, photographs, as well as patterns for hares, dolls, pillows, etc. The books of this famous author are sold all over the world and are very popular on the Internet. Not all of Tony Finanger’s books and magazines are represented in Russia.
Hares in Tilda style
In addition to the famous Tilda dolls, there are also a variety of animals and insects, among which hares are very popular. Patterns and detailed master class we will present in this article.
Tilda's hares may look completely different, but it will feel like they are all made in the same style. You can come up with your own outfit for the toy, sew from other fabrics, but if you use life-size Tilda hares patterns, then your toy will still resemble the original.

Tools you will need for the job
In order to sew a hare, you do not need to be a professional in this matter, but any experience in sewing will still be useful. Not everyone succeeds in sewing the toy of their dreams the first time; this requires months and even years of training.
To work you will need:
- Tailor's scissors. These scissors can be purchased at any stationery or fabric store.
- Chalk, soap or fabric marker. A bright one that is clearly visible is best. True, it disappears from the fabric quite quickly. Chalk is sometimes difficult to erase and can ruin the appearance of the toy. Soap, on the contrary, is most often difficult to see on the fabric, which can interfere with work.
- Needle and thread. You can choose even the thinnest needle for work, for example a beaded one. It is very convenient and fast to work with it. The threads must be matched to the color of the fabric.
- Fabrics.
- It can be synthetic fluff, holofiber or even granulate (it is used to weigh down the toy).
- Accessories for decorating toys: satin ribbons, artificial flowers, beads, lace, etc.
Toy body
The most important and responsible stage is working with the pattern, transferring it to the fabric, as well as stitching all the parts and connecting them. The first step is to see what kind of hares you will get. Life-size patterns look like this:

This pattern will help you sew the same Tilda bunny as in the photos above.
The first step is to print out this pattern, and then cut out all the details and transfer them to the fabric. To do this, you will need a fabric marker and the fabric itself (usually flesh-colored, you can take material with a print). Bunny ears are not included with this pattern; you can draw them on paper yourself or take them from this pattern:

Identical parts need to be sewn together using a needle and thread or a sewing machine (if available). Don't forget to leave an unsewn part on each piece so that you can unfold it and stuff it with padding. After stuffing, you need to sew up the hole. The hare patterns can be left for the next toy.
Further design of the toy
If you sew a bunny from ordinary fabric, you will need a costume or some kind of decoration with ribbons or flowers. If you sew a bunny on special fabric"Tilda" (it is easy to purchase in specialized stores), then you can do without further decoration. If you don't know where to buy such fabric, you can go to a regular tailor's store. Take the hare patterns and attach them to various bright materials. Typically, fabric with flowers, butterflies or stripes is used.
If you are sewing a hare from flesh-colored fabric, then you can decorate the toy by tying it around your neck beautiful bow. Having extensive experience, you can sew clothes for toys using rabbit patterns. It can be any dress or even a suit.

Tilda is a very interesting style that will help give your home originality and comfort. There are many photographs in handicraft publications with other Tilda hares from which you can draw inspiration. Bunny patterns will help you create the best and cutest toys.
Textile dolls in the Tilda style are valued for the sincerity and kindness that comes from them.
In this master class with step by step description you will see how to sew a Tilda hare with your own hands, as well as clothes for this cute boy. Created in good mood The rabbit will decorate the interior, become a safe toy for a child or an original designer gift. Such souvenirs are not cheap at the handicraft market, so feel free to give them as a gift. New Year, March 8 or Teacher's Day.
Preparing for needlework
To sew a hare in the Tilda style, it is not necessary to buy new fabrics; you can use old but strong things as a basis from natural materials- linen, cotton, fleece. Children's things that the child has long outgrown are ideal for clothing. Seeing a familiar outfit on the toy, the baby will fall in love with his new friend even more.
By the way, previously textile toys were never made from new materials, but were based on “happy” things in which something good was experienced. In addition to fabrics, prepare for creativity:
- padding polyester for stuffing (filling from old jackets is suitable);
- threads;
- a needle;
- scissors;
- pins for cutting;
- pattern paper.
Of course, it is more convenient and faster to sew on sewing machine, but you can do it manually, but the process will take longer.
Scheme and master class on sewing a hare
Prepare a Tilda hare pattern and transfer it to fabric. You can take a look at our sewing master class, where a more detailed pattern of the torso, ears and fashionable overalls is given.

You should get: two parts of the body, four ears, as well as four blanks of arms and legs. If you want to make the ears two-color, then make two figures from one fabric and two from a material of a different color.


It is much more convenient to sew the pieces together without cutting out each one separately, but when they are all together.


When all the parts are sewn, cut them out, 2-3 millimeters away from the seam. Then turn it inside out and use a wooden stick align all seams.

After this, proceed to stuffing the Tilda hare. Stuff the padding polyester tightly enough using a wooden stick.


When sewing on the arms, fold the raw edge of the piece inward and sew it in a circle with a blind stitch. If the seams are not very even, don’t worry, the clothes will hide them.


Using the same principle, sew on the ears. Then draw the eyes with a black felt-tip pen or embroider with black thread. Embroider the nose with brown thread.


Bunny clothes
You also need to sew clothes for the Tilda hare yourself. You don't have to make complicated patterns for this. Fold in half to get shorts denim and draw shorts according to the size of the hare.

Then fold the top and bottom edges of the two pieces and stitch to prevent the fabric from fraying. Sew the pieces along the lines and trim off the excess.


Thread the elastic into the waistband using a pin, then tie it off and trim the ends. Turn the shorts inside out and try them on the boy.