Trimmed classic manicure. How to do your own manicure at home How to do a trim manicure
Nails have become an important indicator of grooming and culture. Taking care of your nails is easy if you know the principles. Not everyone knows how to do a properly trimmed manicure. After all, it’s not enough to receive a set of tools as a gift; you also need to know how to use them. Some will have to be thrown away immediately, while others will have to be sharpened. But first things first.
Tools
Not everyone goes to manicure courses. There are tons of educational materials that show the process for free. But all people are different, everyone’s skin and cuticles are different. The classic method of manicure, which is taught in famous schools, will tell you about all the problems and cover the complete technology. Does the free video take into account exactly your nuances?
Let's look at some tips from the master on how to properly do a trim manicure. First you should prepare the tools you will need. These are scissors for cutting cuticles or tweezers for the same purpose. They should be sharp enough not to wrinkle the skin, not tear it off into pieces, but cut it off.
The test can be carried out on a regular paper napkin: a cut made once should not cause layers of the napkin to be pulled behind the blades. If there is no clear cut left with smooth edges, it’s time to sharpen the tool.
A few words of consolation to the girls who received the set: all tweezers over five thousand are produced unsharpened. So this can even make you happy - it means the instrument is of high quality.
The files that will be needed must have an indication of their grit (this is the amount of abrasive per square centimeter). For natural nails, this indicator should only be 180 grit, no more. Less is possible - up to 240 grit, but it will take a long time to cut.
The exception is glass files, but it is better to purchase them in professional stores. Cheap files quickly lose their properties and begin to wrinkle your nails.
A pusher (cuticle pusher) and a scraper (hatchet) are often combined into one tool, this is very convenient. They have metal cutting edges, which must also be sharp.
How to do a trim manicure correctly: description of the process
In a classic manicure (called a hygienic trim), there are three stages: shaping the nails, maceration (the hand is lowered into the bath), and removal of the cuticle.
Shaping your nails is always done dry. Wet nails cannot be filed; they will only become frayed and you will have to wait for them to dry.
Maceration is done on one hand, and the master begins work with the little finger, the remaining fingers should be in the bath at this time. Taking out one finger at a time, the master processes them and, lubricating them with cuticle oil, leaves them in the air.
When the turn of the thumb comes, change the water in the bath and lower the second hand into it. While the thumb is being processed, the second hand is being prepared. Her manicure also starts with her little finger.
After the manicure is completed, the nails are degreased and varnish is applied, then, after it dries, cuticle oil is dripped again.

Step-by-step instruction
There are instructions defining how to do a properly trimmed manicure.
1. Shaping your nails:
- Excess length is removed, nails are trimmed to a harmonious size.
- The side edges of the nails are filed in accordance with the chosen shape (square, oval, almond).
- The corners are smoothed and sawdust (unevenness under the nails) is removed with a buff.
2. Add liquid soap and, if desired, bleaching salt to the bath, and lower your hand into it.
3. Take out one finger and dry it with a towel:
- The proximal cushion is moved back.
- Clean the pterygium with a scraper, carefully removing it from under the cuticle. A “pocket” should form, that is, the skin above the nail plate does not stick, but covers it.
4. Cut the cuticle with scissors or tweezers. In the corners where the roller is rounded, lift the tool vertically to make small cuts and avoid injury.
The operation is repeated with other nails.

At home
Many people think about how to properly do a trim manicure at home and follow the rules of disinfection. In salons they use autoclaves - something like an oven. At home, you can use the oven of your kitchen stove by selecting a special tray for this.
Specialty nail stores sell craft bags. You can buy them, they are inexpensive. But you can be sure that not a single molecule from the instrument will get onto the food pans.
Files and orange sticks can be soaked in a solution of a professional disinfectant, following the instructions. This will provide protection against accidental contact with the skin of fungi, viruses, warts, hepatitis and the like.
Trimmed classic manicure: ideas
The new century has updated the arsenal of nail artists. These include manicure machines, files of various grits, and cuticle softeners.
Appeared the new kind manicure - combined. It combines elements of classic edged and European unedged.
How to do a properly trimmed manicure using new technologies? First of all, you should remember the operating procedure in classic version. Some operations can be simplified by using a manicure machine, just do it carefully.
Based on fruit acids, it is a wonderful assistant in the fight against keratosis. Hands that are too dry are first treated with anticuticle in the area of the nail folds, then placed in a bath.
If your hands are in good condition, maceration may not be necessary. Instead, use a cuticle softener and follow all the steps of a classic manicure.
Unfortunately, this rapidly developing segment of the global market has attracted unscrupulous manufacturers. Their products do not meet standards and often harm nails. Let's talk about both.

Good things first
Recently, two tools have appeared to help the nail artist: a ceramic nail file and a ceramic hoof. Let us explain how to do a properly trimmed manicure using these devices.
They are designed to work on dry skin. This is required for some artificial turf applications. It must be said right away that they will not be able to remove the cuticle. But it’s quite possible to remove the pterygium - a thin film that moves out from under the cuticle as the nail grows.
Just do this dry, without using anti-cuticle. Typically, girls use the hoof between salon manicure sessions when they want to change their nail polish. Having removed the old coating, carefully run your hoof over the nail in the area of the proximal ridge, removing the overgrown pterygium. It flakes off like flour. Having brushed off everything unnecessary, they begin to apply a new layer of varnish.
A ceramic file is a good helper for processing rollers. It gently removes rough skin and can correct the shape of nails. After working with it, cuticle oil is applied to the nails.

And now about the sad
All markets, haberdashery stores and supermarkets offer penny sets of manicure tools. They are no good, even for children's games. The buyer, using these items, may forget about how to properly trim a manicure.
The enemy of nail artists is the manicure fork. The very design of the tool suggests that it is designed to disfigure the nail folds. The bevel that the metal edges of the tool have allows for cutting out the skin strap. But you won’t be able to carefully remove the overgrown cuticle.
Another tool, a cheap nail file, is a reliable tool for roughing up ends. nail plate. Usually the grit number is not written on them, but it feels like 120. This is only used for extended nails. Using it on natural nails will lead to peeling and crumbling nails.
Be that as it may, you can do a manicure at home, it won’t be difficult. If regularly it will no longer grow quickly. Constantly moving away the proximal roller will clear part of the nail from the skin, and its shape will become more noble. Constantly covering your nails with varnish will allow your nails to form a semicircular arch, which will affect their strength and beauty.
Learn how to do a manicure correctly, and everyone around you will notice it!
Every woman has done a manicure, but not everyone knows about all the intricacies and rules of classic manicure. The classic cut manicure differs from other varieties in that the cuticle is completely removed using scissors or nippers. In this article we will tell you how to do a classic edged manicure, look at photos and trends in the beauty industry.
There are two main types of foot treatment - classic, also known as trim pedicure, and hardware. Today we will look at what a trimmed pedicure means, what tools and how it is done, how it differs from a hardware pedicure, and what foot treatment technique is best to choose.
What is a trim pedicure
A classic trimmed pedicure is a foot treatment in which calluses, rough skin, corns, and overgrown cuticles are removed using cutting tools. The master cuts off a thin layer of hardened skin so as to completely remove the defect, but without damaging the skin or leaving cuts. As a result, the feet become smooth and soft, and look well-groomed.
Differences between classical and hardware processing
What is the difference between a hardware manicure and a classic one? The difference between a classic and hardware pedicure is the method of treating the feet and removing calluses and keratinized particles. With hardware, the master uses a special machine with a cutter that rotates at a speed of 30-50 thousand times per minute.
The cutter has a grinding surface like sandpaper. Due to the abrasive surface and high rotation speed, it gradually removes rough skin, layer by layer. This treatment takes longer, but is more gentle. The technique of performing a classic pedicure is such that micro-cuts and damage remain even after the most careful master. When processed with a milling cutter, the skin peels off gradually and is not damaged.
During a hardware pedicure, the master also uses a machine with a cutter to process nails:
- Use a rough cutter to file down the overgrown edge of the nail and at the same time polish it as with a regular nail file.
- Using a cutter with a pointed end, it removes the cuticle, which is also not cut, but gradually peels off, due to which it grows back more slowly and without burrs
- Using a cutter with a fine abrasive surface, polishes the nail plate so that it is smoother and the polish stays on it longer.
What type of pedicure is better?
Which pedicure is better, hardware or edged? Below, we will list the main advantages and disadvantages of each type of foot treatment so that you can compare and choose which one is best for you. So, which is better, trimmed or hardware pedicure?
Trim pedicure
Advantages:
- Quickly completed, takes no more than 15-20 minutes, depending on the speed of the wizard
- It is inexpensive because it does not require the use of additional special equipment
- Available in every salon and from masters of any level and price category, since this is where training begins
Flaws:
- There is a high probability of cuts, even if handled very carefully and slowly
- The appearance of the effect " thin skin» due to the fact that coarsened particles are removed quickly and in a large layer
- The presence of several contraindications for which it is not recommended to do a pedicure
Hardware pedicure
Advantages:
- More delicate treatment, exfoliation of skin in small particles without discomfort
- Elimination of cuts and other damage, the cutter is designed for gentle treatment of the skin and does not injure it
- No discomfort after the procedure caused by removing large areas of rough skin
Flaws:
- Higher cost, hardware treatment will cost 10-20% more than a classic edged manicure
- Not available in all salons, especially in small towns, since not all craftsmen have machines with cutters
- It takes longer, 20-30 minutes, since processing the skin with a cutter is slower than with a machine
So, which is better, hardware or classic pedicure? Based on the advantages and disadvantages of both types of treatment, we note that classic pedicure should be preferred if you want to save time and money, have no contraindications or damage to your feet, and your skin is not particularly sensitive and will withstand intensive treatment without discomfort. Hardware pedicure is better if you have delicate skin, do not want to experience discomfort and are willing to spend more time and money on visiting the salon.
Home manicure kit
To make a classic edged manicure, you will need nippers, scissors, files of varying hardness, an orange stick, oils and cuticle products. The most important thing is that all items are well sharpened. Don't forget about it when doing a manicure at home. All instruments must be treated with an antiseptic.
The technique of performing a trim pedicure involves the use of the following tools and accessories:
- To soften the skin. To soften the skin of the feet and make it more amenable to treatment, use a bath with warm water. Soap is added to it, sometimes salts and aromatic oils.
- For treating calluses and corns. The master can use a special pedicure grater or blade. The principle of operation of both instruments is similar: they are used to cut off rough and dead layers of skin.
- For nail treatment. A basic set of pedicure tools includes scissors, nippers and a nail file. Tools are needed to trim the overgrown edge of the nail and polish it.
- For processing cuticles. If the master does a manicure with cuticle trimming, he uses nippers or a special cutting device to remove it. If the cuticle is not thick and has not grown much, it is simply pushed back with an orange stick.
- For polishing nails. The master has several types of files at his disposal - hard ones for removing gel polish and soft buffs for polishing.
How to do a trim manicure

Stages of pedicure
What is included in a classic pedicure? The master removes rough skin, calluses, corns, and cuticles. Trims and polishes nails and, at the client’s request, covers them with a decorative coating - varnish or gel polish. A classic pedicure is done in stages as follows:
Softening bath. You need to fill the bath with water at a temperature of +37-40 degrees. Add antiseptic, soap, sea salt or aromatic oil. Leave your feet for 10-20 minutes until the skin softens.
Treatment of the nail plate. After the bath, your feet need to be dried, and then you can start treating the nail plate. To do this, remove any remaining polish, if any, trim the overgrown edge and shape the nails using a file.
Foot treatment. How to do a trim pedicure correctly? You need to properly treat your feet by moving from the middle to the edges of the foot. Movements of the machine should be smooth and careful. It is important not to press too hard, otherwise you may cut the skin. Particular care should be taken when treating the feet in the bends and on the toes, since there the risk of cutting is especially high.
Cuticle treatment. First you need to apply a softening agent, then carefully remove it with tweezers or nippers. If the cuticle is not trimmed, it should be pushed back to the base of the nail with an orange stick.
Antiseptic treatment. If you are doing a classic pedicure, the execution technology involves mandatory treatment of the feet with an antiseptic. Even if you move as carefully as possible and there are no cuts left on the skin, the machine may leave microdamages that are invisible to the eye. To prevent infection from getting into them, your feet must be sprayed
antiseptic.
Massage, applying moisturizer. How to do a classic pedicure next? At the end, be sure to moisturize the skin of your feet, lubricate with foot cream and massage so that it is completely absorbed.
Decorative nail treatment. After the feet have been treated, you can cover your nails with decorative varnish or gel polish. Regular varnish it needs to be applied to the base and covered with a finish that will increase its durability. Gel polish is also applied after drying the base and must be covered with a top coat. It must be dried in a UV lamp after applying each layer of coating.
When not to do a trim pedicure
Classic pedicure has several contraindications. The main one is the presence of fungus on the skin of the feet. If you treat the affected feet, microparticles of skin will remain on the instruments, and the fungus can spread due to damage. For the same reason, trimming cannot be carried out in diabetes mellitus if there is damage to the skin. Micro-cuts will cause them to spread and make the situation worse.
It is highly undesirable to trim damaged areas if there are wounds, cuts, scratches or any other skin damage on the legs. In such cases, a special medical pedicure is recommended, which can be done in a salon.
Secrets of perfect nails
We will also share with you the technology for performing the perfect manicure and secrets that not all specialists reveal.
- Choose your nail shape based on the length and thickness of your fingers. A square looks good on elongated, thin fingers, but those with a wide nail plate will want pointed nails that will visually elongate the silhouette.
- The varnish should not be shaken; it is better to roll it between your palms.
- Use products that slow down cuticle growth, this will make your life much easier.
- In order for the polish to lay down evenly, you first need to apply a transparent base to the nail.
- If you're running late and the polish doesn't want to dry, run your nails under cold running water or dry them with a cold hairdryer.
- Girls with short fingers are recommended to use pearlescent varnishes, which will visually lengthen both the nail plate and fingers.

Shared
Species decorative manicure many have been invented, but this variety is united by one common property: any design looks beautiful only on smooth and neat nails. There are different ways to give them this look, but edged manicure is considered the most accessible and in demand - it’s not for nothing that it’s called classic.
The method got its name because of the way the cuticle is removed: it is carefully pushed back and then cut off with special tools. Before performing the procedure, the palms are dipped in warm water for a while to soften the skin, which is why the manicure is sometimes also called wet.
Initially, the trimming technique was considered the main way to get your hands in order and prepare your nails for applying a decorative coating, but it has a serious drawback: if you handle it ineptly or use low-quality tools, you can get hurt and even get an infection or fungus. Because of this, beauty salons in Europe have abandoned this service and only provide safe products. unedged manicure.
Reference! There are other types of hygienic manicure, for example, hardware or Japanese. However, the fundamental difference between them also lies in the method of removing the cuticle, so the above methods are sometimes considered as varieties of untrimmed.
Despite the lack of classic manicure, many women still prefer it, because it has incomparably more advantages:
It may not be possible to cut the cuticle perfectly evenly the first or even the second time, but as you gain experience, you will understand which tool is more convenient to use and how to perform the procedure as carefully as possible.
How often can you get a trim manicure?
The question of the frequency of the procedure most often arises when discussing another feature of trimmed manicure: it is believed that removing the cuticle provokes its rapid growth. In reality, this statement is only partly true. The fact is that the cuticle protects the growth zone of the nail, and if it is constantly cut off to the base, then the body will quite expectedly react with increased growth of this small strip of skin. In addition, it will become rougher and denser each time, so some girls are afraid to do a trimmed manicure more often than once every two weeks.
That's just rapid growth The cuticle is easy to avoid if you cut off only its upper dry part, doing this as carefully as possible so as not to touch living skin. Such an operation will not affect the overall appearance of the manicure, but it will not provoke an accelerated restoration of lost protection.
A properly trimmed manicure is even considered beneficial. Firstly, it accelerates the growth of the nail, which is held back by an excessively wide cuticle. Secondly, it can cause grooves to appear on the nails, and timely removal of the keratinized strip of skin solves this problem. Thirdly, if you do not remove the cuticle, it begins to grow, dry out and crack, which can lead to infection at the base of the nail.
Therefore, you can do a trim manicure more often than once every two weeks, and the exact number depends on individual characteristics body. Of course, mechanical removal of the cuticle enhances its growth, but it is not so critical as to abandon it completely. Manicurists believe that to keep your hands and nails in perfect shape, it is enough to do cosmetic procedure once every 7–10 days.
Important! Trimming manicures have contraindications. It is not recommended for girls with thin and weak cuticles: by depriving your nails of natural protection, you can slow down their growth and damage the nail bed. The procedure is prohibited for people with poor blood clotting and diabetics, in whom even small wounds heal slowly and can become infected. You cannot cut the cuticle before extensions, since during the process the nail plate is polished at least twice, and the stratum corneum protects the living skin from possible injury.
How to do a trim manicure at home: a step-by-step description of the process
Learning how to perform a classic manicure on your own is not a difficult task. All you need is a set of tools and a little patience to get the hang of it. But then, when the period of experimentation is over, the finished result will be no worse, and perhaps even better, than in the salon.
Required Tools
The work does not require any rare or exotic devices; everything you need can be found in specialized manicure departments and even ordinary cosmetics stores. The only condition is that you do not need to save on tools designed for cutting cuticles and hangnails, since the overall appearance of the manicure and the safety of its implementation depend on their quality.
So, for independent work you need to buy (or find at home) the following things:
In addition, you will need antibacterial agents to treat devices and disinfect wounds. Most often at home, alcohol, peroxide, chlorhexidine, and iodine are used for these purposes.
When everything you need has been collected, all that remains is to disinfect the tools, and then you can proceed to the remaining stages of creating a manicure.
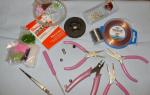
Photo gallery: tools for trim manicure
To restore the cuticle, you will have to give up trimmed manicure for a while and constantly treat your fingertips by special means
Video: trim manicure at home
Classic manicure does not lose popularity, especially in home care, because any girl has situations when she needs to look beautiful, but her hands at that moment are not in the best condition. The trimming method allows you to quickly give your nails a well-groomed look, so even supporters of safe techniques resort to it from time to time. Consequently, the ability to do a classic manicure yourself will save time and money, and will also protect you from inexperienced masters, low-quality tools, fungal infections and other troubles that can happen in the salon.
Trim manicure is also called “wet” (since it uses special baths with warm water and by various means), or classic. This method is available both in nail salons and allows you to give your hands a well-groomed look at home.
Advantages and disadvantages of classic edged manicure
The frequency of performing classic trim manicure has made it possible to repeatedly identify its advantages and problem areas. Among the advantages of classical technology are the following:
- This option is suitable even for cases where the hands have not been looked after for a long time.
- It can be done with a minimum amount of funds, as well as at home.
- Available to everyone, you can learn how to do it yourself.
- Financially accessible.
What are the disadvantages of this method?
- Requires some skills.
- Traumatic (cuts occur).
- Not suitable for people with delicate cuticles and people with diabetes (it is better for them to use an unedged manicure).
- May lead to certain infections ( European manicure considered safer in this regard).
What tools are needed to complete this?
To do such a manicure yourself, you will need the simplest and most common means and items (and not necessarily all of them listed at once):
Most of the items and tools used are listed here. Professionals and beauty salons have a wide variety of products. But to perform a classic edged manicure, it’s easy to get by with a significantly smaller number of them.
Doing a trim manicure at home: step-by-step instructions with photos
It should be noted that the implementation methods different masters nail salons are different. Each of our readers (or readers) will ultimately determine for themselves a technique that will be individually convenient. Next, we list the main stages of performing a manicure step by step with some variations.
STEP 1: Hand sanitizer, disinfecting tools (especially if they have been used by someone else). Later we will dwell on why this is extremely important. In the meantime, a short recommendation: avoid using manicure tools that have been used by other people without proper disinfection. This is especially true for everything that can hurt to the point of bleeding: scissors, wire cutters, knives. 
STEP2: Nail treatment. At the first stage, while the fingers are dry, the nails are processed (soaked nails, when treated with a file, can bend and then peel). Therefore, first dry cut them with scissors or tongs to the desired length and give the desired beautiful shape edges of the nail, and then file. When using a file, try to make movements in only one direction, since moving in different directions will damage the nail and subsequently peel it off. The final part of processing the nail plates is polishing them with a buffer or a file intended for polishing. With their help you can remove uneven nails and also make them shinier. 
STEP 3: Treat the skin of the hands around the nails. But when working with the skin during a hygienic trim manicure of this type, it is done in a moist state. Prepare a bath at a pleasant temperature (in a special container or suitable dishes in the house). The optimal temperature is 35-40 degrees Celsius. It is recommended to add salt (sea), grated soap and/or oils (essential) to the water. 
Before lowering your hand, use a manicure spatula to gently lift the skin around each nail.
Hands are lowered into the bath and treated one by one. First, lower your first hand so that your fingers are half immersed in the solution. About five minutes in water will be enough (but some prefer the procedure to last up to 15 minutes).
Remove your fingers from the water one at a time, starting with your little finger (the rest will continue to get wet). First, dry your finger with a towel.
Use a manicure spatula (pusher) to move and lift the skin around the nail again. In this case, you do not need to press hard on the nail, especially at its base, where it is more delicate. If you do this, then the nail may have depressions and irregularities. 
Further treatment of the skin around the nail consists of two parts: working with the cuticle and treating the side with a roller. The cuticle is the keratinized part of the skin that covers the nail on the side of the nail plate from which it grows. And the lateral ridges are the parts of the skin adjacent to the nail on the sides.
Each master performs these operations a little differently, and you can verify this by watching video tutorials on trimmed manicure from different authors. Here is one of the most popular options.
First, use special nail scissors to remove the cuticle. They have curved long tips. The cuticle of each finger must be cut off as a whole, not in parts. This will protect your finger from burrs in the future. The continuous movement of the scissors starts from one corner of the nail (in the part from where it grows) and ends in the other corner. The side rollers are not affected at this stage of processing. The removed cuticle should look like a thin single rope. 
After this, the next finger is removed from the bath, and the entire operation is repeated.
It is worth noting that many choose another option - removing cuticles with cuticle tweezers. Which one you choose is up to you, the main thing is that it is convenient and provides high-quality results.
When one hand is treated, some people prefer to change the water (it may cool down). After which everything is repeated with the second hand. Instead of or together with a manicure spatula, you can use a special orange wood stick. 
STEP 4: Skin and nail care treatments. When all fingers have been treated, you need to move on to hand care. The cuticle is treated with oil, the entire hands are nourishing cream. These care methods soothe the skin and make it soft and velvety. For dry skin, use a special cream. 
STEP 5: Varnishing. If desired, the nails can then be covered with decorative varnish of any beautiful shade or with a protective coating. There are also additional products used before applying the varnish, as well as on top of it. Before applying varnish, do not forget to degrease your nails, for example, with alcohol. Your nails are ready! 
Why is it dangerous to use unsanitized tools?
The answer to this question is simple - if you prefer this classic method of nail care, injury is possible. And if you come into contact with the same tools that another person used, dangerous infections can be introduced into the wounds, including viral hepatitis and even HIV. In a manicure salon, you can become infected with other diseases, including nail fungus.
Even if you think that your master is a decent person, and all the clients of the salon as a whole, too, then still clarify how the tools are disinfected after each client.
If you do your nails at home, also keep an eye on who else is using your manicure kit. After all, guests rarely come with medical records, and they themselves may not be aware of some of their diseases.
How to choose a manicure set?
If you are not a fan of hardware manicure and prefer to do a classic manicure at home yourself, you will have to provide yourself with convenient tools.
After reading our material, you could be convinced that for a trim manicure you do not need as many devices as some expensive manicure sets contain.
And perhaps the first thing to start with is writing a list of what separates you personally from a great manicure. This list will probably include not only the components of the kits, but also a special bath, as well as care products. All this will also need to be purchased.

Next, you can purchase tools that you think are right for you, in their inexpensive version. And that's why. As already mentioned, each master chooses his own tools - some prefer scissors, others tweezers. In addition, everyone has their own skin and nail characteristics. For some people, edged manicure is not very suitable for physiological reasons (for example, this may happen if there is diabetes mellitus when any wounds heal very poorly). Try doing your nails a few times first. If you are uncomfortable, change some of the tools.
By trying inexpensive tools first, you can choose the ones that work best for you. And if you want to buy what you personally need in a more expensive version. After all, as a rule, all necessary devices are sold individually.
By purchasing a large expensive set at once, you can get great amount unnecessary items that will lie idle for years.
It is also worth choosing a separate case for storing all items, where everything will be laid out separately. After all, if metal tools come into contact, this can contribute to their dullness.
My video to help
“You can be a smart person and think about the beauty of your nails,” said A.S. Pushkin was absolutely right. Well-groomed hands adorn not only women. You can often meet men in the salon getting a hygienic manicure. And this is not coquetry, but simply a sign of a person’s inner culture. Hands are what the interlocutor always pays attention to. They will say a lot about a woman - about her taste, attitude towards herself, and even to some extent about her well-being and prosperity. You can take care of your nails different ways. One of the most common is the classic edged manicure. It would seem nothing complicated, but even here everything needs to be done correctly.
Advantages and disadvantages of edged manicure
It is called a classic manicure because its technique has been known since time immemorial and has been for a long time the only way nail treatment. And despite the new techniques - hardware and non-edging - it remains the most familiar and, perhaps, popular type of manicure.
The technique of performing a manicure is inherent in its name. Nails are processed using scissors or nippers - they trim the overgrown cuticle. When done skillfully, nails very quickly acquire a beautiful shape and neat appearance. The edged type of manicure is simple and is used by most women. It requires a minimal set of tools and a little training. This manicure has its pros and cons. The advantages include:
- the ability to quickly tidy up even very unkempt hands;
- the fact that you can do it yourself at home;
- no contraindications.
The disadvantages are the risk of injury and the threat of infection. However, if you do a manicure in compliance with all the rules, its disadvantages become very relative.
Some women do not like it because after it the cuticle grows back quickly and they have to carry out the procedure frequently. Yes, after the cuticle is cut, the skin begins to grow faster and becomes rougher. Manicurists advise doing this manicure no more than once every two weeks. In fact, the frequency of its implementation depends on individual characteristics.
Tool for classic manicure
The quality of your manicure depends on the tool you use. Tweezers and scissors must be well sharpened. Otherwise, they will not cut, but tear the cuticle, which will lead to the formation of burrs. In addition to the cutting tool, you will need:
- file for shaping nails;
- polishing or buffing;
- pusher (spatula);
- trimer;
- orange stick.
The file should be selected based on the density of the nails. The size of the grains of the abrasive layer is measured in grids. The larger the grid, the finer the abrasive:
- 900 - 1200 grid is a polishing file;
- 400 - 900 grid - file for weak nail plates;
- 180 - 400 grid - suitable for permanent use.
Well-known manufacturers always indicate the number of grids on the file
Files with coarse abrasives are only suitable for extended nails. Nippers and scissors are selected according to the degree of convenience. The spatula for moving the cuticle and separating it from the nail can be single-sided or double-sided. Many, fearing to cut themselves with tweezers, use a trimer to trim the cuticle - a V-shaped sharpened tool that cannot be cut. Often the trimer is equipped with a spatula (pusher) at the other end. Nippers and scissors are selected according to the degree of convenience. For home use, it is better not to save money and buy high-quality cuticle tweezers. Here are some tips for choosing them:
- the optimal length of the cutting edge is 5 mm;
- check them before purchasing - they should not creak or move jerkily;
- the best material for tweezers is medical steel;
- The tweezers should compress well and unclench easily;
- carefully inspect the cutting edge; there should be no nicks or other defects on it;
- The sharpness can be checked on a plastic bag; tweezers should cut it easily.
Photo gallery: tool for doing nail work
 Polishing (buff)
  Cuticle pusher
 Trimer
Buy tools made by trusted manufacturers; they are more convenient to use and durable.
How to do it right
If you don't want to spend money on a manicure at a salon specialist, you can do it at home. With some skill, it will turn out no worse and will take a little time. In addition to tools, you will need:
- disinfectants in case of a cut - chlorhexidine or 70% alcohol solution;
- napkin or small towel;
- a bowl of water or soap solution;
- nail polish remover;
- degreaser (you can use the same alcohol) to wipe your nails before applying polish.
Trim manicure is carried out in several stages.
Nail preparation
Start by removing the old coating. Use nail polish remover without acetone, it is more gentle. Dry nails need to be shaped. If necessary, cut them with scissors or special nippers; if not, simply file them down, giving them the desired shape. Try to move the file in one direction - from the side edge to the middle of the tip. This way your nails will peel less. When filing the tip, take into account the shape of the base of the nail. If they are the same, the manicure will be more harmonious.
Nails should be the same length and shape, otherwise the manicure will look sloppy.
If the nails are short, they are given the shape of a soft square. Almond and oval shape looks better on long nails. Square nails have already lost their relevance. But it is the square that is the starting point for giving the nails all other shapes.
Next, slightly move the dry cuticle with a pusher and apply remover to it - a softening agent. Usually such drugs are quite aggressive; if they get on the nail (and this is inevitable), they can damage the plate. Therefore, place the prepared hand in a bath with water, a small amount of liquid soap and sea salt.
To make the bath more beneficial, you can add to it essential oils. To strengthen nails, use almond or calendula oil, for whitening - lemon or rosemary ether, for growth - sandalwood oil.
Cuticle removal
Cuticle trimming is the most important stage. The beauty of your nails and their health depends on how you do it. Move the cuticle softened in water with a pusher or an orange stick. Soaked skin differs in color from the rest - it turns white. It is this part of the cuticle that needs to be cut off with tweezers. This must be done without stopping to avoid burrs. Also white skin it is necessary to cut off the side bolsters as well. The position of the tweezers on the side rollers should be parallel to the nail, when cutting the cuticle - perpendicular.
You should not cut the skin at the very base of the nail. A severely trimmed cuticle will open up infection. In addition, transverse ridges may form on the nail (as it grows, it takes on the appearance of a washboard).
You can use a trimmer to remove cuticles. Although, it must be said that it has not really caught on with professional manicurists, and it is rarely used at home. The trimer has one significant drawback - it injures the most delicate part of the nail - on the hole at the very base. Therefore, it must be used with caution.
Do all manipulations on one hand first. Having completely finished the manicure on it, do the same with the second one.
Cuticle care after manicure
After trimming, you need to polish your nails with a buff. Movements should go from the base of the nail to its free edge. Special attention given to the tip. After treating both hands, take care of the skin around the nail. After using the remover, it needs to be restored and moisturized. special cream or cuticle oil. There are always bottles with different oils on sale; they are equipped with a brush, just like decorative varnishes. After drying your hands after a manicure, spread oil on the nail and the skin around it and rub it in with massage movements. If you do not use decorative colored varnish, you can simply apply a protective colorless coating to your nails. It will protect them from aggressive action detergents and other household chemicals.
There are many recipes for caring for kutila. One of them is a scrub. It is prepared from olive and castor oil(1 tablespoon each), a teaspoon of honey and half a glass of ground walnuts. The procedure must be done 2 times a week.
If you regularly use a nail scrub, you can slow down the growth of the cuticle. This will allow you to trim your manicure less often.
Decorative varnish coating
Nail design is an art. Today you can do everything - from a discreet nude manicure to a bright one, decorated with rhinestones.
Modern tendencies
The trend of the season is a knitted manicure that imitates knitwear with a convex pattern. Manicure remains fashionable " cat eye» using gel polishes. It all depends on the occasion for which it is being done. Many companies today object to female employees having colored manicures, especially those who work with clients. The maximum permissible is a neat French jacket. He is always in fashion.
Long extended nails have long been forgotten; they have given way to “native” short or middle length nails from 2 to 5 mm. Gel polish is not losing its position and remains the most popular due to its durability and ability to hide nail defects. The choice of color is limited only by your imagination and makeup tones. Main trends:
- Assorted decoration, which is on short nails looks more advantageous than long ones. It can combine such techniques as “moon” and French, graphics and ombre, “broken glass” and French.
- Fantasy. A combination of patterns - graphic and floral patterns, bright and pastel colors. The only thing that is not welcome on short nails is a pattern that is too small or too large.
- Minimalism additional decorations- rhinestone, glitter or tape.
Photo: manicure ideas
 Manicure using tape
  Nude manicure option
  Manicure "cat's eye" with rhinestones
  Manicure with elements of floral patterns
  The combination of glossy and matte varnish in a nude French manicure is always in fashion
  Manicure using the “moon” technique
  Nude manicure using the “moon” technique
How to properly apply nail polish
Before applying polish, nails must be degreased. You can use a special composition or simply wipe them with alcohol. Natural nail has the ability to absorb varnish. To ensure that the decorative coating does not lose its shine and holds better, a colorless base is applied underneath it. Apply a sufficient amount of varnish to the brush (it should not drip). The brush should be placed in the middle of the nail and gently moved towards the cuticle, but not reaching it. Then extend the color to the tip of the nail. The brush should not come off the nail plate. Then, placing the brush next to the cuticle and perpendicular to the nail, brush it first to one side edge. Along the contour of the nail, make a rounding motion towards the free edge, keeping the brush parallel to the nail. Do the same on the other side. Finally, “seal” the tip by painting its end. If there is not enough varnish during the coating process, dip the brush again.
When contacting a nail service salon, listen to the reviews about it. This is important because how you get your manicure depends not only appearance, but also health. What should you pay attention to? First of all, on the interior and cleanliness. Be sure to ask the master if there is a first aid kit in the salon, how the instrument is processed and how many manicure kits the master has. Require disposable wipes. If there are none, then the towel that is offered to you should be fresh. If you constantly visit one master, you can agree with him so that you have an individual set. These measures are necessary to protect yourself from serious infections such as hepatitis and HIV.
Video: cutting manicure lesson
Do you want to always be well-groomed and beautiful? Spend as much time on your hands as you do on your makeup. And then you can rightfully claim the title stylish woman with impeccable appearance.