How to pierce a raw egg. How to blow an egg out of the shell for an Easter craft: a master class with a photo. Decorate empty eggs
Eggs are not only an ingredient for mouth-watering dishes, but also great material to create homemade crafts. From them you can make original gizmos: a swan, a chicken, a lamb, an airplane, a piglet, a fish, etc. You can involve your children in creativity or younger brothers and sisters, it will make the work more fun.
You will need:
- Eggs;
- Scissors;
- Yellow threads for knitting;
- PVA glue;
- Brush;
- Colored cardboard;
- beads;
- Wooden skewers (toothpicks).
Instruction:
- First, you need to blow the egg out of the shell so that your craft will stand for a long time and not deteriorate. To do this, take a thin needle and gently pierce it on both sides. Blow out the contents of the shell, rinse thoroughly and dry the empty egg.
- Cut the yellow threads into about 5 - 10 mm (this depends on the desired length of the plumage). Lubricate the egg with glue using a brush. Sprinkle it on all sides with threads, gently pressing them to stick.
- Insert a skewer into the hole you made. If it is too large, grease it with glue - so the chicken will sit firmly on a stick. Cut the legs out of cardboard and glue to the skewer.
- Attach beady eyes to the egg.
- Cut out a beak from red cardboard and glue it on. Make as many chickens as you need. For chicken boys, you can make tufts of thread, and for chicken girls - bows from ribbons.

You will need:
- Eggs;
- Plasticine;
- PVA glue;
- White cotton;
- Colored cardboard;
- Red marker;
- Beads.
Instruction:
- Remove the liquid content from the egg. Coat the shell with glue and glue cotton wool, which will serve as a fur coat.
- Make horns from plasticine. To do this, roll it into a thin rope and twist a snail out of it. Make legs and ears out of plasticine.
- Glue beady eyes, draw a mouth with a red felt-tip pen. Cut out a clearing for a lamb from green cardboard, stick a few flowers and blades of grass on it. Put the finished lamb in the clearing.
Egg swan: master class

You will need:
- Egg;
- Feathers;
- Plasticine;
- Cardboard;
- PVA glue;
- Paints;
- A beautiful saucer.
Instruction:
- Empty the liquid from the egg. From cardboard, cut out the base on which the swan will be attached.
- Set with plasticine eggshell. From white plasticine roll out the sausage, give it the shape of a thin swan neck and attach it to the egg. Make eyes and a beak out of colored plasticine.
- Glue the feathers with PVA. You can glue the entire swan, or you can only certain areas.
- Make an impromptu lake out of a saucer - pour water into it and paint it with paints in blue color. Put the swan in the saucer.
- In the same way, you can make a black swan that will swim with the white one. The technology for making a black swan is exactly the same, only the shell needs to be painted black, find black feathers and make a neck out of black plasticine.
We make a children's plane

You will need:
- Egg;
- Pencil;
- Thick cardboard;
- Scissors;
- PVA glue;
- Brush;
- Felt pens and markers;
- Beautiful stickers.
Instruction:
- Carefully remove the contents from the egg, rinse the empty shell. Using a pencil, mark the attachment points for the tail, wings, cockpit glass, windows, landing gear and propeller. From thick cardboard, cut out the tail and wings of the aircraft.
- Lubricate the parts with glue and carefully glue them to the shell. Using a felt-tip pen, draw the cockpit and windows. Cut out the chassis from silver cardboard and glue it to the egg.
- Install a propeller that will close the hole from the needle. You can decorate the plane with beautiful stickers by placing them on the wings and tail of the plane.
Decorative egg for Easter

You will need:
- Egg;
- PVA glue;
- Brush;
- Scissors;
- Colored yarn.
Instruction:
- Remove the contents from the egg, rinse and dry it. Coat the shell with glue and start gluing colored yarn. Do not rush, try to wrap the whole egg with yarn, otherwise, the craft will turn out to be sloppy.
- At the end of the work, hide the ends of the thread in the center of the spiral. Decorate the egg with thread patterns in contrasting colors.
- You can glue the craft in a circle, make flowers, circles, zigzags and other patterns. In addition, the decoration with beads or beautiful beads looks original.
How to make an egg empty?
In order for the craft to be more durable, the contents are blown out of the egg. This procedure is not as complicated as it might seem at first glance. Take a raw egg, wash it well using dishwashing liquid, wipe it off and pat dry.
Using an awl or thin needle, carefully poke a hole. The size of the hole should not be large (1 - 2 mm is enough). Make exactly the same hole on the other side. Now, you can blow the liquid out of the egg. To do this, take a large syringe, insert a needle into the hole and pump air into the egg. Under pressure, the contents will slowly flow out the other end.
When you have completely emptied the egg, rinse it and dry it.
There are several ways to blow an egg out of its shell. Let's take a look at the two most popular methods.
Method 1
We will need:
- capacity,
- egg,
- needle syringe,
- water.
We act as follows:
- We pierce the shell in the center from the blunt or sharp end with a needle from a syringe. To expand the hole, twist the needle in a circle, slightly pressing on the edges of the shell. The diameter of the hole should be slightly larger than the needle itself.
- We put the needle on the syringe, draw in air and insert it into the hole made. It is necessary to pierce the yolk, then we begin to push the air out of the syringe into the egg.
- In order not to damage the shell, at the moment the thick parts of the protein come out, we slightly pry them with a needle and help them pour into the substituted container.
- We take in air again and continue the process until the shell is empty.
- We wash the needle with water, draw warm water into the syringe and inject it inside. We shake.
- We draw air into the syringe and now, gradually introducing it under the shell, we force the water to pour out. So we can gently rinse the shell from the inside. The procedure must be repeated 3-4 times.
- We make a hole with a needle already from the opposite end. We also slightly expand so that the remaining water flows out.
Method 2
We will need:
- Cup,
- egg,
- pharmaceutical pear,
- awl or needle
- toothpick.
Action algorithm:
- We pierce the egg shell with a needle from both ends. One hole should be slightly larger than the other.
- With a toothpick, mix the yolk with the protein to make it easier to pour the contents.
- We hold the egg over the cup and with the help of a pharmaceutical pear we begin to blow air into the upper hole. We do this until all the contents are poured out. We complete the procedure by washing, as described in the first method.
When the work is done, we will have an unusual tool in our hands for creating original crafts.
The shell can be used as follows:
- Paint and apply an Easter drawing with acrylic paints - this craft will become nice gift for Easter.
- Make funny characters, for example, a bunny. To do this, you need to attach ears, a tail and paws from felt to the shell, and also draw the muzzle of the animal.
- Cut lacy patterns on the shell using the shell carving technique, creating a beautiful interior accessory.
Is it possible to get a quail egg without damaging the shell
The scheme for blowing quail eggs is not fundamentally different, however, due to the smaller size, you will have to be a little more careful.
We will need:
- needle,
- egg,
- a bowl.
Action algorithm:
- Poke holes at each end of the shell with a needle.
- We pierce the yolk with a needle.
- Holding the egg over the bowl, blow sharply into one of the holes so that the contents of the shell “fly out” out.
- We wash the shell.
Original small shells are fertile material for creativity.
 Animals from the shell of chicken and quail eggs
 From them you can make:
- Children's crafts in the form of animal figurines. We string several empty quail eggs on a bamboo skewer, so you can make a giraffe or other animal. It remains to apply the “combat color”, make the head and attach paws out of paper.
- If you know how to draw, apply hand-painted, complement it with rhinestones or beads and fix it with glue.
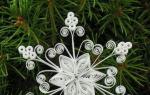
- Knitting lovers can crochet beautiful lace and stick them on the shell.
- Decoupage crafts are also popular - with the help of napkins you can create original gizmos.
The task of increased complexity is to correctly blow out an ostrich egg
Ostrich eggs have a very hard shell - its thickness is about 4 mm, it is not so easy to break it.
- hand drill,
- knitting needle,
- cocktail straw,
- deep bowl.
We act as follows:
- With a drill, carefully drill small holes at both ends of the egg.
- With a knitting needle, mix the yolk and protein.
- We insert the straw into the upper hole and blow until all the contents are poured into the bowl.
VIDEO INSTRUCTION
Large ostrich eggs are perfect for creativity, they make original souvenirs.
- The shell can be painted with a brush and paint. Thanks to the large surface, even an inexperienced artist will be able to apply at least a simple pattern.
- Ostrich eggs are often decorated using the quilling technique, when strips of colored paper are twisted and glued to the surface. In this technique, you can create beautiful flowers, animal figures.
- Some craftsmen have mastered the technique of shell carving. If you place a candle inside, you get an unusual candlestick.
A little skill and you will learn how to blow eggs quickly and easily!
Egg crafts are always relevant for Easter! Regardless of what exactly you are going to do with it and how you decorate it, the egg must be thoroughly cleaned and rinsed inside of it without damaging the base.
You will need the following: a clean, washed egg, a medical twenty-cc syringe (you can use a smaller one, but there will be more fuss), a container for the contents of the eggshell. With the tip of the knife, carefully make a small rounded hole in the bottom of the egg (it is better to make a hole at the bottom, because it will not be visible). Be very careful not to overdo it. You can not damage or split the shell, otherwise all efforts will be in vain - the egg will become unsuitable for decoration.


When you start painting or decorating eggs, be careful and extremely careful. The shell is very fragile, do not squeeze it with your fingers, but just hold it lightly.
Eggs are not only an ingredient for mouth-watering dishes, but also an excellent material for creating homemade crafts. From them you can make original gizmos: a swan, a chicken, a lamb, an airplane, a piglet, a fish, etc. You can involve your children or younger brothers and sisters in creativity, this will make the work more fun.
How to make a chicken from an egg?
You will need:
- Eggs;
- Scissors;
- Yellow threads for knitting;
- PVA glue;
- Brush;
- Colored cardboard;
- beads;
- Wooden skewers (toothpicks).
Instruction:
- First, you need to blow the egg out of the shell so that your craft will stand for a long time and not deteriorate. To do this, take a thin needle and gently pierce it on both sides. Blow out the contents of the shell, rinse thoroughly and dry the empty egg.
- Cut the yellow threads into about 5 - 10 mm (this depends on the desired length of the plumage). Lubricate the egg with glue using a brush. Sprinkle it on all sides with threads, gently pressing them to stick.
- Insert a skewer into the hole you made. If it is too large, grease it with glue - so the chicken will sit firmly on a stick. Cut the legs out of cardboard and glue to the skewer.
- Attach beady eyes to the egg.
- Cut out a beak from red cardboard and glue it on. Make as many chickens as you need. For chicken boys, you can make tufts of thread, and for chicken girls - bows from ribbons.
Egg lamb: manufacturing method

You will need:
- Eggs;
- Plasticine;
- PVA glue;
- White cotton;
- Colored cardboard;
- Red marker;
- Beads.
Instruction:
- Remove the liquid content from the egg. Coat the shell with glue and glue cotton wool, which will serve as a fur coat.
- Make horns from plasticine. To do this, roll it into a thin rope and twist a snail out of it. Make legs and ears out of plasticine.
- Glue beady eyes, draw a mouth with a red felt-tip pen. Cut out a clearing for a lamb from green cardboard, stick a few flowers and blades of grass on it. Put the finished lamb in the clearing.
How to make a swan from an egg?

You will need:
- Egg;
- Feathers;
- Plasticine;
- Cardboard;
- PVA glue;
- Paints;
- A beautiful saucer.
Instruction:
- Empty the liquid from the egg. From cardboard, cut out the base on which the swan will be attached.
- Use plasticine to set the eggshell. Roll out a sausage from white plasticine, give it the shape of a thin swan neck and attach it to the egg. Make eyes and a beak out of colored plasticine.
- Glue the feathers with PVA. You can glue the entire swan, or you can only certain areas.
- Make an impromptu lake out of a saucer - pour water into it and paint it blue with paints. Put the swan in the saucer.
- In the same way, you can make a black swan that will swim with the white one. The technology for making a black swan is exactly the same, only the shell needs to be painted black, find black feathers and make a neck out of black plasticine.
Plane from an egg: how to make?

You will need:
- Egg;
- Pencil;
- Thick cardboard;
- Scissors;
- PVA glue;
- Brush;
- Felt pens and markers;
- Beautiful stickers.
Instruction:
- Carefully remove the contents from the egg, rinse the empty shell. Using a pencil, mark the attachment points for the tail, wings, cockpit glass, windows, landing gear and propeller. From thick cardboard, cut out the tail and wings of the aircraft.
- Lubricate the parts with glue and carefully glue them to the shell. Using a felt-tip pen, draw the cockpit and windows. Cut out the chassis from silver cardboard and glue it to the egg.
- Install a propeller that will close the hole from the needle. You can decorate the plane with beautiful stickers by placing them on the wings and tail of the plane.
How to make a decorative egg?

You will need:
- Egg;
- PVA glue;
- Brush;
- Scissors;
- Colored yarn.
Instruction:
- Remove the contents from the egg, rinse and dry it. Coat the shell with glue and start gluing colored yarn. Do not rush, try to wrap the whole egg with yarn, otherwise, the craft will turn out to be sloppy.
- At the end of the work, hide the ends of the thread in the center of the spiral. Decorate the egg with thread patterns in contrasting colors.
- You can glue the craft in a circle, make flowers, circles, zigzags and other patterns. In addition, the decoration with beads or beautiful beads looks original.
How to make an egg empty?
In order for the craft to be more durable, the contents are blown out of the egg. This procedure is not as complicated as it might seem at first glance. Take a raw egg, wash it well using dishwashing liquid, wipe it off and pat dry.
Using an awl or thin needle, carefully poke a hole. The size of the hole should not be large (1 - 2 mm is enough). Make exactly the same hole on the other side. Now, you can blow the liquid out of the egg. To do this, take a large syringe, insert a needle into the hole and pump air into the egg. Under pressure, the contents will slowly flow out the other end.
When you have completely emptied the egg, rinse it and dry it.
Egg crafts are lovely way to occupy yourself and children, as well as to develop in yourself Creative skills. Can be made from eggs a large number of interesting souvenirs. Just be careful, empty eggs are quite fragile material that needs to be handled with care.
With Easter approaching, more and more ideas are popping up that use eggs. And sometimes crafts require an empty egg. In this article, I will tell you how to blow out (release) the contents from the egg.
For this we need:
- eggs;
- awl (small diameter);
- soap;
- bowl (for contents).
1. First of all - carefully wash the eggs with soap !!! to prevent bacteria from entering the body (including salmonella). Wash and let dry or dry with a towel.

2. Now, with the help of an awl, we make a hole first on one side, then turn it over and do the same. I would suggest starting with the tapered side of the egg and making a larger hole on one side. As the holes were made, gently push the awl inward and try to pierce the yolk. If it doesn’t work with an awl, use the most ordinary needle.

3. Now let's get to the fun part. We bring the egg to the mouth with the side with the smaller hole and take a deep breath and exhale. We repeat this until all the contents come out of the egg.

There is another way in which you do not have to blow the egg yourself. To do this, we need a syringe with a needle. We make the same holes, draw air into the syringe, insert a needle into the hole and push the air. You will have to repeat several times.
4. We wash the egg under running water, periodically draw water into the egg and shake it (to rinse the egg from the inside as well). Or, you can use a syringe with water and rinse the egg as well. The main thing!!! it must be rinsed very well so that no bacteria remain inside, and then bacteria multiply.

Next, wash the already empty eggs and the awl with soap.
5. Put the eggs in a box and let dry.

In the future, to hide the holes in the egg, use a regular band-aid.
The remaining contents can be used both in scrambled eggs and in pastries or make a useful mask for hair or face.