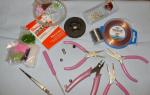
DIY gift items. Interesting DIY gifts. To make it you will need
2 213 936
The anticipation of the holiday is often more pleasing than the holiday itself. Especially if you approach this matter responsibly and start preparing gifts in advance. And you don’t have to go on a shopping spree, buying all the little things that catch your eye. It’s much better, cheaper and more enjoyable to prepare cute gifts with your own hands.
Panel made of threads and nails
A stylish picture made of threads and carnations is a creative gift for all occasions. You can present it to both relatives and friends. Gorgeous panel self made will not leave anyone indifferent.
To work you will need:
- a piece of board or plywood of a suitable size;
- paper template of the desired image;
- thick threads (floss or yarn);
- thin cloves;
- masking tape;
- hammer.
Prepare a drawing template on paper in advance. Secure it to the base with masking tape and hammer nails along the contour at equal intervals. Their height should be the same - do not forget to control this.
Remove the paper pattern. Now comes the most creative stage of the work - wrapping the nails with threads.
Tie the end of the thread to one of the nails and cut off the tail. Start wrapping the nails with threads in a random order, you should get sharp corners between them - constantly change the direction and try to grab each nail at least once.
At the end of the work, tie a thread to one of the nails and cut off the tail.


Some ideas for inspiration:


If you still have questions, watch a step-by-step video master class on creating panels from threads. You will see that there is nothing complicated about it, and it can be made quite quickly and at minimal cost.
Edible bouquets
Edible bouquets of fruits, vegetables, sweets and snacks are a new fashion trend in unusual gifts. They are gaining more and more popularity for a variety of reasons:- it's unusual and cool;
- You can eat such a bouquet with pleasure; it will not be thrown away withered, unlike a traditional flower arrangement;
- To create them, it is enough to arm yourself with imagination and patience, having first visited the nearest supermarket.
Bouquet of vegetables and fruits
It’s hard to surprise anyone with a basket of vegetables or fruits, but a basket made from them original composition will make a great gift. Stock up on fresh gifts from nature, toothpicks and patience. Additionally, corrugated paper, ribbons, lettuce leaves, foil and other decorative elements will help decorate the bouquet.Tangerine tree
An unusual topiary made from tangerines is a wonderful winter gift idea. Such an interesting tree will create a festive atmosphere and fill the whole house with its aroma. Armed with your imagination, try to create decorative trees from small oranges or lemons, decorate them with pine needles and shiny ribbons and New Year's tinsel. The main thing is not to be afraid of experiments.
Men's bouquet of fish, beer and nuts
Even such banal products as beer and nuts can be presented beautifully and tastefully, using them as a heartfelt bouquet for a male company. Even a novice lover of DIY crafts can make it at home.
Bouquet of sweets
Flowers and sweets are an ideal gift option for all occasions. Do you want to surprise everyone with a non-standard approach? Feel free to visit with a unique one. It will be a wonderful surprise not only for those with a sweet tooth and will be remembered for a long time by everyone present. How to create original present, watch the detailed video tutorial.And here you can see how to design a “Sweet tank made from Pepsi and candies” for boys:
Tank made of socks - an original gift for a man
Socks for your husband on February 23rd are the subject of many jokes. But they can also be presented in such a way that the loved one, out of delight, cannot even utter a word, not to mention jokes.
To make a gift you will need:
- 5 pairs of plain socks in dark and gray:
- a 0.3 liter bottle of your favorite drink, preferably with a high neck;
- colored paper;
- wine stopper;
- toothpick;
- 2 rubber bands for money;
- leg-split;
- glue;
- ribbon.

Roll gray socks into tight rolls and secure with elastic bands.
Connect them together by putting loops of twisted elastic on them. You should have one garland of 6 rollers.

Wrap the resulting structure with 2 dark socks. Tuck the toe of one into the elastic of the other.

Place the sock over the bottle, pulling it up to the twine. Fold the remaining part up and tuck it under the elastic band.

Wrap the bottle crosswise with the other sock, placing the heel inward. To make it clearer, look at the photo. Hide its ends under the fold of the first sock.

The design should look like this. It can be secured in the corners with sock staples or small paper clips for strength.

Wrap the wine cork in black paper. Place the tank turret on the tracks. Smooth out any rough edges. Make a flag from a rectangle of construction paper and a toothpick. Insert it under the twine and secure the entire structure with tape.

A cool gift for your favorite tanker is ready.


Candles of original shape
An unusual multifaceted candle will be a wonderful and useful souvenir. Despite the apparent complexity of the form, it can be made easily and quite quickly.
To work you will need:
- candle template printed on glossy photo paper;
- paraffin;
- wax crayons of the desired color;
- wicks;
- scissors;
- ruler;
- PVA glue.


Carefully cut out the template along the outline.

Using a ruler, bend all the edges.

Glue the edges of the template: they are numbered so that it is clear in what order to connect them.

Press the edges tightly to ensure good adhesion of the parts.

The glued workpiece can be covered with a layer acrylic paint to prevent possible paraffin leakage.

Melt the paraffin in a water bath, add crushed wax crayon of the desired color and aromatic oil (optional).

Place the wick in the center of the mold so that it reaches the bottom and carefully pour in the paraffin.

When it has completely hardened, remove the paper mold from the candle. Your creation is ready.


Want more ideas for flights of fancy? See another one step-by-step master class creating colorful scented candles.
Unusual candlesticks
Still wondering what gift you can make with your own hands? Make a beautiful candlestick. It will fill your home with comfort and will be an excellent gift for your family and friends.
To work you will need:
- small glass jar;
- matte black paint;
- masking tape;
- a simple pencil;
- sharp knife or blade;
- twine, braid or ribbons for decoration.

Cut it along the contour with a sharp knife. Carefully remove excess tape, leaving the heart still attached.

Paint the entire outside of the jar with black paint. To do this, it is convenient to use spray paint.

Let the piece dry completely and decorate it as you wish. You can tie the top of the candlestick with a ribbon or twine, draw a dotted line around the heart with white paint - use your ideas about beauty.

All that remains is to place a small candle inside the jar and light it - the house will immediately be filled with an atmosphere of warmth and comfort.

A picture of what was
Do you want to please your loved ones for a housewarming with a painting of your own design, but you don’t know how to draw at all? No problem. You can easily create a spectacular panel from scrap materials, and you don’t even have to pick up a brush.
To work you will need:
- large wooden or plastic frame with base;
- white Whatman paper;
- two sheets of black or other contrasting color;
- glue gun;
- pencil;
- scissors;
- ruler;
- scrapbooking paper;
- braid, ribbons, rhinestones, beads and other decorative elements.

Glue scrap paper of any color with random patterns into each small frame. Elements of the picture can either harmonize with each other or contrast.

Decorate each blank of a large panel as desired: glue a lush bow from satin ribbon, interesting buttons, voluminous flowers from corrugated paper, decorative stones or large beads. The design of the painting and the flight of fantasy at this stage are limited only by the available materials. You can supplement the work with inscriptions or photographs.


The main features of such a painting are that it is unique in its kind, exists in a single copy and was made with love for loved ones.
Mirror with frame made of branches
Mirrors with spectacular and unusual frames can completely transform even a dull room. The cost of such decor in stores is quite high. But why pay for something you can do with your own hands practically for free?
To work you will need:
- wall mirror with simple frame;
- willow twigs of the same thickness or wooden skewers;
- glue gun;
- masking tape;
- a can of spray paint in the desired color.

Glue the remaining rods tightly to each other, alternating their lengths. Let the glue dry.


Paint the bars and frame of the mirror with the desired color and leave until completely dry.

Attach a loop to the back of the mirror so it can be hung on the wall.
Looking in such a mirror is pure pleasure. Don't believe me? See for yourself.

We give money in an original way
Are you completely tired of searching for the right gift? Give something that is always needed and invariably causes sincere delight - money.You can present them to the hero of the occasion in the most unusual ways. 
Ideas for original handmade gifts
Beautiful and cute souvenirs made with love cannot be compared with store-bought trinkets. They carry love and positive energy. And also this great way spend leisure time with the whole family, because even a child can be involved in creating various crafts.Any things and products that were created by human hands have a unique energy. Today, the popularity of handmade goods is gaining momentum.
Enough a large number of In their free time from work, people like to make things with their own hands, sew, weave and carve wood.

To create a worthy source of income from an ordinary hobby, you need to truly love your business and have a competent business plan.

There are many handicraft opportunities that can bring you a steady income.
Decoupage technique
Decoupage is a technique of covering various surfaces with pieces of paper or fabric, which are then varnished. This task requires very few materials and equipment: paper and fabric, adhesive, scissors, various brushes.

To purchase a starter decoupage set, you will need to shell out about 10 thousand rubles. The necessary fabric and paper scraps can be found among friends and relatives.

Precisely because hand-made creativity often requires old things, this type of income becomes profitable, since it does not require the purchase of expensive materials.

Decor-candles
Competition in the decorative candles market is quite high, since this type of activity is not new at all. However, by developing your own technology and design, you can create beautiful souvenirs with your own hands in the form of unique candles.

To make the first batch of candles you will need to spend about a thousand rubles, which will go towards:
- purchasing raw materials - as a rule, ordinary candles are melted using the steam method;
- purchasing paint - you can use regular children's crayons;
- making molds from tetra-pack bags. Otherwise, the necessary forms are purchased in stores.
When making candles, you must follow safe work rules, since the wax and paraffin vapors released during melting become a fire hazard.

Floral compositions
Unique individual flower arrangements today cost about five thousand rubles. At the same time, the cost of such a bouquet will be about 2 thousand.

Custom floral arrangements are used for weddings, anniversaries and other celebrations. The only disadvantage of this business is the search for clientele, since flowers are a perishable product, the bouquets are prepared before the order is directly issued to the client.

Sewn dolls
The female sex, at any age, loves to receive dolls as gifts. This is a great toy for little kids; for adult ladies it can be an exclusive model for a doll collection.

High-quality and unique work among sewn dolls is in great demand.

In order to start the production of dolls from scratch and make a really high-quality good souvenir doll, you need to organize a small sewing workshop that will be equipped with:

- a simple model sewing machine,
- scissors, a color palette of threads, needles,
- various fabrics and fillers.
On average, the cost of a finished doll is 500 rubles, while the retail price is 2 thousand rubles.

Note!

Wood souvenirs
Wooden souvenirs can be presented as very miniature decorations, as well as large carved panels and furniture compositions. The material for production is wood, and finding it at any construction site is not difficult. Valuable specimens of the tree are more difficult to find.

To start your own business producing wooden souvenirs, you need to develop and create your first collection. The intensity of its sales determines the demand for specific copies. After this, the mass production process can begin.

Badges and keychains
The production of exclusive keychains can be done by a person who has mastered locksmith skills.

For this task, it is necessary to have specialized equipment in the form of a vice, a machine, blanks and materials. The amount of initial investment will be from 30 to 40 thousand rubles.

Beading
Very beautiful handicrafts and souvenirs are made from beads and seed beads. For such a task, a minimum amount of equipment and materials is required: a machine, bead sets, fishing line, beads.

Note!

The total amount of funds will be approximately one thousand rubles. You can use beads to create various types of jewelry, embroider fabrics with them, and create flower arrangements.
Ceramic products
The stores are full of ceramic products, but they do not have the warmth that hand-made pieces have. The main thing in this matter is the presence of a clay deposit near the direct production.

Even the presence of a special kiln is not necessary, since it is possible to dry a small product in a regular oven.

Knitted accessories
Any hand-knitted item, be it clothing or accessories, has a unique personality. Therefore, such gizmos are valued by the consumer, making this business quite profitable.

To create knitted items, you only need to purchase yarn and hooks or knitting needles. But for industrial production you will need knitting machine, which will cost approximately a thousand dollars.

In addition to the handmade hobbies presented, photos of souvenirs show that today you can also do:
Note!


- making jewelry,
- weaving baskets and boxes from wicker,
- design of books and covers using scrapbooking technique,
- production of chocolate souvenirs.
Sales of handmade souvenirs
In addition to the question of how to make a souvenir, you need to think about where to sell it. There are two ways to sell hand-made items.

The first is store trade. Handmade craftsmen sell their crafts in souvenir shops and departments. At the same time, registration of individual entrepreneurs, LLCs or product certificates is not required here.

However, there is a minus here - a lot of competition and sharing of income with the store owner.

The second option is online sales. To do this, you will also have to spend a lot of money on creating your own website (about 10 thousand rubles). Promoting and organizing a group on social media will also cost money.

However, there are sites that allow buyers and producers of hand-made souvenirs to meet.

Here you will have to pay for sending the goods by mail, since the consumer can be located in absolutely any city in our country.

Photos of DIY souvenirs


Every year the idea of doing something for a birthday is becoming more and more popular. Exclusive and original items, made in a single copy, become a worthy decoration of the birthday person’s apartment and a source of pride.
We present to your attention interesting ideas original gifts that can be presented for the birthday of the hero of the occasion of any age and gender.
The most handmade one is a postcard. It’s quick and easy to make, but the effect will be stunning.
The times of identical images on a sheet of paper are long gone. Modern postcards become a real creative masterpiece, thanks to new execution techniques and unconventionally selected materials.
Let's list what types of postcards are used as an original gift:
- Book;
- Leaflet;
- Curly;
- Closable with ties;
- Small;
- Large;
- Square, round or rectangular;
- Enclosed in an envelope.
There are many materials for such gifts. Their choice is limited only by your imagination:
- Kraft cardboard;
- Wool threads;
- Beads and rhinestones;
- Buttons;
- Lace;
- Tapes;
- Artificial flowers;
- Colored cardboard.
To make cards with your own hands, use one of the popular techniques:
- Volume applique;
- Quilling;
- Volumetric decor;
- Scrapbooking;
- External application;
- Embroidery ribbons;
- Silhouette cutting;
- Volumetric decoupage;
- Lace embroidery;
- Embossing.
The inscription on a homemade postcard can also be made in an unusual way; this will require the following elements:
- Volumetric letters;
- Text arranged in a circle of a beautiful heart;
- Embroidered ribbon confessions;
- “Pop-up” congratulations.
Any handmade birthday card will give a lot of emotions with its originality and beauty.
Cool video instructions on how to make original postcard with your own hands:
Knitted gifts
Knitted accessories are practical and popular gifts. Women especially like such gifts. They are given to a sister, mother, friend or wife.
Let's list what gifts can be associated with the birthday of a loved one or loved one.
Cup cover
A beautiful, stylish gift will decorate the kitchen and keep your favorite drink warm for a long time. TO finished product add additional decor: beads or lace.
Hot stand
Make a functional kitchen accessory elegant by adding coziness and spontaneity to the atmosphere of the “heart” of the apartment.
Fridge magnet
This funny souvenir is often given to children. However, adults with an excellent sense of humor will appreciate a cheerful monkey or a graceful cat that reaches out to the refrigerator door.

Crochet picture
For a friend's birthday or loved one you can associate a piece of art by copying its image. True, it is better for needlewomen with “experience” to take on such work: the painting will require skill. A knitted picture is a great gift for lovers of decorative things.

Case for laptop or phone
Knitted covers are no longer associated with grandmothers. These fashionable accessories Make great gifts for a girl's birthday.

Warmer for teapot and glasses
A beautiful tea “set” is a useful and stylish gift. It will brighten up long autumn and winter evenings with a reminder of your past birthday.
"Chess" pillow
A great surprise for a friend's birthday. The knitted board looks unusual, but it is comfortable and practical.

Slippers
A symbol of home comfort – light, beautiful slippers will come in handy in any home. And if they are presented on a holiday, they will remain a pleasant memory of the birthday for a long time.

Decorative pillows
Beautiful, bright little things scattered on the sofa in the living room or children's room are a great idea for using threads to make a gift with your own hands.

Colored rug
It will become a worthy decoration of any room, maintaining comfort and warmth in the home.

A wicker rug is an original and simple gift
There are many ideas for homemade birthday gifts. Depending on the preferences or age of your birthday person, choose “tied” pencil jars or fun keychains, curtain ties or bracelets.
Sweet surprises
Cooking is an ideal opportunity to create masterpieces from sweets in quality. Make one like this sweet gift Anyone can do it with their own hands. To make goodies, it is not at all necessary to stand at the stove for several hours, baking cakes and kneading special cream.
Let's consider what ideas will be an alternative to homemade pies and will delight the birthday boy and guests of the holiday.
Classic mastic cake
Choose drawings, inscriptions you need, corresponding to the interests of the hero of the occasion.
Set of sweets
Decorate a beautiful box filled with the hero of the occasion’s favorite sweets in an interesting way.
Sweet figure made of candies
Make a guitar, a tank or a bouquet of flowers out of candy. The choice of figurine depends on the preferences of the birthday person.

candy fan
This would be a perfect birthday gift for your mother, sister or friend. It’s quick to make it with your own hands, and in terms of effectiveness, such a fan is not inferior to store-bought copies.
Candy butterflies
This gift idea will appeal to little girls and adult women. “Funny” tasty things will decorate any holiday.
Sweet trees
The “crown” of trees is shaped with candies of different “suits”. And the trunk is “planted” in a beautiful pot, also decorated with sweets.

Sweet poster
An original birthday gift is a homemade poster, on which, in addition to wishes, sweets are pasted. Choose the goodies that the birthday boy loves. Cookies, chocolate or lollipops - don't limit yourself to just one.
Cupcakes with a surprise
The birthday person must guess which delicacy the surprise will contain by trial and error.
Cake pops
Even gourmets will appreciate the beautiful balls located on sticks. If the gift is intended for an adult, give unusual candies filled with alcohol.
Edible cup
An interesting, tasty gift will delight the hero of the occasion at any age. Additionally, you can make cakes with wishes or predictions.
Sweet gifts will please the birthday boy and guests. Therefore, such surprises will always be in demand at birthday parties.

DIY photo gifts
A gift from photographs is a surprise that you can make with your own hands so that it becomes the personification of the past and present birthday person. Frame it in unusual frames so that it becomes a worthy interior decoration.
Here are some ideas on how to use photographs as birthday gifts:
- Family tree with photos of the hero of the day’s relatives;
- Modular picture, assembled from “pieces” best photo birthday boy;
- Photo wallpaper made from a family photo of the hero of the occasion;
- Figure from photographs will reflect the most pleasant moments of a person’s life;
- The wall newspaper allows you to use wishes, inscriptions and drawings along with photographs;
- Glowing collage of photos looks unusual and stylish;
- Clock with photo order or make it yourself using small preparations;
- Any photo souvenirs can be used: T-shirts, mugs, sofa cushions;
- Glossy magazine from a photo of the birthday boy will make him feel like a real cover star;
- A photo book is a reason for the hero of the occasion to collect new photographs, complementing the existing collection.
This is an easy birthday gift to make. The main thing in this matter is to be patient and take photographs.

Paper flowers - origami
What holiday would be complete without flowers? Especially if it is female? For a homemade gift, use an original bouquet of paper flowers.
Any flowers can be made from ordinary paper. Give this beautiful gift You can do this for your birthday:
- Garland;
- Bouquet;
- Arrangement in a pot;
- A basket filled with graceful roses or wildflowers.

Original and stylish flowers will not fade, decorating the room for a long time, delighting their owner no less than a natural bouquet.
detailed instructions- how to make paper flowers with your own hands:
Mom is a special person, so she wants to make unusual gifts for her birthday with her own hands. One of these surprises will be a rug, the direct purpose of which is massage. To make it you will need sea pebbles, patience and a little time.
For the main “component” of a handmade gift, you don’t have to immediately go on a sea voyage: use river pebbles. All that remains is to select the appropriate size rubber base and attach the pebbles to it using glue. Wait for the glue to dry. All that remains is to present an original and very healthy gift.

When choosing flowers as a homemade surprise, do not forget that they need to be placed somewhere. An original vase will be an excellent addition to a gift. You can make it yourself from any materials:
- Colored pencils;
- Plastic bottles;
- Toilet paper rolls;
- Glass jar or bottle.
Remember that all decorative components must be firmly attached to the base using glue. You need to act carefully so that its traces do not spoil a simple but very original gift.

If you have not yet decided what you can give to a friend on a special day, turn your attention to a decorative pillow. This cute little thing will a worthy gift and interior decoration, long reminding of the donor.
To make the surprise original, you need to come up with a creative shape for the pillow. Sew it into the shape of a donut, a piece of watermelon, a cactus or a cookie.

We will tell you how to make a “delicious” donut pillow. To make it you will need:
- Beige felt;
- Pink felt;
- Threads that do not differ in fabric tone;
- Batting or other filler;
- Small pieces of fabric (it’s better to use felt too) of different colors;
- Pins for fastening parts;
- Scissors;
- Chalk for drawing the contours of the part;
- Sewing machine.

Let's get to work.


Such a cute pillow will be a nice gift and will decorate the room where adults and children live.
DIY flower vase decor
Speaking about making homemade gifts, one cannot help but dwell on the design of original vases. Or rather, on their decoration. Such a stylish gift will decorate the room and add exclusivity and sophistication to it. It won’t be possible to make exactly the same thing with your own hands, so the birthday boy can be convinced of the uniqueness of his gift.
Let's look at ideas on how to make a birthday gift with your own hands using an ordinary glass vase.
Geometric Stylish
To make stylish geometric shapes on a vase you will need:
- Masking tape;
- Spray paint of the desired color;
- Brush;
- Degreaser;
- Cotton pads;
- Several cotton swabs;
- Glass vase.

Let's get to work.
- To ensure that the decor adheres well to the glass, the vase must be treated with a degreaser. Apply it to a cotton pad and wipe the vase thoroughly. Wait until the glass surface is completely dry.
- Take tape and cover the vase in any order.
- We paint the remaining “transparent” areas from the tape with paint, spraying the spray over the entire surface of the glass.
- When the paint is dry, carefully remove the tape. A beautiful and stylish vase with a geometric pattern is ready!

Use different variants execution of a geometric pattern. Use very narrow tape or decorate only the bottom of the vase. In the latter case, use a plastic bag to keep the top of the vessel clean.
Please pay Special attention to choose from color range. It must be in harmony with the overall tone of the room, complement it, and not contradict it. Use pastel colors, gold, silver shades. Black and white colors are always relevant.

Another original painting technique glass vase. It will allow you to create a real exclusive. To complete it you will need:
- Acetone;
- Cotton buds;
- Cotton pads;
- Contour paints;
- Toothpick or synthetic brush.

Spray the vase with alcohol to completely remove particles of grease and dirt. Wait for it to dry completely. If you do not yet have experience with this technique, it is better to print out a sketch on which you will apply the dots. Masters also recommend pre-practicing on a piece of paper. This way you will learn to place points of the same density and size.
After all the preparations and training are completed, you can begin to create. Once finished, leave the vase to dry. If you want the design to be better “sealed”, put it in the oven. The instructions on the paint used will tell you what temperature and baking time to use.

Even a child can handle this technique. All you need to complete the work is to choose the desired paint tone that matches the style of the birthday boy’s room. Then use spray paint to carefully and evenly spread the new color over the glass surface.

Don't want to mess around with paint? Decorate the vase in a different way. Tie it with a beautiful wide bow or lace and tie it beautiful knot. Such decoration can be quickly replaced, which will give the vase a new look each time.

Naturalness is always in fashion. Therefore, modern designers prefer to use for interior decoration natural ingredients. The birthday boy will definitely love a vase decorated with twigs, tree cuts or leaves. A vase that combines selected eco-friendly “details” with beautiful lace or beads.

To create such a gift with your own hands, you will need the following materials:
- Alcohol or acetone;
- Contour paints;
- Brush with natural bristles;
- Cotton pads;
- Cotton buds;
- A sketch of the selected design.
When buying paints, pay attention to important point: They should bake well.

Let's get to work.
- We degrease the glass surface with acetone or alcohol and wait until it is completely dry;
- Carefully and very carefully fix the design inside the vase;
- Using a thin brush, outline the contours of the design;
- Leave the vase for 2 hours until the paints dry completely;
- Carefully fill the space of the outlined contours with paint;
- Place the vase in the oven for 30 minutes, setting the temperature to 150 degrees.
A beautiful vase for the birthday boy with a stained glass pattern is ready.

Original panel: patterns of threads and nails
A creative painting is a great handmade gift for dad on his birthday. Such a thing would also be interesting for younger birthday people. To make it, you do not need to use your artistic abilities: this picture is created without paints.
The choice of design depends on the preferences of the birthday person. You can “knock out” a heart, a house, cacti, a car, and even cats in love.

Let's take a closer look at how to make a heart-shaped panel. You will need:
- Wood base;
- Nails;
- Threads of the desired color;
- Hammer;
- Paper with the selected design.

Let's get to work.
- Place the selected design on a wooden board;
- We mark its outline with nails, which are nailed at a distance of 2 cm from each other;
- Remove the paper;
- Attach the end of the thread to any nail;
- In a free order, we “pass” the threads from one nail to another until the entire space is covered with them;
- Carefully secure the remaining thread to a nearby nail.
Such a painting is an exclusive thing that will become a bright “spot” in a room of any style.

Beautiful bracelet
All women love jewelry. Therefore, when preparing for your sister or friend’s special day, pay attention to the bracelets. They are easy to make with your own hands, giving a lot of positive emotions on your birthday.
You will need:
- Blank bracelet (fine decoration without decoration);
- Beads;
- Super glue;
- Threads that match the color of the beads.

Let's get to work.
Using superglue, attach the beads to the bracelet frame. Then we carefully wrap all the beads one by one with threads in several layers. The remaining tip is carefully secured with glue.
Please the birthday girl with 3-4 bracelets, which need to be made from different beads.

The onset of spring for women is a serious reason to start preparing for beach season. And if this time coincides with your birthday, then you can safely start making a bag for the beach. You can make such a gift with your own hands for your daughter, friend, mother.

To make a beach bitch you will need:
- Ready-made plain cotton bag;
- Acrylic paints;
- Iron;
- A stencil with the desired inscription or design.
If you want to make a completely exclusive gift with your own hands, sew the bag yourself. It's simple, just use any ready-made pattern. Printing can also be done in 2 ways:
- A stencil on which paints are applied (the imprint on the bag is left with an iron);
- Make a drawing directly on the bag (this option is only suitable for those who know how to draw well).

Travel themed decor
If you have to attend the birthday party of an avid traveler, prepare an appropriate gift for him. Surely, the birthday boy has plans to visit another country. Delight him with a creative gift that will encourage him to quickly make his dream come true.
Let's list a few ways to please a birthday boy who loves to travel.
Tourist art gallery
You will need:
- Photo frame;
- Photos of the most beautiful cities of the countries that the birthday boy wants to visit;
- White cardboard, suitable for the format of the frames;
- Glue.

Carefully attach the photo to the cardboard using glue. Frame it. You can print the name of the city and attach it to the picture.
You can combine all the “unknowns” for the country’s birthday boy into one picture. For this you will need a geographical map. The “places” you need are cut out of it. It's better to do it in the form of hearts. Then they are glued onto white cardboard in random order and placed in a beautiful frame.

Do-it-yourself volumetric letters from a card
Another way to encourage the birthday boy to travel far and decorate his room is to write an inscription of the country where he wants to visit using three-dimensional letters.
For this you will need cardboard or wood. If you make the necessary ones yourself volumetric figures If that doesn't work, you can buy them to order. All that remains is to cut the geographical map into the necessary parts and paste over the letters.

What will help you quickly achieve your dreams? A decent amount of money. So that the birthday boy can collect it faster, give him an unusual piggy bank.
To make a piggy bank with your own hands, you will need:
- A little time;
- Beautiful glass jar with lid;
- A small souvenir is a symbol of a country.
All that remains is to securely attach the souvenir to the lid with glue and put the “starting capital” into the piggy bank. This will complete the creation of the gift and you can safely give it as a birthday present.

Very romantic gifts that can be given not only for a birthday, but also for any women's holiday. And they are very easy to make.
You will need:
- Glass glasses;
- Thin tape;
- Medium width tape;
- Spray can of paint.

- Cover the glass with tape in any order;
- You can use geometric figures, vertical or horizontal stripes;
- Cover the “free” areas with spray paint;
- Wait for it to dry completely;
- Place a candle in a homemade candle holder.
A creative and cute gift is ready!

Cool DIY rug
Handmade gifts will delight birthday people at any age. But older women especially like them. Therefore, if your grandmother is planning a significant event, use our recommendations for making a wicker rug.
You will need the following materials:
- Dense rubberized fabric, which will become the basis of the future rug;
- Scraps of bright colored material from which the rug will be woven;
- Black threads;
- Scissors;
- Adhesive tape;
- Glue used for fabric;
- Spray that protects against moisture and water (you can use shoe spray).

Let's get started:
- Cut a rug of the desired size from the base;
- Cut pieces of multi-colored fabric into strips;
- Make sure that their length exceeds the length of the base by 8-10 cm;
- Make braids from the cut fabric;
- In each braid, secure the ends with adhesive tape;
- Glue the finished “braids” to the rubber base;
- Sew the edge of the rug with black thread (be careful to catch each braid);
- Remove the unnecessary adhesive tape and carefully trim the fringe.
The last stage of making the rug is treating it with a water-repellent spray.

Convenient case for storing headphones
This useful thing The stronger sex will like it and will be an excellent birthday gift. With the help of such cases, headphones, flash drives, cables and players will always be neatly rolled up.

Source materials for creating a case with your own hands:
- Natural or artificial leather – 20 cm;
- Scissors;
- Buttons;
- Pencil.
Instructions:


We get an unusual, functional case for storing headphones, which can appeal not only to boys, but also to girls.

A cup you can write on with chalk
An original gift that everyone will love. To make it you will need:
- Porcelain cup;
- Masking tape;
- Paint used for ceramics and porcelain;
- Paint brush with soft bristles.

Let's get to work.
- Rinse and dry the cup thoroughly.
- If you want only part of it to be “artistic”, cover with tape what does not need to be painted.
- Using a brush, carefully apply paint around the perimeter of the future masterpiece.
- If you used tape, remove it immediately after painting, without waiting for the paint to dry completely.
- After a day (this is how long it takes for the paint to dry completely), place the cup in the oven for 30-40 minutes. Then turn off the stove, but remove the product when the oven has completely cooled down.

Homemade gifts are always original. They require a lot of time, effort and energy to create. But as a result, you will give a real exclusive, which will stand out among other surprises for its unusualness.
2018-05-03 pvipadmin 
Increasingly, people prefer to give handmade items. When deciding what gift to make with your own hands, you should take into account the preferences of the person to whom it will be addressed and the theme of the holiday. So, you can prepare symbolic souvenirs for colleagues or friends: these are postcards, sweets or themed refrigerator magnets. As a gift for a birthday, wedding, February 23, March 8, birth of a child or New Year For family and close friends, you should choose more significant ones.
A handmade postcard will be an original addition to the gift. It can also be the main one, for example, to congratulate colleagues at work or numerous acquaintances.
Making a postcard is a fascinating process, because in it you can show all your personality. creative potential, and the variety of techniques and materials allows you to make a variety of things.
Before starting work, you should decide on the theme of the holiday, choose an idea and select materials. Everything you need can be found at a craft store.
For example, to congratulate everyone on Valentine's Day, you can make such a card.

To make it you will need:
- blank postcard with an envelope made of thick white cardboard;
- sheets of scrap paper of various colors;
- figured hole punch;
- scissors;
- white thread;
- glue;
- needle.

Using a hole punch, punch out the required amount, based on the fact that you will need two hearts of each color.

If you don't have a hole punch, then prepare a heart template and cut it out using it.
Place the prepared elements in two pieces of the same color on front side cards, secure with glue. This must be done so that they remain in place during the sewing process.

Using a machine, sew with white thread in the middle, without going beyond the borders of the hearts. Then make a few backstitches.

You can sew hearts on your hands. In this case, try to do this as carefully as possible so that the stitch “step” is the same.
Use scissors to trim off excess threads.
Bend the sewn hearts along the line.

The card is ready, you can write a few congratulatory lines and put it in an envelope.
Chocolate card
A chocolate box is a handmade card that has a place where you can put a chocolate bar or another souvenir, such as money. You can give it as a gift for any occasion.
In order to make a New Year's chocolate maker with your own hands you will need:
- kraft cardboard 30*30;
- PVA glue;
- scrap paper;
- decorative elements;
- pencil;
- scissors;
- ruler;
- hole puncher;
- ribbon.
The size of the chocolate bowl directly depends on the size of the chocolate bar. Having measured it, you can start working.
Draw the dimensions of the future postcard on cardboard. In our case: height – 21 cm, width – 10 cm+10 cm, gluing area – 1.5 cm (see photo 2). Cut out the workpiece, run a runner along the fold lines, and bend it carefully.

Glue the resulting card together and try placing chocolate there. It should fit freely inside.


Now you can start decorating. To do this, use 2 scraps of paper, flowers, a chipboard and a die cut. In this process, you can show your creativity and use any decorative elements.

Edible gifts
This category of products will appeal to any person, because they are not only tasty, but also originally designed. You can choose any sweets: chocolate bars, chocolate bars, sweets, cookies, dragees or handmade sweets.
Suitable for packaging sweets carton boxes, glass jars, wicker baskets, wooden boxes, tin boxes or other suitable containers. Their shape, size and color may vary.

Box of sweets
Making such a gift with your own hands is very simple. All you need is the original box and sweets. Choose any filling for the box.
Assembly will not take much time: the sweets need to be beautifully folded into a box, which can be decorated if desired. To do this, tie it with a ribbon or leave a small wish on the lid of the box.

Delicious gift for men
You can prepare such an original gift for men on February 23 and on their birthday. The composition should be chosen based on the preferences of the person for whom it is intended. So, for filling you can choose: alcoholic or carbonated drinks, coffee, tea, chocolates, meat products, vegetables and other edible products.

Also include useful things in the gift: diaries, pens or items of clothing.
To design such a souvenir you will need:
- wooden box;
- edible filling;
- cigarette paper;
- filler.
For the latter, you can choose sisal fiber or tissue paper.
Decoration won’t take much time: line the bottom of the box with filler and carefully arrange the food items.
Features of filling and decorating a gift can be found in this video:
Men's bouquet
DIY gift for a man. How to make a bouquet for the stronger half of humanity
Sweet box with flowers
An edible gift can be complicated by slightly changing its composition. For your mother, sister or friend on March 8 or for your birthday, make a box with fresh flowers and sweets. Instead of the latter, you can put a bottle of wine, macaroon cookies or a can of coffee.
To make a box you will need:
- cardboard box (size depends on the components of the composition);
- flowers - 2 small branches;
- floral sponge (oasis);
- sweets;
- tissue paper matching the color of the composition;
- cellophane or mica sheet;
- wire cutters;
- stationery knife;
- container with water.

If you have a small box, then it is better to use flowers with small buds, for example, spray chrysanthemums or roses, gypsophila or alstroemeria. For a large or medium-sized box, any will do. You can buy them and a sponge at a flower shop.
Before starting work, the floral sponge must be cut to the desired size and placed in a container with water for one hour so that it is completely saturated. Fulfilling this condition will allow the flowers to delight you with their fresh appearance for a long time.
If the height of the oasis coincides with the dimensions of the box, cut off 3-4 cm from the top with a knife, this is necessary for a harmonious appearance, and so that you can close the box.
First prepare the flower area. Attach cellophane or mica to the box to select the size of the required piece. The cut must exceed the dimensions of the sponge.
Place a sponge and wrap with tape. Mica protruding beyond the edges must be cut off. The oasis should be open at the top in order to insert flowers.
Now you can start assembling the composition. Using scissors, cut the flowers from the branch; determine the length of the stem based on the height of the box. Insert them into the sponge in any order.


DIY gift
Box with fresh flowers and sweets. How to make a gift with your own hands.
Bouquet of sweets
A sweet gift can also be given in the form of a bouquet. You can give it to your family or work colleague. You will like it for its appearance and will be a delicious addition to tea drinking. The undoubted advantage of such compositions is that they do not require additional care. And after all the candies are taken out, you can leave the bouquet as an interior decoration.

All necessary materials can be found in craft stores.
To work you will need:
- corrugated paper - 2 rolls of 2 different colors;
- candies;
- basket;
- wooden skewers - packaging;
- scissors;
- a thread;
- glue gun;
- glue sticks;
- green tape;
- organza – cut 70*70 cm;
- sisal fiber;
- stationery knife;
- decor;
- floral sponge or oasis.
Let's get started:
When choosing sweets, pay attention to their shape. It is better to choose a round shape; they will be convenient to work with and can be easily removed from ready-made flowers. Choose the quantity based on the size of the basket.
Having resolved all organizational issues, you can start working.
First, let's prepare the material for the buds. Cut the paper into strips about 5-6 cm long and then cut into rectangles. There should be about 6 pieces in one strip.
Cut rectangles of the same dimensions from green paper. Only the sepals need to be cut out from them (see photo 6). Use a skewer to slightly curl the ends. This will make the bud more life-like.
Then, round off the edges of each rectangle intended for flowers. Stretch the resulting blanks from the center. Before inserting the candy, tuck one “tail” so that it is not visible from the bud.
This action will not affect your ability to safely remove the candy from the flower.
Place the prepared candy in paper and twist it so that it is not visible, and the shape becomes similar to a real rosebud. Now use a thread to tie at the bottom to secure the candy.
In further work you will need a glue gun. It operates on mains power, so perform all steps carefully to avoid burns.
Let's continue to create
Let's start assembling the flower. Wrap the “sepal” around the bud and secure with thread. Using a glue gun, glue the skewer to the base of the bud, and before doing this, trim off the excess paper. Cover the joint and the skewer with tape.
The peculiarity of tape is that by slightly stretching it, it becomes flexible and can be used to give a neat look. In order to tear off a piece of tape, it is not necessary to use scissors; it is enough to sharply stretch it.
Do this with all the colors. And for now they can be postponed.

Cut the organza into squares measuring 5*5 cm. Roll it up, glue it to a skewer, and wrap it with tape (see photos 13,14,15). Using organza, you can close the spaces between flowers so that the bouquet does not look “empty”.
Let's start assembling the composition.
From a sponge you need to cut out the base of the bouquet, matching the size of the basket. Place sisal on top.
Carefully insert the finished flowers and skewers with organza into the sponge. Adjust the height of the skewer based on its location, shorten it if necessary with wire cutters. Try to place everything very tightly.

Collect a basket of “flowers”
The finished work can be decorated with pearls and other decorative elements, for example: artificial greenery, ribbons or rhinestones.
Corrugated paper is a unique material. You can make completely different compositions from it. Show your imagination and you will get a unique and delicious handmade gift.
Interior gifts
Handicrafts can be not only tasty, but also healthy. If you have been invited to visit or to a housewarming party, then you should make a small souvenir for the interior of your home with your own hands.
Topiary
This gift will be an interesting addition to the interior of any room. Its main feature is that it does not require additional care, which means it will be able to please the inhabitants of the house for many years.
Topiary- This decorative decoration tree view. The top may have different shapes, for example round or heart-shaped. And the following can be used as decoration: coffee beans, sisal fiber, fabric or natural materials.
To make topiary from artificial flowers and sisal you will need:
- blank in the form of a ball;
- sisal in a bundle;
- snag;
- artificial flowers and leaves;
- ceramic pot;
- gypsum;
- white thread;
- glue sticks;
- glue gun;
- decorative elements.
The process of creating topiary
In order for the topiary to turn out harmonious, you should first check the consistency of the pot and the workpiece. They should be almost identical in diameter and size.
If you have a workpiece, then you do not need to carry out any additional actions with it. If you don’t have one, you can make a ball out of paper. To do this, crumple up several sheets and shape them into a ball. Do this with all the sheets, increasing the volume. When the form is ready, wrap it with thread, pressing the protrusions of the paper, this will help you get an almost even ball.
It is better to use white sheets and white thread, so you will no longer need to do anything with it. If newspaper was used, you will have to additionally cover the ball with corrugated paper.
To make sisal balls, you need to pinch off a small piece from the bunch. Use your hands to roll it into a ball shape. They should turn out quite dense, if you succeed, take a little more sisal and continue rolling. As a result, you should get dense balls with a diameter of about 3-4 cm.

We continue to work
You can start decorating the workpiece. Use glue to attach the sisal balls and flowers. Glue leaves and decorative elements between them. All spaces should be filled, so the topiary will look more harmonious. Leave a small empty space at the bottom, where the snag will be attached.

When you finish decorating the workpiece, you can begin to secure the driftwood. To do this, make a small hole with scissors, pour glue and insert a piece of wood. Hold your hand strictly perpendicular to the workpiece until the glue hardens.
In order for the topiary to be stable, it must be placed in a bucket of plaster.

Gypsum can be immediately poured into the pot, filled with warm water and stirred. As it begins to harden, place a driftwood with flowers. Hold it vertically until the plaster hardens completely.
If you stain a piece of driftwood, the plaster can be easily cleaned off by hand or with a knife.
Decorate the top of the pot with sisal and flowers so that the hardened plaster is not visible.

Painting in string art style
This work will truly surprise you. Her appearance is completely unusual and colorful. And working on it will be interesting and exciting.
You can choose absolutely any image in the painting: it can be an inscription or a symbol.
To work you will need:
- a small sheet of plywood;
- 2 packs of small rounded nails;
- hammer;
- template paper;
- floss threads;
- scotch.
First you need to prepare a template. It can be found on the Internet or made in one of the photo processing programs. Print and cut out.
Before work, the plywood can be painted in a neutral beige shade or a decorative panel can be used instead.
Attach the workpiece to the plywood and secure it with tape so that it does not move. Now let's start hammering nails. For convenience, it is recommended to place something under the plywood so that the nail does not pierce the place where you will be doing this.

Nails should be driven along the contour of the letters and try to keep the distance between them the same. The optimal step is 1 – 1.5 cm. You need to punch along the entire contour of the word.
When you are finished hammering the nails, the template can be removed. Now everything is ready for registration.

Use a thread to connect the nails that are located side by side in a chaotic order, starting with the first letter. And do this until the end. Tie the end of the thread around the nail and carefully cut off the tail.


If handicrafts are not your thing
Handmade card? Florarium or bouquet of sweets? If handmade gifts are not your thing, then this is what you need! Just a few clarifications about the recipient of the gift and the guys from Ukhtybox will put together the perfect gift for you. Surprise the birthday boy with your creativity!

DIY florarium
Lovers of fresh flowers will love this gift. It differs from simple potted ones in appearance.
Florarium is a small glass aquarium in which plants are grown. Due to its original appearance, it will become a real living decoration of the room.
For a florarium, it is better to use small and unpretentious plants: cacti or succulents.
To make it you will need:
- small round aquarium;
- live plants;
- priming;
- drainage - expanded clay;
- live moss;
- pebbles;
- decorative elements;
- fertilizer;
- plastic spoon;
- watering can with water.
Work process
To avoid getting your hands dirty, wear rubber gloves.
Wash and dry the aquarium.
Fill the bottom with drainage and add a few spoons of fertilizer. Then add soil.
Now you can start planting the plants. First, remove them from their pots and shake out the roots. Carefully plant them in the ground one at a time, helping with your hands and a spoon. Because space is limited, be careful not to damage the plants.

When you finish planting, cover with moss and water, and decorate with pebbles.
If the walls get dirty, wipe them with a damp cloth.
All additional information can be obtained from this video:
DIY florarium
How to make a florarium at home. Detailed instructions.
Volumetric letters
Such a handmade gift can be made in the form of a word or one letter, for example, the first letter of a first or last name. Volumetric letters will become bright decoration room and will remind you of your attention. They can be made from artificial flowers, paper, fabric or natural materials.
Proposed option three-dimensional letters can be prepared for Mother's Day or her birthday.

To make it you will need:
- artificial flowers;
- cardboard for letters;
- floral sponge;
- glue gun;
- glue sticks;
- a simple pencil;
- ruler;
- stationery knife.
In order for this gift to become a harmonious decoration at home, you should choose the optimal size and suitable color scheme letters
The frame of the letters will consist of glued pieces of cardboard. They must first be drawn and cut out. Use a glue gun to connect them.
Using a knife, cut the sponge into suitable pieces and insert into the recesses of the letters. It’s better to do this in small pieces, so it will take up all the space.

Once the letters are ready to be filled in, you can begin working with the colors. They should first be cut from the stems. Now you can insert them in a chaotic order, filling the entire space.

They can be attached to the wall using double-sided tape.
Accordion album
For photography lovers, you can make an original accordion photo album. In order to make it you will need
- wooden box;
- dark thick paper;
- satin ribbon;
- glue;
- photos.

First, decide on the number of photographs; the number of folds, and therefore the paper, will depend on this.
First you need to cut the paper correctly. To do this, measure the width of the photo and add 1 cm to obtain the required width of the paper.
Now measure the height and also add 1 cm.
Transfer the resulting dimensions onto paper. Now cut lengthwise according to the resulting size.
You need to make several such strips and glue them together.
Draw a line according to the height of the photo. Photos will be located here, such places need to be taken in accordance with the number of photos.

Now use a running wheel to follow the lines to form an accordion. Glue the photos, glue a small ribbon under the first photo, you can use it to pull out the entire accordion.

Attach a loop
We are in social networks:
Original do-it-yourself gifts
IN Lately Many people wonder: what to give to the person who has everything? Today, gifts that have practical value are increasingly valued, because they will remind of the giver for a long time. In this section of our website you will find interesting master classes creative gifts. Try to surprise your loved ones and give a gift made with your own hands.
Don't know how to make cards or are not yet familiar with the scrapbooking technique? Have you seen a topiary made from coffee beans from your friends, but don’t know how to make it? Read articles with photo descriptions and discover new handicraft techniques. We have collected manufacturing ideas for you useful gifts, as well as many crafts that not only adults, but also children can do.
The holiday is always associated with fun, feeling happy life. However, if you don’t know what gift to choose or how to present it correctly, our articles are for you. There is no doubt that giving gifts is much more pleasant than receiving them. However, the difficult task is to choose an original item from a variety of possible products. The most important thing is that the person likes the gift and that it is beneficial.
What's the best gift to give?
Certificates for purchases in stores. Everything is very simple here. For example, you can go to a store or fitness club to buy a subscription or a certificate for a certain amount. The person you give such a gift to will be happy. In addition, he himself will buy whatever he wants for the amount of the certificate.
In the end, you can directly ask a loved one what he wants to receive. Of course, for the sake of decency, everyone will evade the answer, but only at first. Then a subtle hint will come. The most important thing is to understand the hint and buy the right thing.
To make the gift truly useful, you can give a souvenir made by yourself. For example, if a man has golden hands, then find an engraved hammer, and for a woman you can buy some kind of trinket for the kitchen. Car enthusiasts will accept key fobs, pens in original packaging. Such gifts always lift the spirits and people like them.
The eternal gift is a book. But it should be given only when you know that the person is reading. If not, then decorate the book box and surprise a loved one or friend with an unusual souvenir.
In some cases, you can afford useless gifts. For example, these could be T-shirts with photographs, CDs with common songs, congratulations, and so on. You need to take care of such gifts in advance. Only Original gifts can be remembered for a lifetime.