Is it possible to paint nails with acrylic paints? How to choose and use acrylic nail paints? What is better to choose
Beauty requires not sacrifice, but help. Take, for example, fragile and brittle nails - they turn into strong and stable ones in a session of extensions. A beautiful nails They make gels and paints - for example, acrylic, which we will discuss in detail below.
Acrylic paint in nail art: from canvas to nails
As a child, to be a super girl, it was enough to put on a bow. Adult woman should be beautiful, as they say, to the tips of the nails. As for the “tips,” the attitude towards their beauty has changed radically recently.
An ordinary manicure is already considered boring, preferring more expressive methods of decoration - painting, rhinestones and more.
Huge laboratories are working to create materials to realize women's innermost fantasies. And in light of this, the growing popularity of “dense” acrylic paints seems surprising.
Acrylic paint is at least fifty years old. It was invented in the 50s for painting, but only today the material has become in demand in wide circles. The nail industry did not stand aside either, adapting the product to personal needs. And she did the right thing - acrylic paint is wonderful for everyone.
It is distinguished by high covering power, plasticity, brightness - like gel paint, only it dries without a lamp and quickly. It doesn’t smell, it’s not toxic, it’s environmentally friendly – you can paint your nails, even your children’s room. It is cheap, consumed slowly, stored for a long time - a very practical product.
All blots in the process of work can be immediately washed with ZhDSL, and wet acrylic nail designs Easily washed off with water - ideal material for beginners. The rest is a matter of technique.
How to Use Acrylic Nail Paints: A Dive into the Technique
Similar to painting, painting with acrylics will require a canvas and tools. The canvas in our case will be the gel polish coating, and we’ll talk about the tools in more detail.  Inventory
Acrylic paint dries fantastically quickly, so we prepare the equipment before starting work.
You will need:
- palette - special or any piece of plastic;
- a jar of water - for wetting and rinsing brushes;
- lint-free cloth - to remove excess moisture from brushes;
- brushes – elastic nylon or kolinsky from 00 to 2 and/or flat;
- actually, acrylic paints and gel polishes (base, color and finish).
As for acrylic paints, it is enough to have six basic colors - black, white, red, blue, yellow and green. All other 2000 shades can be obtained by mixing.
Technique
We prepare the nail plate according to the standard protocol - from removing the cuticle to applying the base to a grease-free surface and drying it in a lamp.
We paint the nails in one or two layers of colored gel polish, polymerizing each one.
Please note - we remove the sticky layer and buff it a little to get a matte “canvas” texture.
“Sawdust” is removed by wiping with liquid to remove stickiness. While we wait for the nails to dry, we prepare the palette - squeeze out the necessary paints, and screw the tubes tightly.
Let's start drawing.
- We wet the brush in water, wring it out on a lint-free cloth, dip it into the paint and begin to create, adjusting the saturation and density of the color with water.
- We remember that an unsuccessful drawing can be washed off before drying, and after drying, the HDSL can be removed. That is, adjustments can be made at any stage of the design, correcting errors cotton swab. Do not forget to keep the brush moist throughout the entire period of design work, so that dried acrylic does not damage the tool.
- After the paint has completely dried, cover the drawing with topcoat, sealing the ends well. If you cover wet paint with topcoat, there is a high probability of peeling. The brush lies in water while drying the top in the lamp, and then be sure to wash it and carefully wipe it dry.
Beautiful nails: design with acrylic paints on gel polish
We approach the question of what to draw without limiting ourselves in anything. By changing the intensity of the paint, you can paint anything - from rectilinear geometry to watercolor blur. See examples of work and acrylic designs on nails step by step in our photo gallery.
Simple designs with acrylic paints on nails- these are, of course, flowers. A dot in the middle and petals in a circle - that’s a flower. Vegetation of the “pro” level – Chinese painting, Zhostovo, Gzhel, naturalistics. You can train your hand on tips, training cards or cardboard.
In addition to flora, do not forget about fauna. Animal color and animal print are stubbornly in trend. Zebra, tiger, python or ladybug - choose according to temperament.
Nails can be made “cultural” by depicting ornaments, traditional patterns, national motifs and drawings in the style of cave paintings on them. Here are still lifes, landscapes, portraits.
Pay attention to abstraction and geometry. The design does not require artistic skills, is in demand, fashionable and goes with everything - both with club dresses and office trousers. Well, in general, you can paint anything on your nails if your hands grow from the right place and the paints are good.
Good paints: review of sets with acrylic paints
All acrylic paints differ from each other, essentially, only in consistency. That is, you can paint on your nails with Gamma acrylic paints purchased at a stationery store.
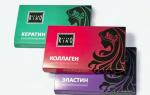
But it is believed that paints for nail art have the correct thickness, high pigmentation and, most importantly, do not contain fat. We will discuss them using the example of four sets for nail design, each of which consists of 12 tubes of 12 ml of acrylic paint.
- RuNail, Set of acrylic paints “Meskalito”
Classic professional set for nail design with gold and silver paint. The paints are quick-drying, well pigmented, optimally thick, in natural shades.
Apply without lumps, do not flow or roll down. All paints can be bought individually, which is very convenient when, for example, you have run out of black and don’t want to take risks by mixing brands.
A caveat: the tubes are made of metal, which means they can break.
Approximate cost 530 rub.
- TNL, Set of acrylic paints
The South Korean brand, whose gel polishes are often compared to American shellacs, has again pleased us by releasing a wonderful set for painting with acrylics. All paints have a deep, rich color. Among the exclusive shades, it is worth highlighting carrot and turquoise.
A number of popular paints - black, white, silver and gold - can be purchased separately. Mixes well with water and with each other. They are easy to use when painting and, as is common among “decent” acrylic paints, they dry quickly.
Approximate cost 595 rub.
- IRISK, Set of acrylic paints “Acrilic Nail Art Paint"
The Russian company IRISK has several sets with acrylic paints in its assortment. In addition to the basic “Acrilic Nail Art Paint”, it is worth noting an elegant box with acrylic paints for 3D effects and Chinese painting with tubes of increased capacity (20 ml).
As for Acrilic Nail Art, the paints are of moderate thickness, well pigmented, expressive. Despite the Chinese production, the quality is stable. Quantities can be upgraded - base colors are sold separately.
Approximate cost 560 rub.
- OUMAXI, Set of acrylic paints
Acrylic paints OUMAXI - China, which is unstable in quality. Density, washability, drying and even the color of the paints in the set are not constant values. If unpredictability doesn't scare you, take it.
There is a high probability that you will find a magnificent lavender shade in the set and the rest will delight you - consistently bright and saturated. If it’s blue, it’s deep; if it’s orange, it’s juicy carrots.
Suitable for training and Have a good mood. You can buy it at a joint venture 2-3 times cheaper.
Approximate cost 540 rubles.
And get inspiration from galleries, museums and exhibitions, memorizing plots, manners and details. And then any paint will be applied thoughtfully, and the drawing will have meaning.
A girl's hands should always be well-groomed and beautiful; this characteristic always demonstrates a woman's neatness and desire to take care of herself. An important detail is the nails; a manicure can be either almost invisible, natural, or a real work of art with amazing paintings. Manufacturers offer a lot of materials for creating unique nail designs: glitter, rhinestones, various paints, powders, stamps, etc. A product such as gel paint has gained enormous popularity; it has become simply indispensable in the work of many craftsmen. What is it and what are the advantages of such a product? Let’s try to figure it out.
Gel paint - what is it and what is it for?
Everyone knows that artificial nails are created using a special material - gel, which polymerizes (hardens) in an ultraviolet lamp. This composition is available in different variations; there are both transparent and colored items. Based on this, many are perplexed - why do we need gel paints? The first and most significant difference from gel paint is its purpose. The first product is intended for modeling the nail plate, the second is exclusively for design. This kind of paint can be used both on artificial turf and on a natural plate, and it is thanks to it that it is possible to create clear and richly colored designs.

In terms of its composition, the product is closest to a gel, only it has a denser consistency and a very rich, dense color. The product is available in small jars or tubes. To fix it, you also need to use a lamp.
Benefits of gel paints for nail design
The popularity of gel paints in the field of nail design is very simple to explain - they have many advantages compared to other available compositions for painting. The following positions are especially worth noting:

- despite the fact that some manufacturers produce a rather limited palette of colors, there is always the opportunity to mix them, creating the desired shades;
- when applying a multi-color pattern, no bumps are created, the overall picture looks uniform;
- the paint does not dry in the air, which means that before placing it in the lamp you can safely draw details and adjust the design;
- The consistency of the gel paint is designed in such a way that the design does not spread and is easy to apply. Also, when drying in a lamp, the contours do not deform and the composition does not bubble;
- One of the most important advantages is color saturation. Unlike other design products, just one coat is enough to create rich and even color. This characteristic adds not only convenience, but also efficiency;
- when applied to natural nail no heavy filing required.
Which gel paint is best for manicure: review of brands
It is best to choose a gel paint for a job experimentally, because for some one option may be ideal, but for others it may not be suitable at all. Based on descriptions and reviews of other masters, you can determine a circle of favorites, among which you can look for your ideal.
Emi (Emi)
 The paints are available in branded 5 ml tubes. The product has proven itself to be of high quality, as it provides good, dense color coverage and does not provoke allergic reactions. The products are manufactured in Germany; the line includes a large number of colors in a warm and cold palette. Sold both individually and in ready-made sets. The manufacturer’s great pride is the paint for creating a mirror-like silver or gold coating. The compositions have all the typical characteristics of gel paints - they do not spread, cover tightly with color and quickly polymerize in a lamp.
Kodi Professional (Kodi)
 ABOUT trademark Every manicurist knows Kodi Professional - products under this name are widely known as specialized, professional and very high quality. Gel paints are available in small black jars with a screw cap (4 ml). The product is based on the company's modeling gel; its consistency does not allow it to spread and makes it possible to draw the finest lines. The paint does not leave a sticky layer after polymerization. You can create both flat drawings and work with three-dimensional designs and casting.
RuNail (Runail)
 The release form is round jars with screw caps, the volume for this category of products is quite large - 7.5 ml. The composition is easy to apply, gives a dense color coating without glitter or pearlescent. There is no unpleasant odor, which makes working with paint comfortable and enjoyable. The product is intended for artistic painting, creating flat design and French. On this moment The proposed palette includes 15 noble shades, which can be safely mixed if necessary. Another plus is the affordable price for high quality.
Miranda (Miranda) for painting and casting on nails
 Gel paint is available in jars with a screw cap, volume 8 ml, reasonable price. The product is packaged hermetically, nothing leaks or overflows during transportation. It is immediately worth noting the saturation, even if we are talking about delicate shades. The manufacturer offers a wide selection of colors, both pure and with glitter and shimmer. The consistency is standard, dense, but easily applied to the brush in the required amount. It polymerizes quickly in the lamp and gives a rich coating. The consumption is very economical.
CANNI (Canny)
 The manufacturer offers you to choose paint from a very large palette of shades, which are maximally matched to modern fashion trends. The product formula is safe, does not contain aggressive components and does not provoke allergies. The paint doesn't have unpleasant odor, it’s a pleasure to work with, and due to its dense texture it’s also very comfortable. The volume of one jar is 5 ml. The colors, like other products in this line, are rich, and drawing fine lines is very easy. The product has all the necessary quality certificates, including international ones.
How to apply gel paint
The contour of the gel paint application depends entirely on the desired design - it can be individual lines or dense coloring in the area of the free edge of the nail. The process of applying the composition itself is quite easy:
- The desired pattern is applied to a previously prepared surface using a brush. Its contours can be easily corrected with an orange stick or another clean brush - if the drawing has not yet been subjected to UV exposure, then it can easily be adjusted;
- after the layer of gel paint is polymerized in a lamp for about 1-2 minutes (the exact time is indicated by the manufacturer on the packaging);
- Depending on the type of product, it may be necessary to remove the sticky layer.
To create a harmonious picture during application, you can add sparkles, rhinestones and other design elements. This technique gives a good effect - foil is applied to the dried paint and sharply torn off, leaving behind an uneven shiny coating. This helps create a bright and effective design, especially if contrasting colors are used.
Video: how to paint with gel paint on nails
Beautiful intricate patterns on nails are accessible to everyone. All you need to master the technique is the right brush, which will be convenient to work with, and high-quality gel paint. You can find technology and examples of work in this video.
Photos of designs on nails with gel paints
Examples of the work of other masters are an inexhaustible source of inspiration. You can either try to completely reproduce the chosen design, or create something of your own “based on it”. The main thing is not to be afraid to experiment and constantly train, and the photo gallery of examples will help with this.


The last year has delighted fashionistas a huge amount interesting trends and styles in all areas of fashion and beauty, and innovations have not bypassed the sphere of nail design. More and more often on the pages of fashion magazines one could see a matte finish on the nails of models - it is stylish, modern and beautiful. But it didn’t stop there; nails with a velvet texture subsequently gained enormous popularity - they are not only visually different from standard varnish, but also unique in their texture. Let's find out in what variants such a manicure exists and how to do it at home.
Manicure options with acrylic powder
Acrylic powder is a polymer powder, which is one of the integral components when creating hair extensions. acrylic nails. During this procedure, the powder is mixed with the monomer and quickly hardens, creating a durable coating of a given shape. But this material is also used to create decorative covering– it is thanks to him that it is possible to form a matte surface and intricate velvet patterns.
Knitted sweater with velvet effect
Imitation knitted sweater on nails is one of the most popular trends of this year. This design immediately attracts attention - glossy or matte surface nails are recreated knitted patterns, which, thanks to the powder, look like real ones, they have some fluffiness and velvety, you just want to touch them.
There are a lot of variations of this nail design. The choice begins with a specific pattern for application, color and selection of a harmonious combination of shades. Most often, soft, pastel colors are taken as a basis, and the pattern itself is made in a similar color. This choice is not accidental - it is in light, calm shades that the texture is best seen. However, this does not mean at all that you cannot do it differently, there are no restrictions on the selection of colors and you can combine them very successfully different shades the basis and the drawing itself.
Matte manicure
The glossy surface has been popular for a very long time; everyone liked bright and shiny nails, regardless of age and profession. Today, matte, satin nail art has taken the palm - this is what can be increasingly found on the pages of magazines and on the hands of models on world catwalks.
Undoubtedly, the most popular are natural, nude shades of such coatings - they look gentle, neat and suitable for any occasion. But this is just one of the options matte design. Bright colors, velvety textured coatings, designs with matte patterns, and even successful combinations of lacquer and satin surfaces on one hand are actively used. Acrylic powder is the number one assistant for creating such designs; almost all manicurists use it, as it gives the perfect texture.
Nail art with designs on nails
This design option is more interesting than just a plain matte or glossy finish. Usually, when resorting to creating velvet designs on nails, they play on the difference in effect, that is, they apply a design using acrylic powder onto a standard glossy coating, and even if these two elements match in color, all the details will be clearly visible.
There are several technologies for applying a design with acrylic powder; both the exclusively artistic abilities of a manicurist and special stencils can be used. You can create such beauty on your nails at home, having all the necessary tools and materials.
Gradient manicure
A gradient implies a smooth transition of colors from one to another, and creating this on your nails is not as difficult as it might seem. You will need a base coat (usually a gel or gel polish) and acrylic Powder desired colors. Using a brush, the master applies colors one by one, and if using varnishes with this technique nothing good comes out, then due to the fact that the powder consists of large quantity small particles, it is easily shaded and creates the effect of a smooth “flowing” of one color into another.
Such a manicure will never go unnoticed and admired reviews, and taking into account all possible options color combinations, gradient nail art is simply an inexhaustible source of designs for a variety of occasions.
How to do a manicure using acrylic powder
A manicure with a velvet effect, in fact, is not so complicated if you know all the stages of the procedure for creating it.
Necessary materials
For matte nail art, you first need acrylic powder as the main component to create velvet elements or coating. The color is selected as desired; it is better to choose gel paint as the base on which the particles will be fixed. white or a shade that matches the shade of the powder. You can just use gel, but it is more fluid, which means it will be more difficult to create thin and clear lines.
To create the main color when applying a velvet pattern, use gel polish, applied in several layers to obtain a dense background.
Step by step execution
First of all, the base is created - the nail is covered with the desired color and the required number of layers of gel polish. Then it all depends on what kind of design is being created. To cover the entire nail, the last layer of gel before drying is sprinkled with powder and sent to dry in a lamp, after which the residue is removed with a brush. If it is necessary to create a design, then draw it with a thin brush with gel paint, and also sprinkle the entire top with acrylic powder.
When the excess grains of sand are removed, you can enjoy the wonderful final result - a beautiful velvet manicure.
There can be many options for a spectacular manicure: nail decorations on any background, patterns, photo nail designs, etc. After all, most often they take gel polishes as a basis and improvise with appearance marigold through color combinations, painting. Now it has become much easier to make elegant patterns and drawings, since a product has appeared that resembles acrylic paint in pigmentation, but has the structure of a liquid gel. A new convenient material for manicure design is gel nail paint.
Gel nail paint - what is it?
Already from the name it is clear that the cosmetic product has something in common with nail gels and acrylic paint. Many users of gel paints compare it with the usual colored varnishes, since it does not have such a dense texture and consistency as gel polish. The product takes the following features from gels:
- the coating on the nail plate is uniform and perfectly covers the entire surface of the nail;
- polymerization takes place under LED or UV lamp radiation;
- has amazing durability.
The cosmetic product inherits from ordinary colored varnishes and acrylic paints:
- dense pigmentation;
- extensive color palette;
- light texture, which allows you to carry out any artistic painting, even thin lines, and provide convenient mixing of colors;
- the ability to wipe off the drawing without harming the applied base layer (if there is one).
There is no need to stir the colored gel paint before applying it to the nail, and unlike acrylic paints, the product will not dry out while working. Ideal for detailed painting, where you can take your time with the drawing and devote enough time to the process.
You can use gel paint on natural nail plates, as well as on nails after extensions, any artificial coverings. The consumption of the product is quite economical, since it is usually applied with a thin brush, controlling the amount of paint on it. If you use the product to cover the entire surface of the nail, then the product will not only be used up faster, but you will most likely need to apply a second coat.
Advantages and disadvantages
The clear advantage of this product is its resistance to drying out while work on the nail design is still in full swing. Also, the ease of use is also captivating. And many more “positives”:
- when covering the entire surface of the nail with several layers of gel paint, a minimal layer is formed that does not thicken the nail;
- the ability of the nail to “breathe” under a layer of such coating;
- optimally used for various design techniques: Chinese painting, aquarium design, for a “smile” or “moon” in French and moon manicure, casting technique, etc. Ideal for use in a unique planar design;
- no need to intensively file the nail (remove its shiny layer);
- While the gel paint is drying, you can adjust the design;
- It is possible to mix different colors to obtain a unique shade, just like real artists do.
But besides all the positive qualities of the product, there are also minor disadvantages:
- It will not be possible to remove gel paint with special liquids; you need a mechanical solution to the problem: files, a router;
- It is inconvenient to use on thin nails, since gel paint does not provide them with additional strength.
Once you get the hang of using gel pigment to design your nails, you can create real masterpieces. A inner feeling style will only help to create an organic tandem of gel paint and other auxiliary accessories: foil, mica, rhinestones, stones, etc.
What is the difference between gel paints and gel polishes?
Opinions about what cosmetical tools like the similar gel paint - they are one and the same, they are not true. Although there is a lot in common between them, there is also a colossal difference:
- Structure. Gel polishes are denser and more viscous, which makes them difficult to work with. With gel paints it’s the opposite: they are pliable due to their fluid structure, and their liquid consistency allows them to be used for various decorative purposes;
- Pigment. For getting bright color, varnishes need to be applied a couple of times, and paints only need to be applied in one layer. This is due to the concentration of pigments in both products - there is much more of it in gel paint, even several times higher;
- Persistence. Gel paints are less susceptible to chipping than gel polishes;
- Delete. Gel paints cannot be removed with any solvent, unlike gel polishes.
Although gel-based paints are considered followers of gel polishes, and not a separate species coatings, the difference between them is all there and it is significant.
Kinds
Like gel polishes, paints can have a sticky layer after polymerization. But this doesn't always happen. There are also those that do not require dispersion removal. But these are not all the differences between gel paints. They are also distinguished by the following types of structure:
- dense;
- translucent;
- transparent.
Thick paints completely cover the nail, resulting in a monochrome coating. Translucent, as well as transparent, you can tint the previous layer or create the effect of stained glass, penumbra, gradient, etc.
With a sticky layer
There is no particular difference between the result obtained after using gel paint, which has or does not have a dispersion layer after drying. It's more of a production cost. If you use this product, you will need additional liquid to remove stickiness.
Paints with a dispersion layer allow you to create designs using casting techniques and other effects where “gluing” is necessary, for example.
No sticky layer
For a manicurist, a product without a sticky layer is more convenient to use. Most modern paints have lost the ability to leave stickiness after drying. Practicality is evident: after each drying step under the lamp, you do not need to wipe your nails. Also, products without a sticky layer do not need to be fixed with a top coat if they cover less than half the nail area.
Paints without a sticky layer are optimal for all painting techniques. You can create original options design combining dense texture with transparent or translucent.
How to apply gel paint: step-by-step instructions
Applying a coating such as gel-based paint does not require any special preparation or special tools. If you have experience working with gel polishes, then mastering the technique of applying paints will not be difficult.

For the paint application procedure, you will need some tools that are best prepared in advance:
- a special thin brush (necessary for creating or complex designs). If one is not available, then it can be replaced with a thin artistic brush made of artificial material(nylon, for example);
- a brush of medium thickness (for filling large areas of the nail);
- palette (most affordable option– a piece of foil or dense polyethylene);
- lamp with UV radiation or LED + related tools for manicure, liquid for removing the dispersion layer, etc.
After preparation necessary tools, materials, trimmed or hardware manicure (if the nails are well-groomed, then no manicure is done), you can start covering your nails.
- Treat the nail with a buff, then with a degreaser.
- Apply base (primer).
- Cover the nail plate with one layer of gel polish (you can use clear or colored gel). Dry. If necessary, repeat the procedure (make a second layer).
- Remove stickiness special means(clinser).
- Apply liquid gel paint with a thin brush (the number of colors and shades depends on the design and idea). If you need to get a new shade, you can mix several colors on the palette.
- After completing the drawing, the nail should be dried under a lamp. The polymerization time directly depends on the type of drying lamp and the characteristics of the product. The exact time can be found on the paint bottle.
- If there is any stickiness left, you need to remove it with a cleaner.
- It is better to apply a fixing top coat over the design to extend the durability of the nail design.
If you need to use gel paint not for painting, but for completely coloring your nails, then the coating scheme is as follows:
- Degrease the surface of the nail. You can additionally use a dehydrator.
- Apply the primer by applying it to the nail plate (for high-quality and durable nail paint).
- Using a medium-thick brush, apply an even layer of gel paint. If there are paint leaks onto the skin or far beyond the contour of the nail, correct them with an orange stick.
- Dry for the required amount of time under.
- High-quality products do not require re-application of gel paint, providing an even coating. But if the required quality of the layer is not achieved, then translucent paint of a similar shade is used or the product must be applied again.
- If there is a dispersion layer, it is removed with a special liquid.
- Cover with top coat, dry under a lamp, remove stickiness.
With the help of gel paints, you can create an original French manicure and simply a bright manicure, because the texture allows you to make uniform ombre-type transitions, as well as make clear lines of different thicknesses. The most popular use of the coating is in tandem with regular gel polish as a base.
Photo examples of designs on nails with gel paints
Nails can be decorated with designs of varying complexity. It all depends on the skills of the master. The simplest painting options are geometric motifs (dots, stripes, combination of different geometric shapes into one composition, etc.). Some of the more complex ones include floristry and animal patterns. Shades and competent color transitions are important here.
Review of brands of gel paints for manicure
A beautiful design can be obtained from the use of high-quality materials. Proven products will provide stable results after each use and will not give unexpected effects.
Paints are usually produced in small jars (bottles) with a volume of 4-6 ml. The consistency allows you to take the required amount of product onto the palette for subsequent painting so that use is economical.
Kodi
The most popular brand for nail technicians (and not only). One of the first to produce high-quality gel paints. The amount of product is 4 ml in one jar. Gel paint self-levels after application, thanks to the gel included in its composition.
Today we will dwell in as much detail as possible on the topic of how to make designs on nails with acrylic paints step by step for beginners.
Why should you paint with acrylic?

Acrylic paints have many advantages. Painting with these paints is a pleasure: the end result looks neat and very different from the awkward designs created by varnish.
- Latissimus color palette: Missing colors can be easily obtained by mixing pigment.
- Acrylic dries quickly, due to which painting can be done in a short time.
- The paint is easy to use, even a beginner can use it. If you have good brushes, it is possible to create entire paintings on your nails. are not expensive, are consumed slowly: a standard set can be enough for six months of active use.
- In the process of drawing, you can make correction failed elements.
Where to begin

Before you start draw on nails, it is worth considering several nuances. It is especially important to know this information in advance if this is your first time picking up an acrylic brush. So:
- Painting with acrylic paints should be done on varnished nails. If you want the base under the design to be transparent, use a clear varnish.
- The intensity of the color is adjusted by the pressure applied to the brush.
- For a comfortable drawing process select a separate palette, on which you can mix colors and take paint from it for drawings. A piece of cardboard will serve as a palette.
- Before applying the design to your nails for the first time, practice on a piece of paper.
Leopard print

First drawing, where home craftswomen begin when they get their hands on acrylic paints. It’s very easy to do, just look carefully at the photo or read the instructions:
- Cover your nails with the polish you like best. Decorating your nails in different colors will look very beautiful.
- Select nails on which you plan to place the acrylic drawing.
- Apply dots of any color. Choose different thickness dots to give an interesting effect.
- A thin brush with black (or any other) paint, circle every circle. Do not trace some circles completely, or bend the tip of the tracing line.
- Cover the drawing with clear varnish.
Delicate white

An excellent manicure that novice craftswomen can do with only white paint. He is exceptional easy to perform:
- Cover your nails with clear polish. Permissible light beige base under French manicure.
- Place a drop of white polish on the cardboard. Dip a cosmetic sponge into it and press it onto the nail for 5 seconds. You can do it gentle gradient.
- Dip a thin brush into white acrylic paint and paint along the edge of the nail plate.
- With the same brush fill in the dots along the inner contour of the curl.
- Cover the composition with finishing varnish.
Frivolous hearts

What could be more favorite for girls than hearts in detail? Making a manicure as in the photo is simple: apply intersecting lines with a thin brush and shape them into hearts, slightly rounding the corners. Do not forget fix nails clear varnish.

– a popular print on nails among girls who are mastering the specifics of applying a design. To draw a butterfly follow the simple mini instructions:
- Decorate your nails in your favorite style: it can be a solid color or a French manicure.
- Choose a nail that decorate the drawing. You should not draw butterflies on all your fingers: the image will look tacky.
- Do three petals at some distance from each other.
- Draw the body of the butterfly to the petals and draw the outline of the wings from it. Create an outline, based on your preferences.
- Decorate the wings with circles or stripes.
- Draw characteristic mustache to the butterfly's body.
- Cover the design with clear varnish.
Summer

Do you want to surround yourself with flowers? Don't miss the opportunity to paint them on your nail plates with acrylic paints. Bright and light colors will create amazing clearing on your hands:
- Cover your nail plates with white or green polish - it will be a stylized clearing.
- Start planting flowers: draw flowers of different sizes and colors, not forgetting to mark the core.
- Cover with clear varnish.
White-blue

Chic, feminine manicure, accessible to any beginner. To complete it step by step, you don’t need to have an art education - just draw thin blue lines on a white background. blue flower do by connecting three pointed triangles: stick rhinestones in the middle or place a white dot-core.
Decorate your white nails dark blue frame made with acrylic paints.

A spectacular manicure, suitable for evening walks. This pattern can be easily drawn without additional training. Just follow the instructions, periodically checking the photo:
- Cover your nails dark purple nail polish, leaving two nails on each hand to paint a different color.
- Apply light lilac polish to selected nails.
- Dip a thin brush into black acrylic paint and begin to paint thin branches-roots on light nails.
- Secure the result with clear varnish.

A simple acrylic painting technique - tulips. Surely as a child you drew cute roses and tulips in the fields. Stretch your memory and remember the simplest movements: they will allow you to depict a simple design of petals and stems on the nail plates. Do not forget Protect the design with a topcoat.
Roses
There are a great many options for decorating nail plates with chic flowers. To decide which method is right for you, watch the video. In it, the nail artist explains in detail and clearly the technique of making pink flowers.

Another floral option on a French manicure - delicate, simple flowers. Take a closer look at the photo and make the same drawing with acrylic paints.

You can absolutely draw a bug on any background. First practice drawing a family ladybugs acrylic paints on paper, then get started to perform on nails:
- Draw a red oval on any part of the nail - this corpuscle future ladybug.
- Draw a line of black paint from the beginning to the end of the oval. Trace the oval.
- Put several points on the back of a bug.
- Draw the mustache.
- Apply topcoat.
Flowers with leaves

A distinctive feature of this drawing is its unobtrusiveness. Despite the fact that the flowers are large in size and, together with the petals, occupy the entire area of the nail plate, soft color the composition does not look defiant or flashy. If you want to achieve the same effect, create flowers exclusively on a white background. Please note that flowers are designed to be lightweight, sweeping movements a thin brush, and the sheets are clearly drawn. This is done so that the composition does not look blurry.

A chic youth manicure is shown in the photo: all you need is spontaneous strokes, which you will outline into shapes. It’s up to you to decide what shapes there will be: you can leave everything as it is. original photo, or you can contribute something of your own. Fantasize to create some really interesting nail art.

The magnificent painting shown in the photograph can be done while flying in the clouds. Slip with a thin brush on a burgundy or white base will create a magnificent flight of thought.

Simple, and at the same time, difficult material for a beginner to memorize. they are created quite simply: the only difficult thing is to bring them into the form that you see in the photo. The fact is that a beginner who has not learned how to control a brush cannot always immediately correctly adjust the thickness of the lines. And if everything is clear with thin lines, then in thicker lines there is often a lack or excess of thickness. To don't be disappointed For the first manicure of this kind, practice on a piece of paper how to correctly execute the design. We are sure that 20 minutes will be enough for you to feel like an ace in drawing roses from thickened lines.

Are you an amateur? bright jewelry and exotic countries? Then you should definitely paint on your nails not complicated geometric patterns, arranging them in an ethno-composition. Rest assured: a few bracelets, a manicure and a boho sundress, and not a single man will pass by without turning around.

There are many ways to create stripes. One of the popular ones is tape. Of course perfect evenness can only be achieved this way, but imagine how much extra work? Acrylic paints paint stripes no worse: get used to holding them leading hand when working straight, and the result will not disappoint you.

A bright and rich manicure from the photo, it looks as if markers have just been drawn over the nails. This is not so - on the nail plates you see unusually designed stripes. They add volume to the manicure and make it expressive.
If you want to achieve the effect like in the photo above, use only black paint over the rest. Any other color will instantly blur the volume of the picture.

The most delicate manicure with bows will drive any man crazy. Follow the instructions to create this miracle:
- Create a classic French manicure using the free edge pink varnish
- Dip a medium sized brush into black acrylic paint.
- Draw a line dividing the main nail from the free edge.
- Draw on the side of each nail two triangles, with their vertices facing each other.
- Using a thin brush, adjust the triangles, turning them into bows.
- Decorate the center white dot.
- Apply topcoat.
We have provided many options for designing nails using acrylic paints. There are quite a lot of them simple options that do not require training in manicure art. Try your hand at making designs on your own nails. We hope we helped you understand how to make nail designs with acrylic paints step by step for beginners.