Kaleidoscope at home. DIY kaleidoscope: cardboard craft for kids. How to make a kaleidoscope from a paper towel roll
In the video:
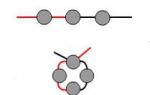
To make a kaleidoscope, we need the main components:
Empty Pringles can
Three plates with a mirror surface,
Transparencies,
Beads, beads, colored stones in general, anything to create a pattern,
pieces of foam,
Tape and hot glue.
To begin with, I want to warn you that the ideal option for making a kaleidoscope is a mirror and I do not advise using foil, as the effect will not be the same. Since I did not have a mirror at hand, I decided to use metal plates with a mirror surface. I indicated all the dimensions in the description (2 plates 15x2 cm in size and 1 plate 15x4 cm in size). First, we need to fold an isosceles triangle from our plates with side angles at the base of 36 degrees, glue our triangle with tape and finally fix it with hot glue.
Then it is necessary to cut off the upper part from the jar of Pringles, so that the lower part is equal to the length of our mirror triangle plus 1-2 centimeters.

We do not throw away the upper part, since we still need it. Then a hole must be made in the lower part in the center. To determine the center of the circle, we need a compass and a ruler. We measure half the diameter of the inner part of the can, make 2 marks and draw a chord, after that we draw the second chord and draw the edges crosswise, the intersection will be the center of the circle. After that, in the center of the bottom of the jar we make a hole with a diameter of 1 centimeter.

Then we insert a system of mirrors into the kaleidoscope cylinder and center and fix the mirrors with pieces of foam.

After that, we cut off from the top of 2 cylinders 1 cm wide and 1.5 cm wide, respectively. We remove a small fragment so that it enters the inner diameter of the can and glue it on the inside at the level of the mirror system. This design will ensure the fixation of the lower part of the pattern chamber.


Then we glue the second cylinder to the inner surface of the kaleidoscope. (Thus, we will slightly reduce the volume of the pattern chamber and fix the film.)

Then we take the lid from the jar and a piece of scissor paper and clean the surface to a matte state.

After that, we find various small objects around the apartment and fall asleep in a patterned chamber.

Then we take the lid from the jar and use hot glue to seal our design.
The game of unpredictability, diversity and transience of kaleidoscope patterns is the very embodiment of creativity, when breathtaking Beauty is born from ordinary and simple objects. Today we will tell you how to make a kaleidoscope with your own hands.
 The game of mirror patterns of a kaleidoscope has always fascinated a person. The variety of options for fleeting pictures in a kaleidoscope stimulates our brain, gives us a powerful charge of positive emotions and activates our creative potential.
 The kaleidoscope is not just a children's toy, it is used in the works of designers to create new designs for fabrics, wallpaper, and carpet weaving.
The ability of the kaleidoscope to activate our imagination is used not only in creativity, but also in the treatment of sexual disorders and for the development of children's intelligence.
Doctors note the powerful psychotherapeutic effect of a kaleidoscope. It promotes deep relaxation, stimulates the decision-making zone in the brain, memory and attention.
The history of the kaleidoscope goes back almost 100 years, and at first, it was entertainment for adults. Then came kaleidoscopes for children. But the inquisitive children's mind was occupied not only with the game of patterns, but also with the question of what is inside the kaleidoscope.
Today we will find out for sure.
How to make a kaleidoscope with your own hands materials: 
- Empty paper towel reel 23 cm long, 5.3 cm in diameter;
- Cardboard with foil, inside of milk cartons;
- Small shiny and colorful objects (e.g. beads, clear stones, etc.)
- Three transparent plastic discs (plexiglass, gift-wrapped plastic);
- Sticky pencil;
- Scotch;
- Black paper;
- parchment paper;
- Paper for designing a kaleidoscope.

Now that you have made a kaleidoscope with your own hands, you can enjoy these hours magic patterns. Moreover, as we now know, this is not at all a useless exercise.
And then I promised that we would definitely make kaleidoscope.
Accept our craft
To make a kaleidoscope you will need:
- a paper towel tube, in our case a foil tube,
- black cardboard,
- small pieces of colored cellophane,
- transparent plastic cap (we took from sour cream),
- colored paper for decoration,
- Scotch,
- ruler, scissors.
How to make a kaleidoscope

- They took a tube from the foil, but it turned out to be longer than a sheet of mirror cardboard. Therefore, at first they cut the tube along the length of the cardboard sheet.
- With the help of a ruler, a rectangle was drawn on mirrored cardboard as long as a tube, and as wide as three tube diameters. Our task is to fold the cardboard along the lines to make a triangle. The mirror side should be inside. The folded triangle was placed inside the tube.
- Redraw the circumference of the tube on black cardboard and cut out this circle.
- With the help of adhesive tape, a circle was glued to one of the ends of the tube. Made a hole with a button.
- They turned the tube over and glued a circle cut out of a transparent plastic cap on its other end. Fastened with tape.
- Put small pieces of colored cellophane on a plastic circle.
- A strip 2.5 cm wide was cut out of ordinary cardboard and glued around the end of the tube. The edge of the strip should protrude slightly (2-3 mm) beyond the edge of the tube.
- A second transparent plastic circle was glued on top with adhesive tape. In the previous step, we glued a strip of cardboard so that there was a small gap between the plastic circles, and pieces of colored polyethylene could move freely. And if you are a needlewoman and there are beads in the house, then I think that it will turn out very beautiful if you replace the cellophane with beads. You can also use small pieces of colored plastic cut from plastic bottles.
- At the end, they decorated the kaleidoscope with colored wrapping paper.
- We directed the kaleidoscope to the light and began to rotate it. And what we saw there is easy to guess.
Kaleidoscope is one of the favorite fun and toys for children and adults. Today we will tell you how to make it yourself. As a basis, we take the usual sleeve from paper towels. The simplest materials, a little imagination and effort - and a small miracle will be born before your eyes.
The design of a mirror kaleidoscope at first glance seems difficult. It is difficult to understand how bizarre patterns are formed in this small tube, which fill the entire visible space with themselves and with their light. In fact, the kaleidoscope is very simple, and even a child can make this toy on their own.
The process of assembling a kaleidoscope will make children feel like a scientist in their own laboratory - they will definitely enjoy it. Besides, it's very helpful. The child will learn to work with scissors and paper, understand the internal structure of a complex toy. Assembling a cardboard kaleidoscope with your own hands will be a wonderful lesson in needlework, physics and logic.
What will we need?
- paper towel roll
- foil cardboard (the inside of boxes for juice, milk, etc.)
- three transparent plastic discs with a diameter of the sleeve hole (can be cut from plastic bottles, plexiglass, etc.)
- black paper (disc the size of the hub hole)
- parchment paper (all the same diameter)
- paper and cardboard for decoration
- shiny filler (beads, rhinestones, sequins, small beads)
- Scotch

Working process
First, let's deal with the "stuffing" of our kaleidoscope. If you do not have foil cardboard, use regular cooking foil. Just glue it to the cardboard with a glue stick. The length of the shiny cardboard surface should be 2-3 cm shorter than the sleeve (we will place the pattern camera in it).
Bend the cardboard into an equilateral triangle so that the triangular-shaped tube fits equally into the sleeve. It should not hang out or sit too tight. Glue it with tape and place it in the future kaleidoscope. On top we place the first transparent disk (without a hole).

We pour our decor into the toy (on a transparent disk). Mix beads, large sequins and other beautiful bright small details. Cover the container with a circle of parchment paper and a second plastic circle. Fasten the structure with adhesive tape and glue.

On the other end of the pipe we place one transparent solid disk and a black disk with a hole.

Then the external decoration of the craft is performed. wrap sleeve beautiful paper, paint it or stick whatever you like on it. Ready!

Kaleidoscope without exaggeration can be called one of the favorite pastimes of both children and adults. A scattering of bright and diverse patterns in an amazing toy fascinates and takes you to a magical and unpredictable world. At first glance, this subject seems incomprehensible and complex. In fact, the design of the kaleidoscope is so simple that it can be made even at home.
Check out a few simple tutorials on how to make a DIY kaleidoscope from scrap materials and you will understand everything. Our lessons will help you easily and quickly make this unusual toy with your own hands to the delight of your family and friends.

We will need:
- paper towel sleeve 23 cm long and 5.5 cm in diameter;
- a pair of transparent plastic discs with a diameter of 5.5 cm (you can cut discs from a plastic bottle) and one circle of transparent paper, such as tracing paper;
- two cardboard circles, one of which should have a hole in the middle;
- a piece of corrugated paper 6 cm wide and 16 cm long;
- colored and velvet paper for decoration;
- foil and multi-colored beads, sequins, rhinestones, beads or colored transparent balls;
- cardboard, tape, ruler, glue.

Step one. We cut out three strips of cardboard 21 cm long and 4 cm wide. It is desirable that the dimensions of the strips be 1.5-2 cm smaller sizes tubes, in which we will place them in the course of work. Wrap the strips in foil.


Step two. We form a triangular prism from the wrapped strips and fix it with tape. We place the prism in the tube in such a way that on one side of the kaleidoscope the ends of the prism and the tube coincide, and on the other side there is room for the patterned chamber. At the end where the prism and tube coincide, we fix a circle with an eye with adhesive tape.

Step three. Next, create a patterned camera. To do this, we use two plastic circles and one circle of tracing paper, with which we will close the camera. We place one plastic circle in the pipe - it should rest against the prism. Pour multi-colored shiny objects into the resulting container. The brighter they are, the better.


Step four. We close the container with a second plastic circle, and cover it with a transparent paper circle on top, attaching it to the tube with adhesive tape. We have a patterned camera. You can open it at any time and change the contents or add some other interesting little things.

Step five. Wrap the middle part of the tube corrugated paper and secure it with tape. We glue the ends of the kaleidoscope with colored paper and decorate with a flower. A wonderful gift for the holiday is ready. Come up with your own unique design! Lots of decoration options. You can paint a kaleidoscope with paints, paste over with appliqué or use the decoupage technique.

Kaleidoscope with mirror plates - master class

We will need:
- cardboard tube;
- three mirror plates (you can also cut them out of CDs or replace them with strips wrapped in foil, as in the previous lesson);
- two plastic discs (one transparent and the other matte);
- two cardboard or paper disk with holes;
- shiny multi-colored trifle (glasses, beads, rhinestones, transparent stones);
- adhesive tape, glue stick, scissors, fabric or colored paper for decoration.
Operating procedure:
- We make a triangular prism from mirror strips. We fix it from the inside with adhesive tape, gluing it to the joints with strips no more than 2-4 mm wide. Next, tightly wrap the prism on the outside with adhesive tape and insert it into the tube.
- We put one transparent disc on the end of the prism, as shown in the photo. We pour a shiny trifle on top of it and cover the camera with a matte disk, which we glue or attach with adhesive tape.
- On the other, viewing end of the tube, we glue two disks with holes. We decorate the toy as you wish. Do-it-yourself kaleidoscope is ready!
Another version of the kaleidoscope with your own hands - a master class


We will need: a cardboard tube 12 cm long, computer disks, tracing paper and a thick transparent film, some colored paper for decoration, colored transparent stones, glue, double-sided and ordinary tape.
Operating procedure:
- We cut out three rectangles 5 cm long from computer disks. We make their width in accordance with the diameter of the tube. We make a prism from rectangles with the mirror side inward. We insert it into the pipe to a depth of 5 cm on one side and 1.5 cm on the other.
- We cut out two circles from a dense transparent film, with a diameter slightly smaller than the pipe. We put one circle on the ends of the prism from the side where it is at a depth of 1.5 cm. Cut out a thin strip from cardboard and glue it inside to fix this circle. We pour colored pebbles on improvised glass and glue a circle of tracing paper on top.
- Cut out two circles with holes from blue paper, as shown in the diagram. We glue one of them on a circle of tracing paper to hide all the bumps. We stick another "donut" on the second transparent circle, which we attach to the inspection hole on the other side of the pipe. We glue the kaleidoscope with beautiful paper, point it at the light and enjoy the magnificent color patterns.
DIY video tutorial on making a kaleidoscope
We offer you a master class on creating the simplest kaleidoscope, which will require a minimum of materials and tools.
Interesting kaleidoscope design ideas
We hope that our lessons will help you become a skilled craftsman in creating unique kaleidoscopes that you want to look at forever, discovering new patterns, perfect in beauty.