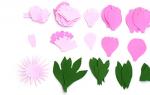
Do-it-yourself horse from a sock. Toy horse from a sock. We make a horse out of paper and buttons
In the year of the horse, his symbol will be the best gift. Both an adult and a child will be pleased to receive a funny textile horse or some other souvenir related to this topic.
DIY textile horse: master class
Step-by-step instructions for sewing a horse on the site masterclassy.ru.
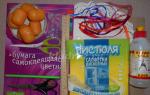
In order to make a textile horse, you will need:
- white calico,
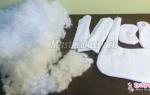
- sintepon,
- acrylic paints for fabric (white, black and brown, blue and purple),
- outline for fabric (black and white),
- coffee,
- cocoa,
- cinnamon,
- scissors,
- needles,
- threads (white, black and brown),
- pins,
- fabric glue,
- pastel,
- tassels,
- 4 buttons (2 cm in diameter),
- patches of colored cotton,
- yarn for mane and tail.
Print the pattern on white A4 sheets, cut, glue. Take a piece of calico and a marker to transfer the pattern to the fabric.
Transfer the pattern: one piece each - torso, muzzle and head, two pieces - ears, four pieces - legs. Note! Between the pieces, leave room for a seam allowance of 5 mm for each (the distance between the pieces is 1 cm). Cut out the details. Take tailor's pins. With their help, pin each of them to the canvas close to each other.
Cut out all double pieces. Stitch them on the machine. For the following parts, leave an unstitched opening for stuffing: for the body - at the top of the neck, for the ears - at the bottom, for the legs - on the side. Sew the muzzle and head completely, leaving no holes. Turn out the legs and ears. Before turning the body, muzzle and head, make cuts along the edges of the part in concave places.
To stuff the muzzle and head, cut a hole on one side of the part. At the head, a hole is at the top, at the muzzle - in the center. Take a synthetic winterizer. Stuff each piece very tightly. Secure the holes in the neck of the muzzle and head with a thread and a needle. Fix the holes on the legs with a hidden seam.

To keep the hoof looking neat, fold the corners at the bottom of the foot inward and secure with a needle and thread.
All details are ready. They should be dyed with a mixture of cinnamon, coffee and cocoa to give an aged look and a pleasant aroma. Proportions: 1 tsp. coffee, 1 tsp cocoa, ½ tsp cinnamon and 100 ml of water.
Paint over each detail on 2 sides in a lighter color, and the muzzle in thick to give a darker look. Take a brush with soft bristles. After painting, lay the parts on cotton and leave to dry.

While the parts are drying, proceed to the manufacture of the mane and tail. You need a notebook or a box measuring 13.5x20x2.5 cm, yarn. Wind the thread around the notebook along the short side (40 turns). Drag the threads in the center on both sides of the notebook and cut them. You will get 2 bundles for the mane. The number of bundles depends on the thickness of the thread. They will need 15 pcs.
The tail is made in the same way, but you need to wind the thread along the long side of the notebook. Drag the threads from one side of the notebook, and from the other - they should be cut. Fold the bundle in half, drag it with a thread below the fold.
When the parts are dry, they need to be brushed. An old toothbrush is best.
I need art pastels. With brown chalk, outline the perimeter of the muzzle. Draw circles - these are the nostrils. Outline the perimeter of the head, legs and torso along the seams.
Rub the pastel into the details straight with your finger. If at the same time the outlined places become pale, repeat their outline. They will take on a voluminous appearance.

You need acrylic paints. Draw a hoof in brown. Draw a white line along the border of each hoof. With a white outline on the fabric, draw lines - an imitation of stitches.
The legs for the horse are ready.
Draw white spots on the body and head with white pastel chalk.
They need to be rubbed into the fabric. To make the spots brighter, make it white acrylic paint.
The most expressive part of the toy is the eyes. They are painted with acrylics. Both glossy and matte paints are suitable. Draw the pupils, the iris in blue or green. Paint the whites of the eyes with white paint. Use purple paint to paint the eyelids, white paint the eyebrows. Black contour on the fabric - cilia. The eyes are ready.


Get to the muzzle. With a brown thread, make a “forward needle” seam along the perimeter of the muzzle, stepping back from the edges about 5 mm. With a black thread, make the nostrils in the form of crosses. Prepare your ears. Shade the inner parts of the ears with brown chalk.
Don't forget to rub in the pastel. Hem the ears along the bottom edge, folding them in half. Ears are ready.
You can start assembling. The parts are stitched and glued together. Glue the muzzle to the head, ears to it, and the head to the neck. Attach the mane. Make a bang by gluing a strand to the head in front of the ears. Glue the rest of the strands on the back of the neck tightly.
You need a needle with a large eye, it should be threaded with the same thread from which the mane was made. With a "tambour" stitch, fasten each strand of the mane, but not very tight to close the gaps between the strands.
Got a lush mane.


Attach the tail. Lubricate the base of the tail with glue, wind the same thread around it that was used to make the tail in a few turns. Secure the end of the thread with glue. Delete the thread.
Got a great tail.
Make patches. Cut the colored calico into small patches and disassemble the edges.
Randomly glue the patches on the legs and torso. Draw stitches on them with a black outline.
You can decorate the horse with accessories in the form of a hat, skirt, etc.
How to sew a horse: video
New Year's souvenir "Horse" from threads with your own hands
Master class on making a New Year's souvenir "Horse" from threads.
Masagutova Liliya Vasilievna, educator of MB preschool educational institution kindergarten No. 6 "Vasilek", Shushenskoye village, Krasnoyarsk TerritoryThe New Year is coming soon, which means it's time to prepare gifts for family and friends. The symbol of 2014 is a horse, so the figurine of this animal will be an ideal gift for loved ones.
I bring to your attention a master class on making a New Year's souvenir "Horse" from threads. Making this souvenir does not require large material costs and does not take much time, and at the same time you can give your family a wonderful souvenir as a keepsake. Since the symbol of 2014 is a blue wooden horse (although some Eastern teachings speak of a green horse), when choosing a color scheme for your craft, give preference to green or blue in order to attract prosperity and well-being to your home. You can combine these colors with gold or yellow, because such an animal as a horse is characterized by assertiveness, dynamism, fiery passion.
Smooth mane, fur like silk,
Have you guessed what it's all about?
Yes, then the horse is in a hurry to stay,
To surprise everyone around in the New Year,
To bring a cartload of gifts, to everyone, to everyone,
To protect the New from problems!
The year of the horse will be the best, believe me
Meet him, well, open the doors!
Purpose: A handmade horse will be an original, unique gift for children and adults, as well as decoration
for New Year's home interior.
The master class is designed for children of senior preschool age,
students, teachers and parents.
Necessary materials:

- semi-woolen or acrylic threads;
- threads "Iris metallic";
- scissors;
- A4 photo frame;
- glue "Moment crystal";
- pieces of leather, fabric, felt;
- decorative eyes;
- beads, braid for decoration;
- copper wire.
Step by step job description:
1. Let's start by making blanks for the future horse.
To do this, we wind the threads on the photo frame
(the number of turns depends on the thickness of the thread, I have about 80).

2. Next, cut the wound threads on one side.

Here is such a blank of pieces of thread turned out.
3. We fold the blank of threads exactly in half and tie it with a thread
the same color.

4. We form the muzzle of the horse. To do this, a piece of thread,
stepping back from the bending line of the workpiece, one centimeter,
we make several turns and tie a knot.

5. We make another constriction just below the first, we form the horse's head.

6. We insert a wire bent in half into the threads.

We distribute the threads around the wire.

7. We wrap the "chest" of the horse with the second bundle of threads and bandage it.

8. We insert the wire into the middle and make another constriction,
creating the body of a horse.

9. We begin to form the hind legs. To do this, we divide the bundle of threads
into two equal parts. We distribute the threads around the wires and make
three straps. After that, you can cut off excess threads and wire.

10. We form the front legs and make constrictions in two places.
11. We make a mane and a tail from the metallic iris threads.
We fix the mane with glue.


12. We fasten the tail with a thread to match the body of the horse.

13. Cut out and glue the saddle from pieces of leather or beautiful fabric.
We decorate the saddle with braid or beads.

14. From a piece of felt or fleece, cut out and glue the ears.

15. Glue the eyes

Thread horse - ready!


New Year greetings 2014
Hooves beat off the fraction imposingly,
The year of the horse is approaching us importantly,
And if we show skill with you,
And we will be in our own way in this year of dexterity,
That with a horse is exactly for us all on the way,
Just know, guide by tightening the bridle.
We will reach, we will rush to the best with you,
In the year of the horse, we manage everything ourselves!
May happiness come in the Year of the Horse!
It will warm you with warmth, dispel sorrows,
He will beckon with a dream, add good luck,
Bring fun and joy!
I wish you health - let it only grow stronger,
And may your prosperity grow, do not shrink.
May life please with beauty and luck,
Have a good New Year mood!
I wish you from the bottom of my heart
Great luck for the New Year,
Let it be very sweet to live
This New Year of the Horse!
Abundant money rains,
And true, sincere friends,
Good luck bright carnival,
To surround you everywhere!
There were often compliments
Happy, joyful moments
You would have more
And every day, and every hour!
Recently, workshops on making soft toys, various crafts, animals and gifts have been very popular. You can make products practically from all improvised items, most importantly, a little imagination and a desire to create something unusual.
If you have a sea of \u200b\u200bdesire, but with a worse fantasy, then let's start crafting together. For example, let's talk about how to make a horse with your own hands using various materials. Perhaps the tips that will be given below will lead you to your own interesting idea.
We make a horse out of paper and buttons
You need to start training with the simplest products and materials, so now we will make a horse out of paper, and to decorate it we need buttons, as well as glue, scissors and some wire (you can replace it with fishing line or strong threads).
Let's start making the figurine:
- On an A4 landscape sheet, draw a horse, and depict the animal so that the body, tail and mane are one, and the legs are separate. If it’s difficult to draw on your own, then find an image in a children’s book or coloring book;
- Cut out the parts of the animal along the outline. To make the product more durable, stick pieces of a paper horse on cardboard, and when the sheets stick together, you can cut them out again. If possible, buy white cardboard and immediately depict the animal on it;
- If you are tinkering with a small child, then offer the child to make a mane and tail for the horse. To do this, you can use unnecessary pieces of fabric by gluing them to cardboard. A cotton tail will look very original, in general, everything that is at hand will do: colored paper, candy wrappers, etc .;
- Now take the horse's torso and attach the legs to it the way you would like them to be when finished. When the position of the limbs suits you, carefully make holes in the cardboard: in the torso and legs;
- Next, thread a fishing line, thread or wire into a button of the desired size and color, fasten the limbs of the craft.
You have a wonderful horse that will move its legs. You can decorate it at your discretion, making it very original and unique.
The first stage has been completed, now you know how to make a horse out of paper with your own hands, you will continue to create.
We make a plasticine horse with our own hands
Probably, all parents of little fidgets aged 2-3 years old will be interested in learning how to make a horse out of plasticine with their own hands. This process, by the way, is very exciting and can interest both adults and kids for a long time.
For creativity you will need:
- 2 different colors of plasticine;
- Toothpicks - 5 pieces;
- Stack - a special stick that lies in almost all boxes with plasticine;
- 2 eyes (you can buy special ones or get by with buttons, beads, etc.).
If all the materials for creativity are available, you can start sculpting a horse:

- Let's make the legs first. To do this, take 4 pieces of plasticine of the same size. Roll up sausages that will expand slightly towards the bottom. In order for our design to stand steadily, it is recommended to insert a toothpick into each leg;
- Now you can craft the body. To do this, take plasticine, the piece should be larger than you took for the legs, roll up a thick oval. Pull one edge of the resulting "sausage" up, this will be the horse's neck. Insert a small piece of toothpick into it;
- Now sculpt your head. In shape, it will resemble an egg, slightly narrowed on one side;
- We pass to the final stage: we collect our horse. Connect the legs to the body, attach the head;
- In order for the similarity of the figure to be complete, it is important to work out the details. Take two small pieces of plasticine, roll up the balls, flatten them. These will be the nostrils of the horse;
- From plasticine of a different shade, make two more balls, insert eyes into them: buttons, beads, etc. and fasten on the muzzle of the product;
- Don't forget to make ears. To do this, form two small flattened "testicles" and fasten on the head;
- Make hooves with contrast plasticine. To do this, roll 2 balls, flatten them slightly and divide them in half with a stack. 4 hooves are ready, can be attached to the legs;
- Build a beautiful mane for your plasticine friend. To make it look more like a horse, make notches with a stack along the edges;
- The final stage is the tail of the horse. For him, roll up a sausage, which will be a little wider to the “priest" of the animal and narrow to the bottom.
Everything, a beautiful plasticine horse is ready, it can be made multi-colored, large or small, decorated with decorative elements. In general, everything is in your hands, create!
We make a horse from plastic bottles
Want to keep your little fidget busy? Make a horse out of plastic bottles with your own hands. Rather, only one container is needed. And the craft itself will not take much time, but the child will be truly delighted and will be able to work with a new toy for a long time, imagining himself as a cowboy or some other fairy-tale hero on a horse.
To get the job done you will need the following:
- Plastic bottle - 1 pc. (it is recommended to take brown or white color);
- Material for ears, eyes and nostrils. Suitable cardboard, buttons, etc.;
- Thick thread for the bridle. It is best to take twine - 1-2 m;
- Threads that will imitate a mane (choose a color arbitrarily);
- Scissors, glue and a stick to secure the horse's head.
After all the necessary equipment is prepared, you can start creating:

- Remove the cap from the bottle and bend the container in half;
- Take twine or thick thread and fix the bottle in a bent position. This will be an impromptu bridle, it should pass 5–7 cm above the bottom of the bottle and be wound around the neck of the container;
- Prepare the eyes, ears, tongue and nostrils for the horse. If they are cardboard, then cut out the blanks;
- Now fix all parts of the muzzle on the bottle, use glue for this. By the way, the bent bottle should be placed with the cork down;
- Form a mane from threads and fix it to the “head” of the craft;
- In conclusion, fix the resulting horse's head on a stick and you're done.
Now your baby has a funny horse that you made with your own hands.
Learning to sew a horse
Sewing a beautiful soft toy is not as difficult as it seems at first glance. You just need to stock up on the necessary materials and patience, then everything will work out. What needlewomen do not sew at home, but now let's talk about the horse.
To create it you need:
- Multi-colored or plain cotton fabric;
- Knitting;
- Small buttons, beads or beads;
- Scissors;
- Needle and thread;
- Stuffing material (suitable for cotton wool, synthetic winterizer, old fabric, etc.).
We turn to step-by-step instructions on how to sew a horse with your own hands:

- The pattern will consist of 3 elements: a torso with a head, ears and legs. True, when transferring the pattern to the fabric, you need to remember that the number of parts will be greater: torso - 2 pieces; legs - 8 and ears - 4;
- When cutting a fabric pattern, it should be allowed on the seams. Now you need to sew the details from the wrong side. To make stuffing the product more convenient, it is recommended to leave 2 unstitched areas: the place where the tail will be and where the mane is;
- It is necessary to twist the body and stuff the toy. Then sew up the remaining holes. The body is ready. Similarly, the legs of the horse are sewn and stuffed;
- All the details are ready, you can collect the toy. As a tail, a bundle of knitting threads is attached to the "ass" of the horse. The horse's mane is also made from them;
- It is recommended to sew the horse's legs through small buttons or beads, so they will hold on better. Now you need to sew on the ears and eyes.
Everything, the horse is ready, if desired, decorate the product with beads, sequins and other decorative elements.
You have learned how to make a fun toy using different materials. If there are those who are wondering what else you can make a horse with your own hands, then there are a lot of answers. Beads, rubber bands, thread, tin cans, shoe boxes and many other items will do. You can list endlessly, everything is in your hands, create and be happy!
16.11.2017
The horse is the favorite animal of many children. Even adults love it. Many people like to do DIY crafts and today we will learn how to make a horse out of paper. We will learn how to make origami - this is folded paper.
- The Japanese used this technique to make paper crafts.
We will also see step by step instructions on how to make a horse of different sizes.
How to make an origami figurine - step by step description
As we have said, origami is a Japanese art. To make a horse with our own hands, we need to take scissors and an album sheet. Let's see the step by step instructions.

- The first thing to make from a sheet is a square. Bend any corner of the paper diagonally, and cut off the excess.
- Open the paper and fold it on another diagonal so there are two lines. Then expand it.
- Fold the sheet in half, horizontally and unfold. Do the same for the vertical line. As a result, you will get a square with four lines.
- Make a rhombus out of paper as follows, bend the sheet along a diagonal line, hide the sides inside the product by bending them along another diagonal bend.
- Bend the sides of the rhombus to the center and then, bend the upper triangle of the craft into the middle.
- Open the top diamond and cut the top sheet from the bottom edge to a horizontal strip down the center.
- After the cut, you need to open the triangles, which will be in the form of a diamond.
- Fold horizontally towards the middle of each of these diamonds.
- Turn the item over to the other side.
- When you see the top diamond, repeat steps 5-8 with it.
- You need to turn the craft 180 degrees and bend the central triangle of the corners up.
- Divide the craft so that you get a square.
- Now we are going to make the body of the horse. Fold the square in half horizontally, and its sides should be folded towards the center. Iron all the curves of the craft.
- Now, let's make the legs of the horse. It is necessary to bend the upper right triangle so that the bottom of the figure makes a horizontal line. Unfolding, bend the corners inward along the marked lines.
- You need to slightly bend the upper left triangle.
- Open and bend the corners inward along the lines.
- The horse's head is easy to make. Bend the tip of the head inward so that the horse's muzzle is not sharp.
So our paper horse is ready.
graceful horse
To make a beautiful horse out of paper and cardboard, you need to make a three-dimensional modular figure. Its technology will be described below.
little pony

A small paper horse can be made from a small white sheet and then it can be decorated with any color. Some knit small ponies from threads.
Volumetric modular figure

Also from paper, you can make voluminous objects. To make them, you will need a ready-made horse scheme, which will help you easily make such a figurine yourself. Such a scheme must be said on the Internet and printed on a printer.
For such a product, you need to take scissors and glue. Cut out the details carefully, following the numbering. Then bend the cut parts and glue them. With this, the work is completed.
Important! If you download a non-color scheme, then the child can paint it, so it will be more interesting for him.
large stallion
A large horse can be made from wire, fabric and thread. A horse's skeleton is made of wire, a fabric is wound around it and fastened with threads, carefully wrap the entire fabric so that it is not visible. Finally, you can sew on the hooves and attach the mane and tail using hair or thin thread.

The size of such a horse will depend on the height of the wire skeleton. Exactly such a product can be made from thick paper, replacing it with threads.
mask horse
Today we will talk about how to make a simple paper horse mask. The advantage of such a mask is that it can be done quickly and easily. To do this, you need a ready-made scheme, glue, A3 sheet, colored paper, black felt-tip pen, scissors. If you wish, you can draw a template or diagram of the horse yourself.

Choose the color of the horse, and with the help of a carbon paper, transfer the animal template to a colored sheet. From the main color, cut out the head, and then transfer the rest of the parts, namely the mane, ears and bridle, to other colors and cut them out. Glue all the details on the base and trace the outline of the horse, for clarity. With a felt-tip pen you need to draw eyes.
Then glue the finished horse onto a blank A3 sheet and leave room for the rim at the bottom. Cut out the horse from the sheet, leaving a rim at the bottom for attaching to the head. As you can see, making a mask is easy.
Schemes and ideas from other techniques
The horse can be made of thick paper and with moving legs. To do this, we need a horse template, flat small buttons, paints, scissors, thin wire and thick paper.

Cut out the horse template and transfer it to thick cardboard. Then paint the horse and cut out all the details. Make holes in the horse's legs and body where they will be held together, and connect these parts of the body with wire and a button on both sides. Attach the mane and tail. By the way, the mane and tail can be made of thread to make the horse look more attractive.
For reference! If you want to move all parts of the body, then you will need to attach additional buttons with wire to the neck, tail, and legs.
Another way is to make a horse on paper from threads. We will need to take threads, scissors, glue, A4 sheet. Draw on paper what your horse will look like. Take the glue and spread it on a separate part of the body, then quickly glue the threads in a circular motion. This should be done with every part of the body. As a result, you will get a horse like in the picture.
Applications in the form of horses
Small children cannot always make a horse out of paper, so an application in the form of a horse is suitable for them. To do this, you need to take a piece of cardboard or a regular landscape sheet, colored paper and scissors. Find on the Internet a diagram of how to make an applique and cut out all parts of the horse's body from colored paper and glue them together.

Such applications allow you to make horses of different sizes. If the child wants, you can cut out all parts of the body from a regular white sheet and decorate them yourself.
Paper bookmark horse
There are many ways to make paper bookmarks. To do this, we need cardboard, paper, glue, felt-tip pens, pencils and scissors. On a blank sheet, you can draw a horse or copy it from a picture. Some people use carbon paper for this. Then paint the horse and cut it out.
Then select the cardboard from which we will make a bookmark and stick the carved horse on it. Give the cardboard the look you want by cutting off the extra parts. You can also glue cut out photos of a horse or ready-made drawings from the Internet onto cardboard. To make the bookmark last for a long time, laminate it or wrap it with tape.
Can kids make these crafts on their own?
Depending on the age of the child, you need to choose one or another technique for paper horse crafts. For the smallest, it is better to use the easiest way - this is a paper application. Older children will already be able to make an ordinary horse out of paper, and teenagers will be able to complete a voluminous modular figure.
To make a beautiful horse, before starting work, watch the video with step-by-step instructions.

A horse on a stick is one of the favorite toys for a happy child under five. And to make such a horse on a stick with your own hands is not at all difficult.
You can even make a few toys so that the child can go on an exciting journey with friends. A horse on a stick will always be a participant in relay races and fun starts in kindergarten or at children's parties.
For manufacturing you will need:
- sock
- mane yarn
- stick 1 meter long
- horse head filler - synthetic winterizer, holofiber or cotton wool
- felt of two colors for the eyes and ears of the horse
- 1 meter of tape of any color
- 4 buttons - 2 for eyes and bridle decor
- threads
- scissors
Manufacturing process:
1. Stuff the sock tightly with filler, leaving about 4-5 cm empty at the entrance.

2. Cut the yarn into threads of approximately the same length, the more threads - the thicker the mane of the horse on a stick.

3. Cut out two blanks for the ears from cardboard - one larger, the second about 1 cm smaller.

4. Lay the mane on the head of the future horse to make sewing threads more convenient, they can be pulled together with an elastic band under the “chin” of the workpiece. Sew the mane with a buttonhole, as shown in the photo.

5. Trace around the cardboard blanks and cut out the ears from the felt, fold them and grab them with a few stitches to set the shape. Sew the ears to the head of the horse, bend the edge on which the seams are visible, bend back. We advise you to sew the ears a little further from the forehead so that the mane covers them.

6. To make a bridle, wrap the muzzle of a horse on a stick with tape, measuring the volume, then carefully remove it and sew it. Without cutting off the excess length of the tape, turn at a right angle, and secure with a couple of stitches. Sew the end of the tape opposite to get this design. Sew buttons and any other decorative elements over the stitches on the bridle.

7. Now you need to make a nose. Take a needle with a double thread and sew a few through stitches at the end of the muzzle, then pull the thread to create depressions. Secure the result with a simple knot.

8. For the eye, cut out circles from felt and sew them onto the muzzle along with buttons of the right color.
A children's toy horse on a stick, made with your own hands from a sock and other materials at hand, is a sea of vivid emotions for children. It is unlikely that there will be a child to whom this toy will be indifferent. Judging by the feedback from parents, both boys and girls are happy to play with this wonderful jumping horse. And if you make such a craft not just one, but at least a couple (or more), and then give it to a group of children, then there will be no limit and joy to a fun children's game. So do not hesitate and take on the manufacture for your child. After all, it's so easy to make!
How to make a horse on a stick
A master class on making a jump rope horse on a stick requires 1 sock and the following materials at hand:
- 2 buttons
- leather pieces,
- two rings,
- yarn or thread and fabric for a scarf.
Photo 1 
We stuff the sock with cotton wool or padding polyester, leaving an empty space in the gum area. Next, sew on button eyes, using a marker, draw pupils. They can also make a nose. We make the mouth from bright threads, pulling them a little. Immediately sew two triangles in the form of ears, folding them in half.

We insert a stick into the sock and fasten it with threads. Then we turn the elastic inside out to cover the threads. Next, we will tie an elegant scarf in this place.

Strips of the required width are cut out of the skin and a bridle is formed. Collect it while trying on the muzzle so that it fits snugly over it.

We put on a bridle and a decorative scarf.

Next, cut a large number of threads. Freshly unraveled threads look especially impressive, as they retain their “curly” shape. We lay them on a strip of paper and cover with a second strip. In this position, we sew with 2-3 lines. Next, the paper is removed.

Now we will fix the mane on the muzzle. After that, we cut it and form a bang.

It remains only to wait for the holiday and enjoy how the kids will have fun "jumping" on their unique horse.

And you can also experiment and make wheels at the end of the stick or sew a horse not from a sock, but from a pattern.
Are you an experienced craftswoman who has sewn more than a dozen horses in her lifetime? We are sure that even you will not resist this toy! After all, this is not just a horse, but, judging by the interesting mane, a whole Przewalski's horse! You will have to tinker with the mane here, but in general, the toy is sewn easily.
How to sew a horse out of socks? First you need to take the materials: two pink and white socks, synthetic fluff, thread, needle, scissors, felt for the eye, yarn for the mane and tail, a ribbon for decoration.
Horse from socks: detailed photo master class:
We cut the first sock very simply: cut out the heel. It turns out three parts: from the elastic band to the heel, the heel itself and from the heel to the toe.
The second sock will go to small parts, so it needs to be cut as shown in the picture. The toe and elastic are separate, and the rest of the fabric will go to four legs, two ears and a tail.

We cut out the ears there so that the upper part is rounded. From the inside, we sew the edges of the ears, except for the base. Turn out to the front side. The ears do not need to be stuffed.

The tail is also sewn from the wrong side and turned inside out. We make a seam only on one side (it turns out a “pipe” with two open sides).

We sew the legs of the horse on both sides and turn it on the front side.

We stuff the legs with sintepuh.

On the one hand, the horse's head is the toe of the sock, so it does not need to be sewn up. We stuff with synthetic down or other filler to your taste. We collect the second edge of the head with the letter "T" as indicated in the photo.

Then we bend this edge down and sew it to the base of the head.

Now let's make the body. With tailor pins we cover the edge that ends with an elastic band. We fill the body with sintepuh.

With the same letter "T", as in the case of the head, we bend the second edge of the body and sew it to the rest of the material.

Our tail was left unfinished: a tube of knitwear, and that's it. There is not enough wool for the horse's tail, which we will make from yarn. We wind the yarn around three fingers and tie it with yarn of the same color.

Cut the threads and trim their ends. It turns out such a brush.

We put the brush inside the tail and sew.

Sew the ears to the back of the horse's head.

It's time to attach the legs and tail. We sew them with light threads.

We make a mane: thread the yarn into the needle, stick it between the ears of the horse and bring it up. We cut the thread and tie its two ends together. In the same way we make all the other hairs of the mane. This is the longest part of the master class.

We cut out ovals (whites of the eyes) from white felt, and small circles (pupils) from blue felt. We glue them to the horse's muzzle with a glue gun or regular glue.

We will make an ornament from a colored ribbon: you need to tie this ribbon around the horse's neck and tie it with a bow. Here the main rule is to use a ribbon of light colors so that the horse does not turn out to be gloomy.

We hope that knowing how to sew a horse out of socks, you will make many of these toys for gifts!

You can make a horse on a stick out of a sock both with a child and for him - as a toy. Horses on a stick are a traditional "boyish" toy. Perhaps the most popular in the XIX - early XX centuries. Then such toys were made of papier-mâché or wood, trying to give as much resemblance to a real animal as possible. Our horse is not very similar to the real one. But you can do it in just half an hour. And the "suit" of our horse on a stick will depend solely on what kind of old woolen sock is in the house. So, to the envy of her living relatives, maybe she is polka-dotted, striped, flowered or blue.
And games with such funny horses can be arranged funny and funny. For example, father and son jumps with obstacles through sofa cushions. Or a mischievous jousting tournament, where the main thing is not victory, but cheerful laughter and a good mood.
How to make a horse on a stick out of a sock.
You will need:
- Sock, preferably wool
- Thick threads for the mane
- Bridle cord
- Sintepon
- Felt or cardboard for eyes and ears
- Stick
1. Take a sock and stuff it not very tightly with a padding polyester. This is the base for the horse's head.


2. Let's make a bridle. To do this, we will tie the horse's muzzle with a cord, as shown in the photo. Any cord will suit us - braid, clothesline or long shoe laces - everything that is at hand. You can weave the cord yourself from thick woolen threads.

3. We make the horse's mane. Thick threads (yarn) are wound on the base.

We distribute the resulting beam over the head of the horse and sew the needle back with a seam.

We cut the sewn loops on the mane with scissors.
4. Cut out the ears and eyes of the horse from black felt. The eyes can also be made by sewing on large buttons, and the ears from black colored paper.

5. Sew ears and eyes on the head. When we sew on the eyes, you can immediately embroider the cilia.

6. Now it's time to give the horse a "torso". A broom and a mop, any smooth stick can serve as a stick-torso for a horse. If there is no stick at hand, then the easiest way is to twist a piece of Whatman paper tightly and seal it with tape.

We dress the horse on a stick and tie a cord from below around the toe and stick.
It is convenient to sew on the eyes, mane and ears of a horse immediately on a stick.
Master class on needlework "Blue horse". Work from improvised means with step-by-step photos and descriptions
Author: Fedyunina Ravilya Ismailovna, educator of the first category, State Budgetary Educational Establishment School "Kindergarten No. 16 "Spikelet" in the village of Tyagloye Ozero, Pestravsky District, Samara RegionDescription of work: I bring to your attention a master class on making crafts "Blue Horse". It is designed for children from 7 years old, teachers, parents and those who are not too lazy. It is made very easily.
Target: Learn to create a horse from improvised means.
Tasks: Raise interest in making crafts with your own hands. Develop fine motor skills in children.
Material and tools: children's sock, a wooden spoon with a long handle (metal can also be used), stuffing (synthetic winterizer), multi-colored ribbons, strong sewing threads, multi-colored threads for the mane (woolen or iris), a piece of cardboard, scissors, Moment-Crystal glue or a hot glue gun , button eyes.

1. Prepare a small children's sock, preferably terry and synthetic winterizer.

2. Fill the sock with padding polyester to the base of the heel.

3. Take a wooden spoon and a piece of padding polyester.

4. Wrap it with a piece of synthetic winterizer and tie it with threads, fastening them well.

5. Put the toe on the spoon, the convex part of the spoon should be in place of the heel

6. Tie the top of the sock with a colored ribbon, tying it tightly to the spoon


7. Wrap different threads around a piece of cardboard. Remove the resulting bundle from the cardboard. Cut the bundle from above and below at the bend of the threads, stepping back from one edge 2-3 cm. Tie the bundle tightly so that it does not fall apart - this will be the horse's mane.


8. Pull the heel of the sock from two corners, forming the ears of the horse.

9. Glue the eyes and mane between the ears with glue.

10. Tie the muzzle of the horse with a satin ribbon - these will be the reins.