Easter chickens made of cardboard and paper. Easter chickens with their own hands. Do-it-yourself chicken from an egg. Master Class
Gift for the Easter holiday "Friendly family". Master class with step by step photos.
Mironova Alexandra, 10 years old, student of the "Needlewoman" association, MBOU DOD Lesnovsky House of Children's Art.
Supervisor: teacher of additional education Novichkova Tamara Alexandrovna MBOU DOD Lesnovsky House of children's creativity.
Description of work: We bring to your attention a master class on making a souvenir for the Easter holiday. You can make it from waste material. The master class is designed for children of preschool, primary school age, teachers, educators and parents,
Purpose: gift for Easter.
Target: making an Easter gift from waste material.
Tasks:
- to interest and involve children in the work of making a souvenir;
- teach how to make gifts with your own hands from improvised material, select the necessary material for finishing the product;
- to consolidate the skills of working with cardboard and paper;
- improve the skills of working with scissors, glue, observing the rules of safety;
- educate children's creative abilities, independent initiative, imagination and sense of taste;
- to cultivate hard work, accuracy, the desire to give gifts and please loved ones.
Only on Easter the sun shines like that!
The bells carry the good news.
Let everyone, young and old, know:
Christ is risen! Truly risen!
Adults and children always look forward to the Easter holiday and prepare for it in advance. To create a joyful and bright atmosphere, they prepare Easter decorations and traditional attributes - eggs - krashenka, fragrant Easter cakes, Easter compositions, make bouquets of primroses and willow twigs. On Easter, it is customary to give gifts to loved ones: decorative eggs, Easter wreaths, toys - chickens, hens, lambs, rabbits. And we propose to decorate the festive table with cheerful chickens. They can be made according to the number of family members. A small souvenir, but it will be nice to receive it if it is made by children's hands. Let's start implementing our idea. And good luck to you!
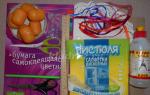
Materials and tools:
Capsules from Kinder Surprise sweets;
- yellow viscose napkins "Clean";
- thick cardboard;
- color self-adhesive paper;
- narrow satin ribbons;
- paper napkin;
- funny eyes;
Scissors, pencil, ruler, titanium glue

Templates:

Step by step craft.
Let's prepare templates for the chicken: a rectangle measuring 13cm by 9cm, paws, wings, beak. If school-age children work, then the marking of the rectangle can be proposed to be done independently, directly on the fabric. The child can cut the beak himself, in the form of a small triangle.

On thick cardboard, trace the paws according to the template and cut them out. Before starting work, we repeat the rules for working with scissors and monitor compliance with these rules throughout the lesson.


Trace the paw template on self-adhesive red paper with a 1 cm allowance and cut it out.

We glue the blanks of the paws. Cut out the beaks in the form of small triangles.


Cooking wings for our future Easter chickens. According to the template, we circle the required number of wings on a yellow viscose napkin and cut it out.


We make the markup of a rectangle 13 cm long and 9 cm wide. Cut out. On one side, carefully cut even, narrow strips 3 cm long.


“Swaddled” the capsule, leaving 1 cm of fabric from the bottom, and glue the side edges.


Glue a napkin to the capsule below. It remains to glue the wings. So, on the sides, at the same distance.


We put the chicken on its legs and glue it.


We tie a beautiful bow.


We glue the eyes, nose and such a cute, funny chicken was “born” into the world.


And this is what the chicken looks like from the back.

Let's make friends for our chicken so that it would not be boring to celebrate the joyful Easter holiday.

I was "born" first. We all line up behind me. Admire! You like?

Where, and how not to put us, we look good everywhere.


We are young and handsome chickens. Everyone is ready to celebrate Easter at least now.


"On a walk". This lovely composition was made by Uliana Varlamova.

Great post behind! Easter has arrived!
Fills our hearts with kindness and affection.
Easter is a day of miracles.
We say: "Christ is risen!"
Helpful Hints
Crafts for Easter from different materials
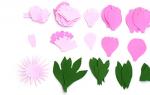
DIY Easter gifts: fluffy Easter wreath

You will need:
Circle for floristry
Knitting
Lace in the form of flowers.

1. Take a circle and wrap it with knitting threads.

2. Glue the flowers (lace) with superglue to the wreath.

Craft for Easter (to school or garden): Easter egg wreath

You will need:
- plastic eggs
Knitting.

Each egg needs to be wrapped with knitting threads and then connect all the eggs to get a beautiful wreath.


Easter workshops: egg with a surprise
This craft will be a very original gift for Easter. Having broken the egg, it will be possible to find a surprise inside, namely sweets.

You will need:
Food colorings
PVA glue
small candies
Small basket.

1. The tip of the egg must be carefully beaten off, after which the egg shell should be washed well.


3. Z fill the shellsmall sweets.

4. Trim the edges of the eggshell, grease them with PVA glue and glue the basket to it.

* Make some eggs of different colors.
Crafts for Easter photo: embroidered eggs

You will need:
raw eggs
Engraver or other device that can make holes in the shell without destroying it
Long needle (the thinner the better)
Threads for embroidery
small scissors

1. Prepare a drimel with a disk (nozzle) or a needle and start carefully making a hole in the egg. The place where you made the hole will be working. On the opposite side will be embroidery.
Carefully cut and make holes of the desired size (see image). After that, clean the egg from the insides.
* Wipe and dry the egg before further use.
2. Decorate the egg
To make a simple pattern, first you should draw an egg, making a symmetrical pattern - draw auxiliary lines and mark the places where the holes for the thread will be.

3. In the marked places, make holes using a small drill, needle or drill.
* It is advisable to practice making holes on another shell.
Clean the shell of dust.
4. Embroider the pattern.
Do not make too complex patterns. It is enough to make simple crosses with colored threads. On a light shell, the crosses will look very beautiful.
* Do not overtighten the threads so as not to damage the shell.
* At the end of the row, it is worth cutting off the thread with a margin and fixing it with glue.
Put your eggs in a bowl or basket and you're done!
DIY Easter: Paper Easter Chicken
In this master class, cardboard packaging from under eggs is used.
In addition to it, you will also need scissors.


Easter crafts for kindergarten: pom-pom eggs

You will need:
Thread for knitting
Scissors
Felt or colored cardboard
PVA glue

1. Prepare two pom-poms from knitting threads. You can buy pom-poms, or you can make them yourself.
* In this example, the pom-poms are made using a special device that winds the thread in a special way.
To make a large DIY pom-pom, wind the yarn around your wrist several times, remove the wound thread, tie it in the middle and cut the loops on the right and left.

A smaller pompom can be made in the same way, but not wound around the entire brush, but around 3 fingers, for example.
Here is another way to make a pom pom:
2. Two pom-poms need to be tied together or glued to each other.

3. From felt or colored cardboard, cut out the eyes and beak of a chicken and glue them to a small pompom.
Easter crafts for kids: 3-D chick
For this craft, you will need to print a template prepared especially for the Easter holiday by Epson.
The 3-D chicken pattern can be found here.


With our own hands we make crafts for Easter with children: draw Easter eggs with pom-poms
If the children are bored with painting with simple brushes, then you can offer them pom-poms with clothespins instead of brushes.
With the help of such an unusual homemade tool, you can draw beautiful Easter eggs.

You will need:
pom poms
Clothespins
Paint (acrylic or gouache)
black marker
Disposable plate.

1. First, draw a large egg on paper with a marker.
2. Squeeze out the paint onto a disposable plate to make it easier to dip.

3. Have the children take the pom-poms, dip each one in their own paint, and leave round pom-pom prints on the egg.
4. Cut out the colored egg.
* You can attach a ribbon to the egg and place it somewhere.

Paper Crafts for Easter: Paper Strip Easter Egg

You will need:
Pencil
colored cardboard
Colored or wrapping paper
Scissors
Utility knife (if necessary)
1. Draw a large egg on one sheet of paper.
2. Cut out several multi-colored stripes from colored paper.

3. Glue the strips over the painted egg. It is not necessary to cut the strips to the size of the egg.
4. On a sheet of colored cardboard, draw an egg a little smaller than in step 1 and cut it out with a clerical knife or sharp scissors so that you get a frame.
5. Connect the frame and paper with glued strips (frame on top). Fix them with glue.

6. It remains to put the work in a frame and you're done!
Crafts for Easter with the hands of children: an Easter egg from a thread

You will need:
Thread for knitting
Adhesive tape (adhesive tape)
Screwdriver, awl or hole punch.
1. Draw a large egg on a piece of cardboard and cut it out.
2. Make a small hole in the paper egg and thread the thread through it.

3. Start wrapping yarn around the egg. For children, this may not be very convenient, so you can fix each end of the thread with tape.

Also, instead of wrapping the string around the egg yourself, the child can hold the egg and turn it over while you hold the string.
4. After the whole egg is covered with thread, secure the end with tape.
This Easter craft can be hung anywhere.

Easter pendant "Chicken with chickens" with your own hands. Master class with step by step photos.
author: Travneva Olga Yurievna, primary school teacher, KSU "Secondary School No. 21 with. Saryozek Osakarovskiy district Karaganda region KazakhstanDescription: this master class can be used in their work by teachers of preparatory groups in kindergarten, primary school teachers and parents.
Purpose: gift, to decorate the interior of the apartment, work for the exhibition.
Target: making an Easter pendant for the holiday.
Tasks:
- to form practical skills in working with cardboard, scissors, glue;
- develop aesthetic taste, creativity, fantasy, imagination, fine motor skills of hands;
- to cultivate independence, patience, perseverance, respect for traditions.
Materials and tools needed to make an Easter pendant:
- colored cardboard;
- scissors, glue, pencil;
- templates, sample work.


Guys, tomorrow is a big holiday; Feast of the Resurrection of Christ, Feast of Easter. In the old days there was a belief that on Easter "the sun plays." Many tried to watch for this moment, turned to him with a song.
On this bright day, people become kinder, happier. All insults are forgiven, all quarrels are forgotten. Let us also say the words: “Christ is risen - Truly risen”, embrace and forget about disputes and strife forever.
Everywhere the blessing is buzzing
Of all the churches, the people bring down,
The dawn is already looking from heaven,
The cover of snow has already been removed from the fields,
And the rivers are torn from the shackles,
And the nearby forest turns green,
Christ is risen! Christ is risen!
The earth is waking up
And the fields are dressed.
Spring is coming full of wonders
Christ is risen! Christ is risen!
On Easter, the doors of the houses are open to all guests. Guests are greeted cheerfully and cordially, generously treated with Easter cakes. And on the table are plates with colored eggs. In ancient times, people dyed eggs, and washed themselves with water from a red egg in the hope of getting rich quickly. And on street festivities with eggs, interesting games were held. For example, the best prize was given to the one who rolled the egg the farthest without damaging it. It was considered enviable to collect as many Easter eggs as possible, deserving them with dexterity and "sharpness" of the eye.
It is believed that any wish made for Easter is fulfilled. The girls made wishes.
Sunday of Christ!
Send me a single groom!
God bless the groom
Not on a cow, but on a horse!
And the old people combed their hair on Easter with such a wish: “May I have as many grandchildren as there are hairs on my head!”
On the eve of Easter, the fair was especially lively and cheerful. People from all volosts came here to buy festive dresses and gifts.
The sun rises bright
People rush to the fair
And at the fair goods -
Selling samovars, cups, sleds,
And sweets, and bagels,
Millet, eggs, cheesecakes,
Tape in braids and toys.
Guys, and I want to invite you to make a gift for the holiday of Holy Easter with your own hands - the Easter pendant “Chicken with chickens”.
We will be working with scissors, so we need to remember how to handle scissors while working.
When working with scissors, observe the following rules:
1. Keep order in your workplace.
2. Before work, check the serviceability of the tools.
3. Do not work with loose scissors. Use scissors with rounded ends.
4. Work only with serviceable tools: well-adjusted and sharpened scissors.
5. Use scissors only at your workplace.
6. Watch the movement of the blades as you work.
7. Put the scissors with the rings towards you.
8. Feed the scissors with the rings forward.
9. Don't leave scissors open.
10. Store your scissors in their sheath with the blades down.
11. Do not play with scissors, do not bring scissors to your face.
12. Use scissors for their intended purpose.
Making the Easter pendant "Chicken and Hen".
Let's prepare the templates. You have templates on your tables, with the help of them we will cut out all the details of our future pendant. For the egg, chicken, bow, we need to cut out two parts. Do not forget that the second part is traced in a mirror image to the first part. This is necessary so that the parts match when gluing. If we use double-sided cardboard, then we will prepare one part of an egg, a bow, a chicken.
If there are two chickens on your pendant, we prepare the details for two chickens accordingly.
Now let's decide on the color. For the egg, you can choose any color, since eggs are dyed for Easter. For chicken, you can choose white, gray or brown. For chickens - yellow cardboard is more suitable, but white cardboard can also be used. For the bow, choose the color to your taste, the main thing is that it differs from the color of the testicle.

1. Cut out the details for the egg and carefully glue them together.

2. Prepare the chicken for hanging:
- cut out the details of the body of the chicken and glue;

- cut out the part of the scallop from red cardboard and stick it on;

- cut out a beak from yellow cardboard and stick it on;

- cut out the eyes (it is easier to cut out the eyes from colored paper) and glue them.

3. Now glue the chicken on the egg.

4. Prepare the details for the chickens and stick them on the chicken.
Let's start with the chicken girl:

- cut and paste the wings (in one piece);

- cut and paste the head;

- cut and paste the beak;

- cut and paste the eyes;

- Cut out and stick on a bow.

5.Now prepare the details for the chicken boy and stick it on the chicken:
- cut and paste the body;

- cut and paste the head;

- cut and paste the beak;

- cut and paste the eyes;

- cut and glue the wings.


6. Glue the details of the bow and stick it on the pendant.

This is how our Easter pendant looks like.
Front view.

Back view.

Glue or insert the thread into the pendant.

Now our Easter pendant "Chicken and Hen" is ready.
A bright fluffy chicken will perfectly decorate the house for Easter and create a festive mood not only for children, but also for adults. Try to make a cute and easy-to-make chicken out of thread, or rather, out of pompoms.
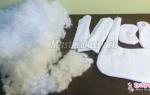
1. To make a chicken with your own hands, you need to prepare:
Yellow threads.
Cardboard.
Glue.
Scissors.
Red flannel.
Beads.

If there is no red fabric and beads, then it does not matter. Make a paper chick's beak and eyes.
2. We draw circles of different diameters on cardboard. Two larger circles and two smaller ones.


3. Cut out these circles with a hole in the middle.
4. We tightly tie a small circle with a thread. For convenience, I take a not very long, but double thread. If you work with a long thread, then it gets confused and the hand gets tired quickly. Well, a thread in two additions significantly saves the strength and time of the needlewoman.
5. We also wrap a large circle with a thread. So, we have a small detail - the head and a large detail - the body of a chicken.
6. Slightly spread the thread and insert the scissors between the cartons.
7. We begin to cut the threads along the edge of the workpiece.


8. Take a piece of thread, preferably longer. Holding the center of the circle with your thumb, gently pull the thread between the cardboard.
9. We tighten the thread and tie a knot. We remove auxiliary parts from cardboard. We get the head of a fluffy baby.
10. We do the same with the second blank.


11. Well, now, perhaps, the most difficult moment in the whole work. It is necessary to take the head of the chicken and tighten the pompom-body of the chicken with the remaining thread. At the same time, you fasten the threads of the body and attach the head to the body.
12. We remove the cardboard and get just such a blank for the future chicken. You need to fluff the threads a little.
13. Cut out the beak.
14. Fold the beak in half and apply glue along the fold line.
15. Glue the beak to the head.
16. Glue the beads.


Since the chicken is directly related to Easter, let it be the main decoration of the festive table. The chicken stand will create an atmosphere of comfort and warmth and will certainly give you a great mood. Moreover, even children can easily make such cute crafts for Easter with their own hands.
1. We need: a sheet of thick paper for pastels or cardboard, felt of different colors, glue stick, scissors, flowers for decor, two beads for the eyes, a pattern for a chicken.


I took the pattern from krokotak.com
2. Cut out a blank from cardboard according to the template and bend along the dotted lines.

3. We glue the head and tail parts of the Easter chicken, as well as the triangles in the bottom.

4. Cut out the main part of the chicken from the felt.

5. We paste it on a cardboard base.
You need to spread felt with a glue stick, not cardboard, then it will stick quickly and firmly.

6. Cut out the individual parts of the chicken from colored felt:

7. We glue them in a certain sequence: a head with a comb and a beard, a head of a contrasting color on top, then feathers on the tail.

8. We decorate the chicken with ready-made felt flowers (I bought them at the All by 38 store) or other decorative elements and glue the beady eyes on a glue gun or glue like Titan, Moment, etc.

I made a chicken according to the template, it turned out exactly the size of a chicken egg. It took me about an hour to make an Easter chicken with my own hands. I liked the process so much that I made a second one the next day ...