Polymer clay for beginners: basic information and simple techniques. Varnishes for polymer clay What to do if you still bought the "wrong" varnish and it started to stick
We are often asked what varnishes we use in the creation of works and what recommendations we can give regarding their choice.Today we will share our subjective-objective)) opinion about those varnishes that we have ever used in our work.
Kalinkapolinka:
"Do not use ordinary nail polish or acrylic varnish for creativity, some varnishes are able to dissolve plastic, even if it seems that it is dry at first, then over time it can begin to stick and collect all the dust, it cannot be removed from the product, which will be irretrievably There are special branded varnishes from Fimo and Scalpi.You can use not special, but experienced varnishes for construction work: Tikkurila parquet-yassia varnish (in a green jar, dries for a couple of hours, shines well, water-based, with a slight odor, brush easy to clean with water), tikkurila unika-super (this is a yacht varnish, the coating is simply eternal, there are a couple of minuses - it yellows light products, dries for a long time and has a strong smell), synteco pro 90 (pro 90-glossy, pro-45 semi-gloss, pro- 20 semi-matt, properties as clear, but more stable, gives a more durable coating)."
Tanya Flower
"I use Studio by Sculpey polishes - Satin Glaze (matte) and Glossy Glaze (glossy). These are special polishes for polymer clay.
They suit me just fine. I would say 100%) But since I used only them among professional varnishes, I cannot objectively compare with other professional varnishes.
I apply varnish on the product with a regular art brush. Try to avoid bubbles, because they will look ugly on the finished product, unless it is an artistic idea)
Try not to use: nail polish, art lacquer.
I apply 3-4 coats of varnish.
Anna East.
"A good varnish when working with polymer clay is not unimportant. I won't repeat myself and say that of course, of course, it's not worth in no case use nail polish))) Properly selected lacquer sometimes has the ability to "pull" the entire product on itself and present it in the most advantageous form for it. Perhaps I will repeat myself, but I will describe only those varnishes that I used myself. "To taste and color", as they say, so ideally, by trial and error, you will find "your" varnish that will meet your conditions of use. Finding everything out empirically, I came to the conclusion that I am quite satisfied with the result obtained from branded "plastic" varnishes. I will try to describe the impressions of the varnishes I use. I draw your attention to the described varnishes - glossy. Matte and semi-matte are not required in my work, so, perhaps, the review will turn out to be "one-sided".
FIMO GLOSS VARNISH. Glossy water-based varnish. Despite the assurances of some polymerists that this varnish is "not very" I can not say anything bad about it. The physical and subsequently aesthetic properties of the varnish for me personally and my products are very satisfying. When applied correctly, neither bubbling nor cloudiness awaits you, and even more so it is quite difficult to tear it off the product with a film, which I have heard more than once. Do not shake the lacquer before work, dry the product before the second or third coating, do not touch the top surface with your hands before applying the lacquer - these are quite feasible requirements so that this lacquer does not disappoint you. If you need a glossy surface, then this is what you need. It is enough to remember that the best is the enemy of the good, therefore, before coating, it is better to sand the product, if it allows it, without achieving an unbearable shine by applying a large number layers. You still won’t be able to achieve glassy transparency with this particular varnish, due to the properties and composition of the varnish, and the product may well take on a “non-marketable” appearance. Therefore - polishing and high-quality drying!!!
STUDIO BY SCULPEY. Excellent varnish. Although I had a chance to work with them very little - the impressions were the most pleasant. The trick of the varnish, in my opinion, is that it can be applied even BEFORE baking, which I specifically checked. In terms of consistency, it seemed a little thinner than Fimo varnish, so again sanding and sanding again, or many layers of varnish to make it glossy. Unlike FIMO lacquer, a large number of layers of STUDIO lacquer does not give an ugly haze.
Again, I will make a reservation that these varnishes were tested by me exclusively on Fimo, Premo and SculpyIII plastics. How these varnishes behave with plastics from other companies - I can’t say anything.
VARATHANE CRYSTAL CLEAR WATERBONE DIAMOND WOOD FINISH. The one that is glossy. The most recent one I bought I liked extremely, despite the fact that it is not created specifically for polymer clay (yes, yes, that's right, this polish can be found with a little effort either in hardware stores or, with luck, in hobby stores , and not in all)) Observations: it dries very quickly, literally in an hour the product can be covered with the next layer of varnish. According to reviews - it does not turn yellow, which is not unimportant for light products, I personally can’t say anything about this, because. I use relatively recently. Shines. Waterproof ... Although I do not recommend taking a shower in a product coated not only with this, but with any other varnish))))
Another tip I read on the Internet and tested in practice. Sometimes, it happens that even branded plastic varnishes begin to stick on the product. In most cases, the whole point is insufficient "baking" of the product. The plasticizer reacts and as a result, the beads or bracelet become quite unpleasant to the touch. The case can be helped. If the product allows, you can, of course, remove the old varnish and recoat it. But in beads, for example, this is not always possible due to the large number of details. Yes, and there is no guarantee that after a certain time the varnish will not start to stick again. Therefore, it is quite simple and the easy way we can bring our work into proper condition. We just need to "re-bake" the product by briefly placing it in the oven at the "minimum" temperature or bake with the door open, under close supervision. And of course, in this case we are talking only about varnishes for plastics.
To protect plastic products from the external environment or to give them a glossy sheen, it is desirable to varnish them. In addition, varnished works have additional color depth.
Unfortunately, not every varnish can be used for coating, some simply do not dry on plastic, others, although they dry, begin to stick after a while.
What varnishes should not be used?
Conventional varnishes for nails - they have a completely different formula and they can start to stick after a while.Hair sprays - they are not waterproof, in addition, dust likes to settle on them.
Universal acrylic varnishes, which are sold in stationery - they often do not dry on plastic.
What varnishes are guaranteed to be suitable for polymer plastic?
1. Specialized, from polymer plastics manufacturers.Examples:


2. Acrylic water-based wood flooring. Often they also write "polyurethane-acrylic" on the banks.
Examples:
varnish Varathane Crystal Clear Waterbone- water-based floor treatment, transparent, no yellowing, stable, high strength, non-toxic. It happens - glossy / matte / semi-gloss. 
And Future Floor Finish. These two products have been tested by a whole generation of polymer workers.
If you cannot buy Varathane or Future Floor Finish, you can look at the hardware store for any other similar wood floor finish. The main thing - pay attention that the composition of the varnish does not contain latex - it is not friendly with plastic. Detailed discussion different types varnish can be viewed on the Osinka website forum.
What to do if you still bought the "wrong" varnish and it started to stick?
You can try to bake the product in the oven at a temperature of 110-130 degrees for 10-15 minutes, if the varnish was water-based. If this does not help and the product is still sticky, then you need to wipe off the layer of sticky varnish with acetone, rinse with soap and water, dry and apply a new layer of the "correct" varnish.Some subtleties
You can often hear that even good varnishes begin to stick, peel off with a film or chip off. What could be the reason?The product was not baked for enough time, the plastic did not completely polymerize and the plasticizer reacted with the varnish. To eliminate this reason, you need to bake the product, you can even without removing the layer of varnish.
There was too much plasticizer in the plastic and a thin oily film formed on the surface of the product after baking, which interferes with the firm contact of the plastic surface with the varnish. St. Petersburg plastic art possesses this property to the highest degree. What to do? - wipe the surface of the product with alcohol before applying varnish and / or wash with detergent for dishes. By the way, a fatty film can also appear from frequent contact of the baked product with your hands, especially if you have worked with raw plastic before.
The first coat of varnish was not dry enough before applying the next one. Some polishes feel dry within 10-15 minutes of application, in fact, many polishes take several hours to fully dry.
If you apply varnish immediately after sanding, without removing the remaining dust, then the varnish will not lie on the surface of the plastic, but on the "pillows" of dust. Over time, during the operation of the product, this can cause chipping of pieces of varnish in these places. Therefore, after grinding, if polishing is not expected, it is advisable to wipe the plastic surface with a damp cloth and dry it before applying varnish.
As a general rule, at least two coats should be applied, special occasions up to five. Believe me, the difference is very big, the more layers, the more deeper color and a more spectacular look, especially for products made of metallized plastic and translucent.The varnish is considered to be completely dry after a week, but this does not mean that the product cannot be worn - it simply does not need to be wetted. By the way, this applies not only to acrylic varnish, but also to acrylic paints. If not allowed to dry between recoats, or wet ahead of time, the varnish may peel or blister.
There are two ways to varnish beads: apply varnish with a brush and dip in varnish. Let's explain the second way. The product on a stick is completely dipped into a container with varnish, then the excess varnish is allowed to drain, twisting around the axis for some time so that the varnish is evenly distributed and put to dry, sticking it into a piece of hard foam or foam. Usually, after a couple of minutes, a small droplet forms in the lower part - it is removed with a soft brush while it is still liquid. After the initial drying of the varnish, you can scroll the toothpick in the bead to make it easier to pull it out later. After the final drying, the beads are removed from the toothpicks with a twisting motion so as not to break it off and it does not remain in the bead.
One of the most difficult processes in working with polymer clay is varnishing products. Either the varnish does not dry and sticks to everything in a row, then it peels off, then it fades, then it does not shine as you want. And usually the selection of a suitable varnish becomes a rather difficult task. That's why I want to give you a very detailed and extensive overview of the different types of varnish.
Lacquering of plastic products. Variety of varnishes. varnishing methods. And other useful little things.
Introduction. Lacquering of plastic products is a rather extensive and controversial topic. Well, firstly, you can not varnish your jewelry at all, with sufficiently high-quality grinding and polishing. Secondly, some products, due to their aesthetic appeal, do not need to be varnished. But at the same time, keep in mind that white and light products that are not varnished will be very dirty when worn.
And yet, most masters prefer varnishing. This protects jewelry from abrasion, small scratches, protects from environmental influences, gives additional strength and durability, and also improves the appearance of the product - it gives shine or dullness, depending on the choice of varnish.
"Varnish is a liquid capable of producing a transparent, shiny film after drying in a thin layer.
Varnishes are solutions of solids in liquids that can either evaporate or dry out; solid substances are personal resins, and ethyl (wine) and methyl (wood) alcohols, essential and vegetable drying oils serve as solvent liquids. The resin solution applied to the surface to be varnished dries, leaving a thin, transparent and shiny film (in practice called varnishing), the properties and qualities of which determine the merits of the varnish taken.
On the foreign languages words fr. lake, German lask means paint obtained by precipitation of organic colorful pigments with metal salts. Such paints in Russian are called bakans, and Russian word"lacquer", as a designation of a liquid with the above properties, is translated in Western Europe by the words English. varnish, Firniss, fr. vernis."()
Mineral-based varnishes do not adhere well to a wet surface, most of them have a strong pungent odor, often take a long time to dry, but at the same time create a stronger coating than water-based varnishes.
Water-based varnishes are almost odorless, dry faster (most often), but do not fit well on a greasy surface, it happens that they swell in a humid environment, and the coating turns out to be elastic, as if rubber, and with a slight damage to the layer, it can be removed like a film from the entire surface. Here is an example of such a situation. However, if you put a very thin layer of varnish - you most likely will not notice any problems with it. You also need to remember to thoroughly dry the beads coated with water-based varnish. During the day, and preferably two - do not touch and do not allow water to enter.
A water-based varnish has the advantage that if it thickens, it is easily diluted with water to the desired consistency. Here, for example, there is a post on how to dilute Sculpey Glaze Gloss. If the "mineral" varnish thickens, then it is necessary to dilute it with solvents with great care, because. some of them react with plastic. For example, I diluted the "mineral" Fimo varnish with medical alcohol. Be sure to read the instructions for the varnish - how it is diluted, and then try applying a small amount to an unnecessary piece of plastic, and watch for a while so that there is no reaction.
_____________
Note: There is another option for varnishing plastic products - this is epoxy. But this is rather a topic for a new article, because there is a lot of information on epoxy. Here I will only say that finding the right epoxy is perhaps even more difficult than finding the right varnish. But the surface coated with epoxy is ideally "glassy" and very durable. Here's a little about epoxy for you to familiarize yourself with, the author
____________
Methods for varnishing plastic products.
Note: Do not forget to degrease your plastic product before varnishing, especially if you are going to use a water-based varnish. For degreasing, you can wash the beads in warm water with soap, or wipe the surface with a cotton swab with alcohol.
1.
Dipping varnishing.
To do this, put a bead on a toothpick or needle (knitting needle), dip it in varnish. You take it out, and for some time rotate the toothpick with the bead around its axis, thereby letting excess varnish drain and distributing the varnish evenly over the surface. Stick a toothpick into a foam sponge for washing dishes or a bunch of crumpled foil. After a few minutes, a drop of run-down varnish forms on the bead, it must be removed with a soft brush.
But I myself don’t like this method and don’t use it, because. it is very difficult for me to catch the right moment to remove the drop - if you remove it too early, a drop (or influx) will still form; if you are late, then the place where you removed the drop may not be leveled, because. the varnish has already thickened.
It is much easier for me to varnish products in the second way:
2.
Varnishing with a brush. Everything is simple here. Take a brush, and evenly "paint over" the bead with varnish. Then also stick a toothpick with a bead into a sponge or foil to dry.
But an important role is played by the choice of brush. To ensure that no grooves (paths) of varnish remain on the surface of the product, you need to choose a soft brush. Which one? Often masters are advised to use a soft synthetic brush or "squirrel", "columns". Alternatively, you can use a soft nail polish brush.
Note: if your brush is fluffy, then there is a lot of air inside the pile, and because of this, bubbles may occur on the varnished surface. In order to “expel” the air from the bristle of the brush, it is advised to take a little varnish on the brush, and with your fingers (do not forget to wear gloves) wring out the brush for a while. Also, so that a lot of air does not accumulate inside the pile, it is advised to purchase brushes that are flat, not round.
3.
There is another option for varnishing beads - it applies to cases when you have varnish in an aerosol can. At first, this method of varnishing may seem inconvenient to you (as it was in my case), but after a little practice, you will understand that this method is sometimes literally indispensable, for example, when you need to varnish a complex surface, with many recesses and protrusions, or when you varnishing a painted or tinted surface, etc.
So, varnishing a product with varnish from an aerosol can is very simple: slowly rotate the bead put on the toothpick with one hand, hold the can in the other, and spray the varnish on the bead. If you have a flat product, for example, a pendant, then you can put it on a bag or paper, spray it with varnish, wait for it to dry, turn it over, and repeat the spraying procedure for the underside of the pendant.
The appearance of your coating will depend on the distance from the can to the bead and the intensity of the varnish jet: if you keep the aerosol away and spray the varnish quite a bit, the surface will turn out with a matte thin coating; if you hold the spray can closer and make the spray of varnish intense, you will get a smooth glossy surface. Just do not hold the aerosol close to the bead - then the pressure of the varnish jet is very strong, and foam with air bubbles may form on the surface. What kind of distance you need - determine empirically, because. Aerosol varnishes are different, respectively, and the effects are different. What I said is based on the practice of using MOTIP automotive varnish.
____________
After your product has dried completely, you need to remove it from the toothpick. Remove with a twisting motion, carefully, otherwise the lacquer layer around the toothpick, or the toothpick itself, may be damaged. Remove with a twisting motion, carefully, otherwise the lacquer layer around the toothpick may be damaged, or the toothpick itself may break and remain inside the bead.
____________Now let's talk
Unfortunately, the choice of varnish, as well as the search for the selected brand, is a rather laborious and expensive process.
To begin with, the opinions of polymer workers about varnish are divided into two opposite camps: some prefer to work only with specialized varnishes from plastics manufacturers; the latter are ready to try varnishes used for decoupage, furniture, parquet and floors, automotive, yacht varnishes and the assortment offered by art and stationery stores.
But even if you are not ready to experiment, and prefer to purchase a specialized varnish designed for use on plastic, be prepared for the fact that your choice may well disappoint you. Unfortunately, at the moment, the situation in the market for "plastic" varnishes is such that it is impossible to say that one (or several) varnishes will suit you perfectly, and you will buy what suits you. Practice shows that the same varnish behaves differently on different products, different masters. So anyway, I think you'll have to go for some experimentation.
From my own experience, I can say that there was one varnish that personally suited me in all respects, this is Fimo mineral-based varnish. Why was? Because the lacquer manufacturer is Eberhard Faber, discontinued its release. This company also has another varnish, but it is water-based, and the result of varnishing with this varnish does not even please me at all. The coating turns out to be fragile, it feels like rubber to the touch, and with the slightest damage it can be easily removed from the surface. Gives a slight yellowness on white and light products.
Drawing conclusions from the material that I read about Studio varnishes, I can state their main disadvantages:
The varnish foams strongly, leaves bubbles on the surface, so you need to varnish very carefully and slowly,
Very liquid, leaves a super-thin layer, so if you want to achieve a "glassy" effect, then you need to put a lot of layers of varnish,
Sticks to toothpicks, i.e. adhesion to wood is stronger than to plastic, as a result, when trying to remove a toothpick, it may break off (break) or the varnish layer around the toothpick will be damaged.
Nevertheless, many masters successfully use Studio varnishes, and are very pleased with them.
For example, the opinion of Elena "shimshoni":
“I can write my feelings. I work now only with him, and with matte, and glossy.
It lays down evenly, without bubbles. Just don't shake the jar!! It is necessary to stir it a little with a brush before applying, and you can use it.
Glossy Studio is thicker, lays down in a thick layer. Dries to a great glossy finish.
For the best result, the first coat of any varnish should be applied very thinly, then two more should be added.
In order for the toothpick not to stick, you don’t need to smear it with varnish!;) And wipe the sliding droplets if you applied a lot of varnish. In general, any varnish is better to apply less than more, so as not to wipe the drops. And you can cover it with the next layer.
I fell in love with Studio more than Future Polish, which is applied perfectly on round beads, but does not fit well on flat products, often with bubbles. Studio has never given me bubbles on either flat or round beads.”
I'll tell you my impressions about Studio.
Glossy varnish
It bubbled up for me. Whatever the brush, even if you don’t talk and don’t breathe on it at all. It was easier with small items, but with large items, such as cigarette cases, it was simply unrealistic to cover smoothly. Everything has been sanded, polished and degreased.
But it was ideal for varnishing beads, i.e. the method where the brush is not involved. Two layers - and everything shines like glass. I usually don’t dip toothpicks in varnish, so I don’t know about sticking :)
Do not apply a thick layer. Especially if the jar is fresh. When thick layers dried, it happened that it gave cracks. Unfortunately there are no photos to demonstrate. Also, if you apply a thick layer unevenly, then everything will dry out for you :) Ie. if in some place the varnish layer was a little thicker than in others, it will be noticeable on the dried product - it will seem that there is an additional layering. Again, this is fundamental in large products - in small ones it is not so critical.
Matt Studio
As a result, I used it as a glossy :) Only more layers, but it is easier to apply than glossy. I have not had any cases of cracking. But it still does not give ideal gloss.
In a word, Studio is a varnish that absolutely does not know how to level. The bubbles do not burst, the layer is uneven - the way you applied it, the way it will look. If the surface had any flaws, then he will not hide them, but emphasize them. Often, after varnishing, I noticed flaws in the products, although they were invisible when uncoated. Matte varnish is more wear-resistant than glossy. With increased wear (again, we are talking about cigarette cases that dangle in all pockets and always fall), glossy varnish often gave cracks. Namely varnish, and not together with plastic.
Concerning drawing on hot products. Here you need to be very careful, since the varnish dries very quickly, almost instantly, and there is an option that you simply do not have time to apply a full layer of varnish to the entire product. Then the places of the “joint” of the varnish that has already dried and that was applied slightly later will be noticeable.
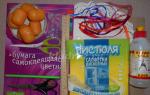
And I will add to the types of varnishes. Especially for plastics, there is also a glossy varnish Schmuck-Lack from Viva Decor (Germany) . Water based. You should look for it in those places where Pardo plastic is sold, also from Viva Decor.
In Kyiv, this is the shop "Artist's Shop", i.e. it can be in all Black River stores.
Here's one:

The label says that it is designed specifically for varnishing jewelry made of polymer clay.
It is thicker than the studio, it sticks very strongly to the toothpicks (it was after this varnish that I stopped dipping them in varnish at all :) It gives a dense glossy film. It does not peel off, does not come off - in general it is more stable than the studio, in my opinion.
Personally, I like it more in almost everything - it bubbles much less and is easier to apply. There is only one caveat: it smells like rotten fish to me :) But, in my opinion, it only seems so to me and you quickly get used to the smell) I have been using it for about 4 months and so far everything is fine.
By the way, I also baked with him, and everything was fine.
Selection of varnish not intended for plastics.
And now let's talk about cases when you do not buy a specialized varnish intended for plastic surgery, but through trial and error you select some other varnish that was not originally intended for plastic surgery at all.
Let's start with what varnishes should not be used to cover plastics.
1. Nail polish. Although beginners often use nail polish, due to the fact that the desired varnish has not yet been found, but try to complete ready product I really want to - still try to be patient. Even if you buy such nail polishes that fit very well on plastic (according to reviews), but are expensive. Simple logic - how quickly does the varnish on your nails “peel off”? Even if it's expensive and high quality. And it’s not even about speed, but about the fact that it “peels off”. It's the same with plastic. Nail polish is not designed to be durable. Plus, after a while, such a varnish may well turn yellow or begin to stick. Believe the opinion of experienced craftsmen, and never cover your products with nail polish.
2. Acrylic varnishes for artwork. You can find such varnishes in art and stationery stores. Moreover, the sales assistant can tell you that such a varnish is perfect for plastic surgery. Don't believe. Such varnishes, for the most part, will not dry at all on your plastic product. And if they dry, the bead will probably be sticky or become so over time.
3. I often met advice on the net not to use alcohol-based (or aldehyde) varnishes for plastics. Search engines do not give out information on aldehyde varnishes, they say there are only phenol-aldehyde ones. Unfortunately, I am not strong in chemistry, so I could not figure out what exactly in the composition of these varnishes can harm plastic. The only drawbacks of such varnishes were considered their fragility and the ability to darken in the light, which in itself already indicates inapplicability for plastic jewelry. Here is a description from the Great Soviet Encyclopedia, if any of the readers can explain something about phenol-aldehyde varnishes, I would be very grateful.
Now about what varnishes you need to buy.
It is best to ask a furniture lacquer in a hardware store, and it is better for acrylic polyurethane (acrylic-polyurethane) water-based parquet. Make sure that it does not contain latex - it is not friendly with plastic. In addition, pay attention to the presence of a UV filter in the composition - then your varnish will not turn yellow over time.
Be prepared that the sellers of hardware stores have not even heard of any acrylic-polyurethane varnishes, and will even tell you that such varnishes do not exist in nature. Don't be discouraged and go to another store. These sellers use the Russian lacquer classification system, which does not include acrylic-polyurethane or polyurethane-acrylic. You can see the Russian chemical classification of bases for varnishes here, and the foreign classification - here.
Try to place an order for the varnish you need in some large store. Remember, the search for "your" varnish often takes a lot of nerves, money, effort and time. Patience and good luck with this.
There are many varnishes, and even more opinions about their compatibility with plastic. I have read a lot of conflicting information on this topic, and I can say that I am incredibly confused, because the same varnish often had completely opposite reviews. Therefore, I will list only those varnishes that have been tested by polymer craftswomen in practice, and which received the most positive feedback.
1. Firm Varathane. VARATHANE CRYSTAL CLEAR WATERBONE DIAMOND WOOD FINISH . This varnish is considered one of the best, tested by generations of foreign masters. Just do not confuse - the name should be exactly that - word for word, because Varathane has many other varnishes, it is easy to get confused. At one time, for lack of a better one, I bought varnish from this company on oil based- He didn't fit me. My notes on this are here.
Characteristics: Water base; three types of gloss: glossy, matte, semi-gloss; drying time from the manufacturer - 1 hour "to touch".
From the description: “Water-Based Diamond Gloss Lacquer for Interior Wooden Surfaces Gives wooden furniture and furnishings a beautiful shine for years to come, protecting them from wear. Advantages: colorless, non-yellowing, minimal odour, waterproof.

2. S. C. Johnson Company. FUTURE FLOOR FINISH. Renamed Pledge® with Future® Shine
Lacquer of the same level as in point 1. B different countries known under different brands: "Parket Plus", "Klear", "Krystal Klear" or "Johnson's One and All", "Klir". Here is information on varnishes and its analogues in English, but if you follow the link "Future in Russia", you can read the information in Russian. They say that this varnish is even more difficult to buy in Russia than Varatan, so look, who is interested, on the same site there is a form for ordering via the Internet from Russia, with prepayment by WM or YandexMoney.
Features: water base, acrylic lacquer. Touch dry 20-30 minutes. Between layers it is recommended to withstand 8 hours.
Characteristics: water-soluble, polyurethane base, the layer dries in 2 hours, you can apply many layers, and then there will be an almost glassy effect. Full drying from 18 to 24 hours.

4.Firm Dufa Meffert AG, Germany, varnish AQUA - PARKETTLACK. Colorless (transparent), forming a glossy or semi-gloss finish. Russian website of the manufacturer.
Characteristics: drying - for applying the next layer - 1 hour at a temperature of +15 to +25 C. Water-soluble. 24 months storage.


6.BonaTech Mega - parquet varnish, polyurethane, water-based. Very much praises this varnish "marina-kotliar". It dries quickly, but completely dries in a day. Liquid, it is convenient to use it for varnishing by dipping.
7. Manufacturer AN Synteko, Sweden, varnish SADOLIN SYNTEKO PRO 20 (semi-gloss), SADOLIN SYNTEKO PRO 90 (glossy) - met in the network only positive reviews on this varnish.
From the description: - one-component water-soluble polyurethane-acrylic varnishes that provide a high-quality appearance and high strength. Used on parquet and wooden floors in living rooms, bedrooms, kitchens, hallways, stairs. It can also be used on raw cork and other wood products. Technical data: binder polyurethane-acrylic lacquer.»
8. Tikkurila company.
ASSA varnish and KIVA varnish - acrylate varnish based on polyurethane. Does not turn yellow.
Please note that there are two types of Tikkurila Yassia - PanelsYassya (red label) and ParkettiYassya (green label), so for plastic surgery you need the one that ParkettiYassya.
Varnish UNIQA super - urethane-alkyd, does not turn yellow, is removed with white spirit.
Review: “My alkyd-polyurethane varnish, tikkurila, passed an 8-month test! It doesn't stick, doesn't flake, and generally behaves decently :) It is cheaper than acrylic-polyurethane, and is sold in small jars, and also gives a smooth glass surface, i.е. very shiny. Of the minuses - white beads turn yellow and dry for 5 hours, and it is difficult to wash the brushes, because it is mixed with white spirit.

From the description: "High quality acrylic lacquer. It is used to coat paints with a metallic effect, etc., to create a protective layer on any painted surfaces. It has excellent gloss, durability, as well as increased resistance to the influence of atmospheric and mechanical influences, aggressive environments.
10. Lacquer produced by Yaroslavl Paints PF 283 (pentaphthalic) for wood and metal, high gloss , alkyd. Composition: alkyd resin, solvents, desiccant. Drying of each layer 36 hours.
I used this polish myself for a while. Gives a beautiful glossy finish, durable. Disadvantages: dries for a very long time - 1 layer 36 hours, and then for a long time the beads feel a little wet to the touch; when applied, it gives foam, yellows white and light colors, has a strong pungent odor.

11.Firm MAIMERI (Italy), lacquer «IDEA» Decoupage. Water-based vitreous top coat for decoupage.
From the description: “Forms a vitreous film resistant to scratches, abrasion and external influences. Easy to use. Perfectly protects and gives exceptional water resistance to the decorated surface. For best results, apply in several thin layers with intermediate drying. After drying, it forms a crystal clear and colorless film with a 'wet' vitreous luster. leaves no brush marks. Irreversible."

12. Firm DARWI, Belgium, varnish DARWI VERNIS - transparent varnish, on a mineral basis. In the description on the websites of stores selling this varnish, it is said that it is suitable for all surfaces, as well as for products "of our own production, for example Fimo". The solvent is alcohol. It is quite popular today in the "polymer" world, many call it a worthy substitute for the mineral Fimo. There's a little discussion here.
And a small “but”: it does not have sufficient plasticity, i.e. on very thin details, if they are slightly bent, the varnish cracks into a fine, fine mesh.

“The drying time before the first contact is written on the jar 4 hours. In fact, a little more. Somewhere around 6-8 hours. Well, complete drying is a day.
I liked the medium-coated beads the most.
They are the most brilliant. Well, in general, like glass.” - the opinion of "bopoha", taken from here.

14. Aqua varnish parquet "POLY-R" : glossy, silky matte. Base: Acrylic urethane copolymer.
One-component, water-borne, fast-drying clear varnishes for interior use. It is used for protective and decorative coating of parquet with normal operating load, as well as for processing furniture and other wood products.
After drying, the varnishes form a hard transparent film, resistant to occasional exposure to water and characterized by high wear resistance. It dries “tack free” in 20-30 minutes, between layers you need to withstand 4-6 hours, complete drying 12-14 hours.
“There are hard varnishes, for example Poly-R, with a giraffe on a green background - here it has a hard surface, I even polished it with fine sandpaper, then varnish again, then polish again. The layer is ideal, glassy, solid. BUT! upon impact or subsequent drilling, it can give chips - there was such a thing. You are right, indeed, it turns yellow, and the more layers, the stronger. Not suitable for white and blue things. But for the rest (black-brown-red-yellow) - good. The main thing is not to make a mistake - the giraffe should be on a GREEN background. This is a water-based acrylic parquet varnish. And do not believe the sellers that this does not happen. I personally used a whole jar, I would have bought more, but here in Moscow it disappeared without a trace. I especially liked the fact that it can be sanded and reapplied. The layer turns out very beautiful "

15. PearlEx Varnish by Jacquard - suitable for those who use pigments, keeps pigments well from blurring the pattern, can also be used as a regular top coat. Water based. Can be used on paper, clay, metal, wood or plastic, easy to clean with water.

Diamongd Glaze by JudiKins - giving a glassy coating. Can be mixed with dye-based paints, watercolors, perlex pigments, etc.
Lisa Pavelka's Magic Glos UV curing Glaze - in fact, the resin and hardens with a thick glassy layer under an ultraviolet lamp. More details in English.
The last two are similar to each other, only Lac Pavelka allows you to create a thicker layer. They lie on any surface - paint, glitter, embossing, natural flowers, etc.
A few conclusions about varnishes.
Mineral-based varnishes do not adhere well to a wet surface, most of them have a strong pungent odor, often take a long time to dry, but at the same time create a stronger coating than water-based varnishes.
Water-based varnishes are almost odorless, dry faster (most often), but do not fit well on a greasy surface, it happens that they swell in a humid environment, and the coating turns out to be elastic, as if rubber, and with a slight damage to the layer, it can be removed like a film from the entire surface. Here is an example of such a situation. However, if you put a very thin layer of varnish - you most likely will not notice any problems with it. You also need to remember to thoroughly dry the beads coated with water-based varnish. During the day, and preferably two - do not touch and do not allow water to enter.
A water-based varnish has the advantage that if it thickens, it is easily diluted with water to the desired consistency. Here, for example, there is a post on how to dilute Sculpey Glaze Gloss. If the “mineral” varnish thickens, then it is necessary to dilute it with solvents with great care, because. some of them react with plastic. For example, I diluted the “mineral” Fimo varnish with medical alcohol. Be sure to read the instructions for the varnish - how it is diluted, and then try applying a small amount to an unnecessary piece of plastic, and watch for a while so that there is no reaction.
Note: There is another option for varnishing plastic products - this is epoxy. But this is rather a topic for a new article, because there is a lot of information on epoxy. Here I will only say that finding the right epoxy is perhaps even more difficult than finding the right varnish. But the surface coated with epoxy is ideally “glassy” and very durable.
Methods for varnishing plastic products.
Note: do not forget to degrease your plastic product before varnishing, especially if you are going to use a water-based varnish. For degreasing, you can wash the beads in warm water with soap, or wipe the surface with a cotton swab with alcohol.
1. Varnishing by dipping.
To do this, put a bead on a toothpick or needle (knitting needle), dip it in varnish. You take it out, and for some time rotate the toothpick with the bead around its axis, thereby letting excess varnish drain and distributing the varnish evenly over the surface. Stick a toothpick into a foam sponge for washing dishes or a bunch of crumpled foil. After a few minutes, a drop of run-down varnish forms on the bead, it must be removed with a soft brush.
But I myself don’t like this method and don’t use it, because. it is very difficult for me to catch the right moment to remove the drop - if you remove it too early, a drop (or influx) will still form; if you are late, then the place where you removed the drop may not be leveled, because. the varnish has already thickened.
It is much easier for me to varnish products in the second way:
But an important role is played by the choice of brush. To ensure that no grooves (paths) of varnish remain on the surface of the product, you need to choose a soft brush. Which one? Often masters are advised to use a soft synthetic brush or "squirrel", "columns". Alternatively, you can use a soft nail polish brush.
Note: if your brush is fluffy, then there is a lot of air inside the pile, and because of this, bubbles may occur on the varnished surface. In order to “expel” the air from the bristle of the brush, it is advised to take a little varnish on the brush, and with your fingers (do not forget to wear gloves) wring out the brush for a while. Also, so that a lot of air does not accumulate inside the pile, it is advised to purchase brushes that are flat, not round.
3. There is another option for varnishing beads- it applies to cases when you have varnish in an aerosol can. At first, this method of varnishing may seem inconvenient to you (as it was in my case), but after a little practice, you will understand that this method is sometimes literally indispensable, for example, when you need to varnish a complex surface, with many recesses and protrusions, or when you varnishing a painted or tinted surface, etc.
So, varnishing a product with varnish from an aerosol can is very simple: slowly rotate the bead put on the toothpick with one hand, hold the can in the other, and spray the varnish on the bead. If you have a flat product, for example, a pendant, then you can put it on a bag or paper, spray it with varnish, wait for it to dry, turn it over, and repeat the spraying procedure for the underside of the pendant.
The appearance of your coating will depend on the distance from the can to the bead and the intensity of the varnish jet: if you keep the aerosol away and spray the varnish quite a bit, the surface will turn out with a matte thin coating; if you hold the spray can closer and make the spray of varnish intense, you will get a smooth glossy surface. Just do not hold the aerosol close to the bead - then the pressure of the varnish jet is very strong, and foam with air bubbles may form on the surface. What kind of distance you need - determine empirically, because. Aerosol varnishes are different, respectively, and the effects are different. What I said is based on the practice of using MOTIP automotive varnish.
After your product has dried completely, you need to remove it from the toothpick. We remove with a twisting motion, carefully, otherwise the layer of varnish around the toothpick may be damaged, or the toothpick itself may break and remain inside the bead.
And now let's talk about the problems and difficulties that you may encounter in the process of varnishing plastic products.
1. Your beads immediately after varnishing or after a while become sticky. This can happen even after a few months, so the varnish can be considered "tested" after a period of at least six months.
The cause of a sticky surface can be either an “inappropriate” varnish or underbaked plastic. Those. if you did not bake your product long enough, the plastic did not polymerize, and the plasticizer residues contained in the plastic reacted with the varnish. Therefore, first of all, if you find that your beads have become sticky, you can try to bake them again - yes, yes, like this, bake right along with the varnish ... ... at 110-130 degrees for 10-15 minutes. But if repeated baking does not help, then you will have to remove the varnish from the bead and varnish it with another varnish.
To remove water-based varnish from a product, it is advised to put the bead in water with lemon or vinegar overnight - the varnish will swell and crack, and it will be easier for you to remove it. To remove mineral varnish from the product, you can use a solvent. Carefully read the instructions for the varnish, which solvent is recommended by the manufacturer. Most often, mineral varnish is removed from the bead with alcohol or white spirit. In any case, there is some risk of spoiling the product, because. some solvents may react with plastic.
If the product allows (there is no pattern, image or complex reliefs on it), sticky varnish can be sanded off the surface with sandpaper. It is better to take a very small skin (for example, 1000-1500), because you need to try, if possible, not to damage the surface of the product.
Pay attention to this: in order to avoid stickiness of the varnish after varnishing, it is best to leave the product in the open air for a while. Since there are varnishes that seem to be completely dry to the touch, but in fact it has not yet completely hardened. The drying time is usually indicated by the manufacturer on the label, but even if you waited due date, do not rush to pack your products in bags and boxes. Play it safe, wait a little longer, but you will be firmly convinced of the result.
You can also try to cover the bead with another varnish, right on top of the sticky one. On the Internet, I met notes about the possibility of applying one varnish on top of another. The craftswomen shared their experience that they did this, and everything is in order.
I will tell you about my experience - for the experiment I covered several beads with Motip car varnish over the old varnish (there were several options for different varnishes) - and so, on one of the beads (coated with oil-based Varatan), two varnishes reacted - the surface foamed and warped. So my advice to you - be sure to experiment on an unnecessary piece of plastic, how varnishes applied one on top of the other will behave.
And sometimes there are situations when the varnish tested many times by many masters can give stickiness. So it happened with Tatyana "gekata_ru" with everything
The famous Varatan. Read the comments on the post at the link if you are interested, but many considered the undercooked product to be the main reason.
2.Undercooked product. As you already understood from point 1, this problem is very important, undercooking affects both the strength of the product itself and the strength of the varnish coating. Determining underdone is very simple: bake a small piece of plastic on your usual baking mode, and try to make a hole in it - with a needle, awl or drill. If at the same time the plastic crumbles and breaks off in small pieces, your plastic is underbaked. In this case, you need to re-bake the product.
The temperature regime and baking time of plastics are indicated on the packaging, different plastics have different ones, but usually this difference is not very big.
Often the cause of undercooking can be that your oven (stove) does not maintain the temperature indicated on the regulator dial.
In order to be sure of the temperature, you must use a thermometer. Such thermometers are specialized, they are produced by plastic manufacturers. You can also use a household oven thermometer. I also met advice to use a thermometer for a sauna, but I myself did not use one.
When measuring the temperature in the oven (stove), pay attention to the fact that your measurements must be spaced apart in time, i.e. if you usually bake plastic for 15 minutes, then you need to take measurements every 5 minutes. This is due to the fact that the heating in the oven (stove) can change. On this occasion, “orangejul” wrote wonderfully in the comments to this post:
“I also have a mini oven. I don't use it much, I'm afraid. Looks like a DeLonghi. I expected better from her, to be honest.
A little lower here I wrote in the comments to the post about a bath thermometer about a digital multimeter. He has measurement limits, it seems, -400 - +1000 degrees. So for our purposes it will go :))))
According to his testimony (amazing accuracy), heating in the mini-oven occurs along a sinusoid. We set, for example, 110 degrees: it heats up to 160-180 (!), Cools down to 70-80, then heats up to 150-160, cools down to 80-90. So further, with the narrowing of the temperature fluctuation to an interval of 50 degrees. I describe this from memory. To achieve this interval, the stove must be turned on for about 40-50 minutes. Thus, it is not possible to achieve a constant temperature in a mini-oven. Or else, as an option, stand near this stove and constantly tighten the handle, which is very inconvenient)))
By the way, after the purchase, we went to the store and tested several more stoves in this way. They are all like that. That's why I'm afraid to bake plastic there. Maybe we'll do some upgrades in the future. My father said that it was sort of possible.
For comparison: in a home oven (electro), when set to 110 degrees, the temperature rises to 125, and then decreases and stays in the aisles of 105-115 degrees. Noticeable difference, however. But the home oven is a pity.
3. On the surface, stains and "islands" are formed. More often than not, this means that your varnish has thickened, or is too thick for your work. In this case, it is advised to dilute a little varnish, coat the surface once with this diluted varnish (as if primed), and varnish undiluted over this layer.
4. When you try to remove the varnished and dried product from the toothpick, you find that the toothpick has stuck to the varnish coating. How to fix? You can gently cut the varnish around the toothpick with a blade. You can heat the product a little in the oven, literally within a few minutes - the lacquer coating will become more elastic, and you can remove the toothpick without fear of chips and damage to the lacquer layer. In addition, you can play it safe a little, and during the drying of the product, when the coating is no longer sticky, but has not yet completely dried out (i.e. remains elastic), turn the toothpick inside the product, or slightly move the bead along the toothpick.
5.Varnish on beads (especially on white or light ones) gives yellowness.
This is a property of your varnish, look at the manufacturer's instructions on the package - are there any UV filters in the composition of the varnish? - just they protect the varnish from yellowing. But even if you have a varnish that gives yellowness, do not rush to throw it away, you can later successfully apply it on dark and yellow flowers plastics.
Precautions when working with paint products.
First of all, I would like to urge those who use spray varnishes to be careful.
When you spray such varnish, a “cloud” of finely dispersed varnish “dust” forms in the air, it settles on nearby surfaces, gets into the eyes and mucous membranes of the nose and mouth. And it turns out that in such a situation it is not enough to work in a well-ventilated room, it is best to go outside for varnishing. Well, at least the stairs. It is also very important to have protection in the form of a respirator, and it would be nice to have goggles as well. The rest of the recommendations for using varnish in an aerosol can are standard: do not bring it to fire, keep it out of the reach of children, in case of contact with mucous membranes, immediately rinse them with water.
When working with other varnishes, precautions are usually standard, and you can read about them on the packaging, here are the most common of them:
Keep out of the reach of children. Work in a well ventilated area. If the composition is swallowed, seek medical advice immediately and show the container or label. Do not empty into sewer. The remains of varnish and its packaging should be taken to a hazardous waste collection point. Work with the material should be avoiding contact with skin and eyes. Use rubber gloves to protect your hands. At the end of the work, wash the tool with a solvent. In case of contact with skin, wash with soap and water. Use personal respiratory protective equipment. Keep away from fire!
Successful work and creative success!
We place here information about varnishes - known and not, well-proven, as well as unsuccessful purchases, so as not to step on the same rake.
Preferably with photos, or at least with the exact name, if possible, indicate the place of purchase.
Lucky
To protect products made of polymer plastic from the external environment, it is desirable to coat them with varnish. In addition, varnished works have additional color depth.
Unfortunately, not every varnish can be used for coating, some simply do not dry on plastic, others, although they dry, begin to stick after a while.
What varnishes should not be used?
1. Conventional nail polishes - they have a completely different formula and can start to stick after a while.
2. Hair sprays - they are not waterproof, in addition, dust likes to settle on them.
3. Acrylic varnishes for needlework and universal, which are sold in stationery and needlework stores - they often do not dry on plastic. A typical example is Hobby-Line.
What varnishes are guaranteed to be suitable for polymer plastic?
1. Specialized, from polymer plastics manufacturers
from the manufacturer Sculpey
water-based (left glossy, right - matte)
to photo hosting → to photo hosting →
from the manufacturer Fimo
water-based (left) and mineral-based (center and right)

2. Acrylic water-based wood flooring. Often they also write "polyurethane-acrylic" on the banks.
Example - Varathane Crystal Clear Waterborne- water-based floor treatment, transparent, no yellowing, stable, high strength, non-toxic. It happens - glossy / matte / semi-gloss.

If it is not possible to buy Varathane, you can look at the hardware store for any other similar coating for wooden floors. The main thing - pay attention to the composition of the varnish was not latex- He is not friendly with polymer clay.
What to do if you still bought the "wrong" varnish, and it started to stick?
You can try to bake the product in the oven at a temperature of 110-130 degrees for 10-15 minutes, if the varnish was water-based.
If this does not help and the product is still sticky, then you need to wipe off the layer of sticky varnish with acetone, rinse with soap and water, dry and apply a new layer of the "correct" varnish.
Some subtleties
You can often hear that even good varnishes begin to stick, peel off with a film or chip off.
What could be the reason?
1. The product was not baked for enough time, the plastic did not completely polymerize and the plasticizer reacted with the varnish. To eliminate this reason, you need to bake the product, you can even without removing the layer of varnish (if it is a water-based varnish).
2. There was too much plasticizer in the plastic and a thin oily film formed on the surface of the product after baking, which interferes with the firm contact of the plastic surface with the varnish. St. Petersburg plastic art possesses this property to the highest degree. What to do? - before applying varnish, wipe the surface of the product with alcohol or wash with soap and water, and be sure to dry well before applying varnish. By the way, a fatty film can also appear from frequent contact of the baked product with your hands, especially if you have worked with raw plastic before.
3. The first coat of varnish was not dry enough before applying the next one. Some polishes feel dry within 10-15 minutes of application, in fact, many polishes take several hours to fully dry.
Here's what else she wrote about varnishes Tin_Liva:
"Key words for a suitable plastic varnish:
for wood(interior work) or one-component parquet varnish(you can hang yourself with two components)
1. on one basis
2. polyurethane
3. product type acrylic "
"about the varnish for plastic. At first, of course, I bought a special water-based varnish for Fimo, produced by Faber, but it greatly disappointed me. The varnish peels off even if you only diligently wear beads, and only if you go to the shower with them .... then I searched on the Internet for advice on what and how to bend plastic. The West has been dealing with plastic for at least twenty years and have had time to practice in this matter. They advise coating plastic with varnish (not even varnish, but a finish coat) for wood, water-based polyurethane. For other solvents can do not chemically react with plastic, i.e. acetone, nitro varnish, nail polish (except acrylic, but it is terribly expensive) is not suitable
Everyone recommends Varathane - a water based polyurethane finish (not varnish, polish or floor wax) that works very well with wood, paper, fabric, etc, including polymer clay! This acrylic product has proven to be compatible with plastic brands including Scalpi, Premo, FIMO, Cernit and others. By the way, you can buy it in Moscow in the Arlum database. Sold in glossy, matte and semi-gloss. this is the best polish. I had to order from America
but in principle, you can buy any varnish for wood if it is 1. polyurethane 2. water-based 3. with a filter of ultraviolet rays so that it does not turn yellow. there are quite a few of them, but as a rule they are sold in rather big jars, however, we bought the Swedish varnish Synteko (parketniy) and chipped into a jar and then poured into smaller jars.
the varnish itself looks like water with milk, with a slight smell, but when it dries it becomes transparent. better product do not immediately throw it into the water for a couple of weeks, then you can even swim with it in the sea, the varnish does not peel off
here are links about Varathane in Russian.