Gel nails step by step. Step-by-step instructions for building nails on forms. Quick dry nail polish
Unfortunately, not all women have endowed nature with strong and durable nails. This issue is easily solved, one has only to visit a beauty salon and use the nail extension service. This process can also be done by hand. We will consider two types of gel extensions: on tips and forms. We will also briefly talk about the types of extensions in the French style with visual photos. And, if you have no desire to visit the salons, then our article will tell you about gel nail extension step by step.
What to choose: forms or tips?
Nail extension can be carried out using forms or tips. When there is a nail base on the finger, tips must be used. In order not to be mistaken right choice, you need to take into account the width of the nail surface, what kind of bend you want to get at the end of the work and do not forget about the height of the nail hole. When we talk about using gel extension molds, we mean recreating from scratch the length, shape that you or your client prefers, not forgetting to take into account the structure of the nails and the size of the fingertips. When the type of work that suits your client has been chosen, you need to know that there are five types of nail structure:
- slightly convex;
- snub;
- flat;
- cat's nail;
- wavy.
The most common are cat's nail and snub-nosed nail growth.
"Cat's Nail"
Cat nail extension should not be carried out on tips, since with the growth of the nail, its free edge will bend down. This will create a space between the tip and your nail, making it possible for dust and water to get in. In this case, you need to use the form for nail extension.

"Snub" nails
If you work with snub-nosed nails and decide to build on the forms, do not be surprised that in the future the nails will lose their correct structure. And in this case it is better to use tips.
The final result of gel extension also depends on the chosen type, one of which is used most often is a three-phase gel extension:
- Base gel
- Construction gel
- Finishing - gel polish

Nail extension at home
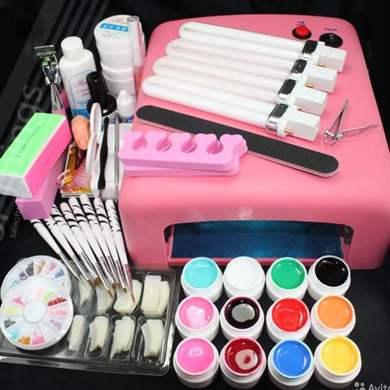
In order for your work at home to be harmonious and complete, you need to stock up on these tools, they can be purchased at ruNail:
- UV lamp;
- antiseptic;
- modeling agent - adhesive;
- the foundation;
- degreaser - dehydrator;
- tips;
- forms;
- sculptor;
- clinser;
- flat brush;
- file 220/280 grit;
- file 240 grit;
- finishing gel;
- glue for tips;
- lint-free wipes;
- orange sticks;
- dust brush
- cuticle oil.
Step by step instructions for beginners
Gel nail extension on tips:
- We prepare the nail surface with an orange stick: peel off the cuticle, create the desired shape for the freed edge, and polish the nail area with a rectangular file 220/280 grit, it prepares the nails for polishing, smoothes and eliminates scratches.
- Apply a degreaser
- Apply a thin layer of glue for tips on the freed edge of the nail and the contact points of the tips. It is necessary to attach the tips to the nail at an angle of 45 degrees, and let it go so that the line of the foot of the tip and the edge of the nail are aligned.
- Further, without disconnecting, gently lower the tips on the nail and spread the glue in the same amount over the entire area with smearing movements.
- Again we put the tips at an angle of 45 degrees, bring them to the stop line and after the heard crackle, gently lower the tips onto the nail. It is necessary to hold for about 10 seconds.
- We shape the tips at the request of the client, taking into account the structure of the nail.
- We get rid of dust particles and degrease.
- We cover with a modeling agent on the area of the nail.
- With a slightly damp brush, apply the base gel along the entire length of the future nail and put your finger under the lamp for 1 minute.
- Using a flat brush, apply the sculptor, taking into account the structure of the nail. Leave under the lamp for three minutes.
- Remove the sticky layer with a lint-free cloth.
- With the help of a buff, we pale the area of \u200b\u200bthe nail.
- Degrease and cover with a finishing gel. Again, put your fingers under the lamp for three minutes.


Below we offer you video tutorials on building:
How to build gel nails on forms
- We treat our hands with an antiseptic.
- We clean the surface of the nail with a 220 grit file.
- Cover with degreaser.
- Next, cover with a base and put your hands under the lamp for two minutes.
- We clean the top layer.
- Fixing the form.
- Using a brush, apply the gel, while turning your finger down with your nail so that the gel is evenly distributed.
- Again, put your hands under the lamp for three minutes.
- Cover with gel again, form an “S” bend.
- After the lamp, clean the sticky layer.
- Getting rid of the form.
- Level the surface with a buff.
- We clean the dust with a brush and cover with a finishing gel.
- Again, put your hands in the lamp to dry for two minutes. Degrease the surface of the nails and cover the oil on the cuticles.
Below we propose to consider step by step extension in photo and video:


Ageless jacket
Under every kind of jacket, you can see finished work in pictures, as well as video on design:
- french millennium

Everything in a person should be perfect: the soul, thoughts, and even nails. A well-made manicure with a perfect coating serves as an adornment for every girl.
But what to do if nature has deprived a beautiful shape of nails, because of their fragility it is difficult to grow at least a small length, but you don’t want to do extensions? Gel nails without extensions will come to the rescue.
It will help to grow the desired length and, if necessary, slightly adjust the shape. natural nail. Very often, girls confuse gel nail strengthening with helium extensions. However, in fact, they have only one similarity: both procedures help to make the nails beautiful and well-groomed.
The differences between them are significant:
- for nail extensions elongation of the nail bed occurs and a change in the shape of the natural nail is possible, while with conventional fortification it is impossible to increase the length of the nail;
- gel nails without extension, a small amount of material is applied to the natural nail, which means that there is no thinning and weakening of one's own nails;
- gel nail strengthening improves the condition of the nail, reduces its fragility and prevents the plate from delamination.
Strengthening gel nails is a great option for those who do not want to resort to extensions, but want to have long and beautiful nails.
Advantages and disadvantages of gel nails
The advantages of helium strengthening of nails include:

Despite all the advantages, this procedure has enough disadvantages:
- The need for regular correction. When the nail grows, the border between the natural nail and the reinforced gel becomes noticeable. The frequency of correction depends on the speed of nail growth, on average it is 1 time in 2-3 weeks.
- Duration of the procedure. When covering nails with gel in the salon at the manicure master, the procedure takes from 1 to 1.5 hours, with self-strengthening, the duration increases by at least 2 or more times.
What is better to use gel or biogel to strengthen nails
To determine what is best suited for strengthening nails, first you need to figure out how these two materials differ. The gel is a synthetic glass-like polymer that hardens when polymerized in a UV lamp.
Biogel –it is a rubber based polymer, which is a very elastic material. 
| Coating type | Advantages | disadvantages |
| Gel nail strengthening | 1. Gel nails, even without extensions, are very strong. 2. The gel allows you to build up any length. 3. Duration of wear is about 3 weeks. 4. Overgrown nails can be corrected by correction, without completely removing the old material | 1. The use of the gel requires washing down the natural nail before coating. 2. The thickness of the artificial or reinforced nail is much greater than that of the one covered with biogel. 3. Nails lose their elasticity, as a result of which they are prone to chipping and cracking. 4. It is not soaked with special liquids, the removal of the material is carried out by sawing (the exception is gels with the soak-off formula). |
| Biogel nail coating | 1. Nails covered with biogel are much more elastic, bend easily and are less prone to chipping. 2. Positively affects the natural nail plate. 3. Does not require washing down the natural nail before coating. 4. Easily removed by soaking in a special liquid. 5. Does not require a large layer thickness when applied. | 1. Relatively short duration of wear (no more than 2 weeks). 2. The impossibility of correction without removing the old material. 3. It is necessary to prevent contact of nails reinforced with biogel with acetone-containing liquids and alcohols. |
Thus, for those who do not want to lengthen the nail plate, but want to strengthen natural nails, biogel will be the ideal material. It will cause the least damage to the nails and give them a beautiful and well-groomed appearance.
Materials and tools needed to strengthen nails with gel
To cover the nails with gel you will need the following materials:

Gels are of several types: single-phase and three-phase. In the case of a single-phase gel, only one gel is needed, in the case of a three-phase gel, a base and top coat are also needed.
Be careful: when carrying out the procedure for coating nails with gel without building up in the salon, it is imperative to check that all the instruments that will be used for cutting manicure are sterilized, since there is a high risk of infection with a non-sterile instrument.
Gel nails without extensions: step by step instructions at home
Covering nails with gel without extensions at home is not so difficult. It is only necessary to comply correct sequence all actions and fill your hand a little in order to reduce the time for the procedure.

It's important to know: if the gel does not dry out, the lamps must be replaced. When using led gels, they can be dried in a led lamp, then the polymerization time will be reduced to 30 seconds. 
- Gel application. The application rules are the same, each layer is dried in a lamp for 2 minutes.
- If you need any design, you need to remove the sticky layer from the gel and cover your nails with gel polish or decorate them with decorative elements.
- Application top cover.
- Removing the sticky layer. When using a top without a sticky layer, this is not necessary.
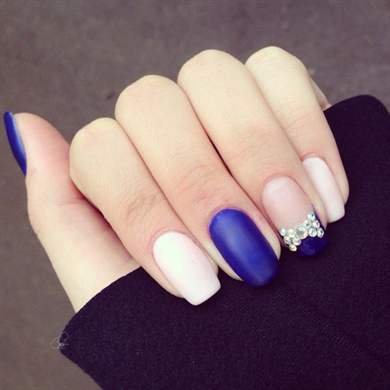
Gel Nail Design Ideas
One of the most common designs for gel nails is French manicure. This option is universal, it will suit any image and style. In addition, with the growth of a natural nail, the transition will not be noticeable much longer. 
It will be interesting to look at a manicure made with plain gel polishes with some design on the nails of the ring fingers.
IN Lately began to gain popularity a variety of pigments for nails and mirror rubs with which the nails look like they are covered with metal.

The ombre or gradient design does not lose demand, in which the nail is covered with two contrasting or, conversely, similar colors, and the border between them is shaded.
How long does gel nail polish last?
The resistance of the gel coating depends on what material was used for strengthening. If a simple gel, then such a coating will last at least 3 weeks, after which a correction will be needed. However, this is more likely due not to the fact that the coating will deteriorate, but to the fact that overgrown nails look very unaesthetic. When using biogel, the coating lasts about 2 weeks.
Note! In addition to the type used in the coating of the material, the following factors affect the durability of the gel coating:
- insufficient quality preparation of the nail plate;
- insufficient gel polymerization time in a UV lamp;
- contact with chemicals, for example, detergents and disinfectants, as well as liquids containing acetone without gloves.
In order for extended or gel-coated nails to retain their original appearance for as long as possible, it is recommended to do all housework with gloves.
Strengthening nails with gel: price in the salon
The cost of covering nails with gel without building up in salons is different, but if you take the average amount, then it will be about 1000 rubles or more. The final amount will depend on the selected coverage, the complexity and quantity of the design, as well as the popularity of a particular salon and manicurist.
It should be remembered that saving on such things is not necessary, since this can lead to the fact that a cheaper master will ruin the nails or introduce any infection by performing a manicure with an untreated instrument.
Useful tips from experts: how to perform high-quality gel nail strengthening
- In order to avoid breakouts, a few hours before applying the gel, do not use moisturizers or oils.
- To keep the coating as long as possible, manicure should be done dry, without soaking. If you need to steam your hands before a manicure, then it is best to make a coating the next day.
- In order for the nail plate to be perfectly flat, you can make additional alignment with a rubber base.
- For perfect coverage it is necessary to remove the pterygium from the surface of the nail as carefully as possible.
- Base leaks must not be allowed on the cuticle and side ridges, this will cause the gel to peel off.
- Be sure to seal the end of the nail at all stages of applying the material to avoid chipping.
Gel coating allows you to keep the nails in order, giving them an aesthetic appearance. At the same time, their strengthening can be done not only in the salon, but also at home, having previously stocked up with all the necessary materials.
Gel nails without extensions: useful video
Gel nails at home without extensions in this video:
White jacket at home. Gel nails without extensions in this video:
Now you will not surprise anyone with artificial nails. In an hour you can decorate your hands with nails of any shape and most incredible design. It is very popular among women gel extension. What types of it exist and how to build gel nails on your own?
Let's help you choose!
If you do not know what to choose for building - gel or acrylic - read in which we described in detail the advantages and disadvantages of both methods.
Gel nail extension methods
On tips
Tips are artificial plates that are glued to the nail with a special substance and covered with a gel on top. They come in various sizes and shapes and are selected individually for each nail. The more plastic the tips, the better the artificial nails will be. Plasticity is checked by bending the plate in half. In this case, there should not be a groove.
Benefits of building on tips:
- High speed of the procedure.
- Suitable for brittle and damaged nails.
- Can be built up with both gel and acrylic.
- Great for large nails.
Disadvantages:
- Not all nail shapes can be done.
- Nails become flat.
- Not suitable for flared nails.
On forms

Forms are templates on which the master lays out the gel. They can be disposable or reusable.
This extension method is divided into 2 subspecies:
- Building on the lower forms.
- Building on upper forms.
Advantages of building on forms:
- The ability to make nails of any shape, thin and elegant.
- The nails are very strong.
- Improve the shape of natural nails.
Disadvantages:
- Qualitatively build up on wide nails with large pillows can only be done by a good master.
- The procedure lasts longer than when building on tips.
It is difficult to answer the question which gel nail extension technology is better. It all depends on the initial state and shape of your natural nails.
What do you need for gel nail extension?

Before you start building, you need to prepare everything you need.
Standard set:
- A lamp, preferably with a built-in timer;
- Gel;
- Forms or tips;
- Means for removing the sticky layer;
- Disinfectant;
- Finishing gel;
- Flat brush for applying gel;
- A set of files;
- Tweezers;
- primer;
- Glue for tips;
- Polishing pad (buff).
That depends on the chosen extension method. Before buying, it is better to study the information about the tools in detail and choose the most suitable models. You can buy a ready-made kit for beginners.
Gel nail extension step by step
To better understand the technique of nail extension, it will be useful to watch video tutorials with detailed description process and photos with the results of the decor.
Gel nail extension on tips
This method involves the preparation of the top layer of the nail, but, unlike building on forms, the gel is applied over the tips. The process is faster and easier for the beginner.
The main stages of the process:
- Hands are treated with a disinfectant.
- The cuticle moves back. Skin growths and other defects are removed.
- Nails are filed under the tip hole.
- The top shiny layer is removed. The surface of the nail is processed with a file to a matte color. Movement should be light, in one direction.
- The brush removes dust from the surface of the nail.
- The size of the tips is selected individually for each nail. The width should match the nail.
- A drop of glue is applied to the inside of the tips, and it is pressed against the nail for 10 seconds. Remove excess glue.
- With the help of two files, the edges of the tips are pressed against the nail.
- Tips are cut to the desired length.
- The required form is given.
- The joint lines are cleaned with a file, then the surface is treated with a buff until the gloss disappears completely. Periodically, dust is removed from the nail plate.
- The primer is applied.
- A modeling gel is applied on top, carefully distributed over the tips. The hand is turned over for a few seconds to level the solution.
- The nail is placed in the lamp.
- After drying, the gel is reapplied and dried.
- The sticky layer is removed with a cotton pad dipped in a special product.
- Using a file and a polishing block, the top layer of the nail is leveled.
- Dust is brushed off with a brush or brush.
- The final layer of mortar is applied.
Gel nail extension on forms
For extension, both disposable and reusable forms can be used. Reusable ones are more convenient, but require care after the procedure, so disposable ones are most often used, and besides, they have a low cost.
On the lower forms
The technology is to use special overlays, which are applied to the inside of the nail and a layer of gel is laid out on them. The technology is not very simple and requires skill.
Extension steps:
- The hands of the client and the master are treated with an antiseptic. It is more convenient to use the product in the form of a spray. Excess funds are removed with a cotton pad.
- The first stage is degreasing. The upper shiny layer of the nail plate is removed with a file. The abrasiveness of the file is 240. Movement in one direction, without pressure on the nail. The surface should become completely matte. The zones near the nail shaft are carefully processed. Then the nails are treated with a buff, after which they are degreased with a cotton pad moistened with a special agent.
- A universal agent is applied that serves as a base coat and top coat. The nail is dried in a lamp for 2 minutes.
- After drying in the lamp, the top layer will be removed.
- If the shape of the nail does not match the rest, the file is adjusted.
- The paper form is placed under the nail, the evenness of the center is checked. The edges of the form are pinched, and it is fixed on the finger.
- With a special brush No. 6, the gel is applied in the form of a drop, starting from the tip of the nail. Maximum compaction is made in the center. For the nail to take nice shape, the finger flips. For 3 minutes, the nail is placed to dry in an ultraviolet lamp.
- After drying, another layer of gel is applied to raise the S-curve. Again, the nail is turned over for alignment and a drop is formed. The nail is placed under the lamp for 3 minutes.
- After drying with a degreasing agent, the sticky layer is removed, then the form is removed.
- With the help of a file, the shape of the nail is attached, in this case a droplet.
- The grinding block evens out the surface, removes small nicks and smoothes the top coat.
- Dust is removed with a cotton pad.
- The final layer is applied and the nail is dried in the lamp for 2 minutes.
- After drying, the nail is degreased. The nail is ready.
For upper forms
Unlike the previous method, this technique is much simpler: no need to form an S-bend. The nail is perfectly smooth. After a few workouts, you can make a manicure that is no different from a professional one. Not so long ago, extensions to the upper forms were made only with acrylic, and today gel is actively used. It is important to follow the technique and carefully process the nail plate so that the grip is strong.
Extension steps:
- As always, the extension begins with the disinfection of the hands of the master and the client.
- The nail plate is prepared, the upper shiny layer is removed, the cuticle is pushed back. Skin growths are also removed from the surface of the nail plate.
- A degreaser is applied.
- The upper mold is selected individually for each nail.
- A design gel is laid out in the center of the mold, dried in a lamp.
- A small amount of solution is laid out in the cuticle area.
- The form prepared with the gel is applied to the nail plate at an angle of 45 degrees.
- The finger is placed under the lamp for 20 seconds.
- Excess gel solution is removed from the inside.
- Nails are dried in a lamp for at least 3 minutes.
- The upper form is carefully removed.
- A special tool removes the sticky layer from the inside of the nail.
- The tip of the nail is given the desired shape.
- Dust is removed with a brush, if desired, a three-phase gel is applied for shine, which does not have a sticky layer.
Nail extension with upper forms has a great advantage - this method can be used on thin nails, small plates.
Gel extension on tips in French style:
French made with gel polishes:
The procedure for gel nail extension is not very complicated, if desired, it can be easily mastered. But it must be remembered that if the nails are damaged, there are fungal diseases or burrs, then it is better to postpone the procedure for a while. You should also responsibly approach the choice of nail shape and length, taking into account your lifestyle and place of work.
To make beauty on your nails, it is not necessary to go to the salon. If you really want, you can do a manicure yourself. This is a very exciting activity that any girl can do. The main thing - be patient and be careful, because gel nail extension involves working with liquid textures that do not immediately lie flat on the plate. If you want to do a manicure at home, listen to a few tips.
The specifics of this type of nail extension
Before you get down to business, choose a place where you will do a manicure. This should be a flat surface, clean and well lit. If this is your first time doing gel nail extensions, be sure to inspect your toolkit. Do not start work without checking the operation of the ultraviolet lamp and other devices.

Hygiene must come first. Disinfect all nail files, scissors and other tools well. Even the smallest cut can cause bacteria to get under the skin.
What is needed for this procedure
The tool kit should include the essentials. Do not try to buy all kinds of tools, most likely you will not need them. If you do not know what you need to purchase for gel nails, take a look at this list:
- . With its help, the gel hardens and takes shape. The device must be in good working order.
- . If you do not have a router, you can get by with a regular nail file and scissors. Just be sure to process them in a sterilizer.
- Nail molds. If you have short nails, you do not need such devices. But if you want to lengthen the nail plate, you need to master the gel nail extension on the forms.
- Base gel. This is what you will apply to your nails as the first layer. If you do not know what gels are needed for nail extension, then choose the most resistant and dense, because it is with the gel that you create the base of the nail.
- Gel paints. You can find a variety of shades in any store. This material is up to you.
- fixing gel. Many masters do not use such tools, covering the nails with a regular base. But using a special gel will give a better result.
- Other details. Brushes, cotton pads, gloves, firming oil - with the help of which you will perform a manicure.

A tool case or a capacious cosmetic bag will help to significantly save space and organize the necessary materials.
Step by step instructions with photo
Preparatory stage
First step starts with cleaning the nail plate:
- make a few movements with a nail file, remove the cuticle. Everything must be done as carefully as possible so as not to get hurt;
- apply a special strengthening lotion or oil to the nail;
- as for hygiene, gel nail extension at home in this regard should not be inferior to salon procedures;
- if you are doing a manicure to yourself, be sure to put on gloves on the other hand;
- after cleaning, you need to degrease the nails so that they can come into contact with the gel.

gel extension process
1. Use special molds to extend the plate. With an incision in the middle, you put it under the nail. How to make such a gel nail extension correctly, you will be shown a step-by-step instruction with a photo.

 2. After you have fixed the shape, apply the nail extension gel to the brush but how do you know which material is best?
- Choose one that fits well on the plate and does not contain pimples. You can test the materials in any store.
- There are also execution techniques that do not involve the use of forms. For example, nail extensions on tips. This technique is suitable for working with short nails. Unlike a shaped stencil, tips are completely covered with gel.
3. You can remove the form after drying the nails in the lamp. Once you've done this, wipe off any remaining gel with a tissue and apply another coat. After that, file it well with a nail file and decorate the edges of each nail. You can make any shape, the quality of the manicure does not depend on it.
Gel nail extension technology is simple, but you must follow each step in the instructions. If you apply the layers in the wrong order or forget to degrease the plate, your nails will soon lose their beautiful appearance.

4. The fun begins when you open a jar of colored gel paint. With its help, you can make solid nails, french or draw a picture. In any case, the finished result must be fixed by drying in a lamp.
5. After the color layer, you need to use a protective coating. It can be a finishing gel or a regular colorless counterpart. If you want to enjoy a manicure for a long time, then it is better to use a special fixative.

7. The last steps are to dry the nail and remove the remaining gel with a tissue. If you want, you can decorate with stones or rhinestones. You also cover them with gel and fix them with the help of light in a lamp.
If you are interested in gel or acrylic nail extensions, but you do not know which is better, opt for gel. Acrylic has a very bad smell and takes a long time to complete. Masters of nail aesthetics very rarely perform manicures with acrylic, gel extensions have long taken a leading position.
Fashionable gel nail extension ideas at home with a photo
Unleash your fantasy
Before you make a nail extension, view a photo of a possible manicure and choose a design. If you have not opted for a particular drawing, you you can come up with it as you work. But the color must be thought out in advance, so as not to perform the procedure again later. Your imagination will tell you what to draw.

Let's start simple: french
It is done very simply. You need to cover the end of the nail plate with one color and the middle with another. Forget that it has to be white, it can be any other color. If this is your first time doing gel nail extensions, frenchwon't take you long. You can also buy special stencils to make the line as smooth as possible.

solid nails
Simple and beautiful - you can achieve such a result, covering nails with one color. Hue can be obtained by mixing several textures.

natural shades
To create a picture of well-groomed hands, use colorless and beige gels. So you can deceive others, because the nail plate will look very natural.

Red is always in fashion
If you are looking for perfect color, choose red gel paint. This is a universal shade that can be combined with almost anything.

Video on how to do gel nails at home
If you want to visually see how to do gel nail extension correctly, pay attention to the following video. On it in stages you can see the dexterous movements of the master. After a few workouts, you will be able to build up, no worse than this.
You yourself were able to see that there is nothing difficult in bringing beauty to your nails on your own. The execution technology is simple, several procedures are enough to hone the technique. As for the chosen material, nail extension with gel polish or gel is practically the same. The only caveat is that you cannot lengthen the plate with gel polish. Have you already done your first manicure?
Overhead molds came into use relatively recently and quickly became popular due to their ease of use. For building on the upper forms are used different materials- gel, acrylic, biogel, but polygel became the favorite. For those who have not yet mastered the skills of nail extension on the upper forms using polygel, our detailed instructions with an overview of the most common mistakes.
Upper molds are a soft plastic product that imitates the natural nail plate and helps to create an artificial nail of the desired length and bend. Unlike conventional blanks, they are installed on the nail, and not under it.
Build-up on the upper forms– artificial nail lengthening procedure using upper forms and gel material. Building by this method involves laying out the material inside the form and imprinting it on the natural nail plate.
Polygel- a material for building, obtained by combining the formula of acrylic and gel.
The tool is odorless and has a high density, which makes it an excellent material for modeling artificial nails. Available in tubes or jars with a lid.
Kinds

Depending on the bend, 3 types of upper forms are distinguished:
- Natural. Slight bend, close to natural;
- Classical. More convex in the center of the design;
- Standard. The most convex. The result is a nail with a slightly lowered tip.
A specific variety is selected based on the data of a natural nail - the bending of the transverse and longitudinal arches is evaluated, as well as the desired form of extension.

- A natural curve is used for a crisp or rounded square end result;
- For the future nail form "Almond" - standard;
- For an oval - classic.
But this ratio is conditional - you can use any bend, but in some cases it can increase the operating time.
A few important points:

- The upper forms have their own size range, which is determined by the numbers embossed on the plastic. The larger the number, the smaller its size. Depending on the manufacturer, the largest figure may vary. Common numbering of sizes from 1 to 10;

- Depending on the manufacturer, it happens with applied lines or without them. The risks on the plastic are designed to determine the length of the future nail and accurately lay out the material. Forms with markings are offered by dozens of manufacturers, for example, PNB, Formula Profi, Monami, Vogue Nails;

- There are small handles on the tips of the plastic blanks - they help to separate the plastic without harming the artificial nail. Find forms with handles are presented by the brands Monami, Vogue Nails;

- On the upper forms, the build-up is done by any kind of gel. But most often it is polygel that is used, as it has a dense texture and does not “roll” from the sides. When choosing a product, pay attention to the brands Canni, Vogue Nails or Patrisa Nail.
The difference between the upper forms and the usual ones

Conventional forms include tips, liquid tips and disposable templates for building up.
- The top ones are reusable. The material after polymerization separates effortlessly and does not leave marks on the workpiece, so it can be used before the bend is lost. Approximate service life - 2 years;
- The top forms do not polymerize together with the coating, but are removed immediately after the material has hardened;
- The technique of working with forms allows you to save material and create nails that are close in thickness to natural ones;
- The extension procedure is halved and ranges from 1 to 1.5 hours along with decoration;
- The end result requires almost no improvement. After polymerization, you only need to remove the excess and polish the resulting nail.
- Unlike liquid tips, where the material is laid only on 2/3 of the natural nail, the upper forms imply the laying of the gel on the entire nail plate;
- After removal, it is not required to report the material.
Description of the extension technology on conventional forms: