How to make a pencil case with your own hands without a zipper. DIY pencil case: creative ideas from various materials. We select the source material
A pencil case is not just a school attribute, but useful thing to help organize your workspace. You can put pens, pencils, felt-tip pens, erasers, rulers, sharpeners and other stationery in it. So that you or your child have an exclusive pencil case, you can sew it with your own hands.
How to sew a pencil case with your own hands?
You will need:
- Canvas, size 18x7 cm;
- 3 multi-colored cuts of the 1st and the same fabric, different sizes- 18x4.5 cm; 17x5 cm and 17x6 cm;
- Lining fabric, size 17x18.5 cm;
- Batting, size 17x18.5 cm;
- Zipper 17 cm;
- measuring tape;
- safety pins;
- Needles and notes;
- Scissors;
- Sewing machine.
Instruction:
- Lay the colored pieces of fabric and the canvas next to each other on the table. Sew all the pieces together with an open seam. Then sew along all the segments with the same seam. Place a piece of fabric for the lining next to it, align them and fasten with pins. Sew them on the 1st side.
- Turn the sewn fabric inside out and attach the zipper so that the zipper is on the right and the zipper is hidden by the fabric. The stripes on the fabric should be perpendicular to the lightning. Fasten with pins, then sew on a typewriter.
- Divide the fabric into lining and outer, fold over each so that the free edge touches the other, unsewn edge of the zipper. Fasten with pins, then sew on a typewriter in 3 layers. As a result, you should get a sharp cylinder with lightning.
- Open the zipper, turn the pencil case inside out. Lay it out so that there is an equal amount of fabric to the left and right of the zipper. Pin the open ends of the cylinder together. Be sure to sew the zipper tape with an overlock or zigzag on a sewing machine. Trim off the excess zipper.
How to make a pencil case with your own hands?

You will need:
- Toilet paper tube or paper towels- 2 pcs.
- Scissors;
- Cutter;
- Lightning;
- masking tape;
- Fabric (fleece or felt);
- Threads and needles.
Instruction:
- Cut 1 tube. Tape the 1st and most of the 2nd with masking tape. A small part of the 2nd tube will serve as a lid. Now sew a cover for your pencil case. Suitable for the child bright colours- this will cheer you up, and the pencil case will not be lost in the baby's backpack.
- The cover must be freely put on the tube. Sew the zipper into the cover and sew the edges. For the lid and bottom, cut out 2 circles from cardboard, glue pieces of fabric to them (you can use other colors than the cover itself).
- Sew the bottom and lid in place.
Pencil cases for girls: options
simple pencil case

You will need:
- Bright oilcloth or beautiful fabric;
- Lightning - 20 cm;
- pins;
- Threads and needles;
- Scissors;
- Sewing machine;
- Decorative elements.
Instruction:
- Cut 2 pieces from the base material, 20x10 cm in size. Fold the fabric and snake with the right sides so that the material is located on top of the zipper and carefully align the edges. Temporary stitch the zipper and fabric to make it easy to sew on the machine. Using a sewing machine, sew along the basting without touching it. Do exactly the same manipulation with another piece.
- Open the zipper and sew the pencil case along all the edges. Turn it inside out and close the zipper. The finished pencil case can be decorated with funny figures, beads and flowers.
Beautiful pencil case for a girl

You will need:
- The main fabric for the pencil case - 38.1x43.2 cm;
- Overlay fabric - 38.1x43.2 cm;
- Batting - 25.4x43.2 cm;
- Harness - 115 cm;
- Pencil;
- Needles and threads;
- Scissors;
- Spray;
- Lightning - 40 cm.
Instruction:
- Apply any design on the main fabric. Make sure that the applied contours can be easily washed off. Fasten the fabric with batting and quilt along the applied contours. Rinse the contours with a spray bottle.
- Now you can make a frame for the zipper. Make limiters, stitch the main fabric and lining. Stitch the face of the stopper to the underside of the fastener frame. Treat the edges of the pencil case with a beautiful tourniquet.
- Make cuts on the folds - this is necessary so that the fabric does not bulge. Sew the outer and inner parts of the pencil case and the lining. Sew them face to face so that the seams are not visible. Turn out the pencil case.
- Pin and stitch 1 side. In the same way, issue the 2nd, leaving an unsewn segment. Turn the hole inside out and sew with a blind stitch. The finished pencil case can be decorated with flowers or beads.
Do-it-yourself pencil case: photo


Handmade is a fashion trend that Lately gaining momentum. Pencil case - stylish accessory that every student needs. Sewing it is not difficult, and the process of making it can be an exciting game, especially if you involve your child in it. Let him talk about his desires, choose the fabric he likes, or just think over the design.
A pencil case is a useful thing if you need to organize your workspace. Pens, pencils, felt-tip pens, erasers and other necessary items are not scattered on the table and are not lost in the bag.
And school pencil cases are just as necessary for children as notebooks or a diary.
But those sold in stores are often too bulky, with ugly monotonous patterns (pencil cases for girls - with pink fairies, for boys - gloomy dark blue cars, and there are almost no alternatives!), And some of them are sometimes dangerous. - Poorly made plastic edges or a protruding tip of the fishing line can be scratched.
An attempt to buy such a necessary thing at school turns into torment. But you can sew one yourself with the help of the videos presented in this article - it will take quite a bit of time, soft fabric will never cause scratches, and the choice of its color is up to you.
How to make an original pencil case with your own hands? In that step by step master class from the photo you will see that it only takes five steps.
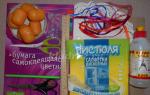
You will need:
- a piece of canvas (18 x 7 cm);
- three multi-colored cuts of the same fabric - you can take any, for example, linen:
- the first of them is 18 x 4.8 cm;
- the second - 17 x 5 cm;
- third - 17 x 5.8 cm;
- lining fabric - 17 x 18.5 cm (if the lining is not always visible, this still does not mean that it should be boring and one-color, a good thing is beautiful from all sides);

- a piece of batting 17 x 18.5 cm;
- zipper at least 17 cm long;
- measuring tape;
- safety pins;
- sewing machine.
The finished pencil case, as in the photo, according to this instruction should turn out to be 9 x 17 cm in size. Please read all instructions carefully before you start cutting. Even a children's pencil case with their own hands cannot be sewn without careful measurements.
We make a children's pencil case for the school with our own hands: a step-by-step description
So, we begin to sew our own school pencil case for pens, pencils and other office supplies.
1. First we create the outer part - this is the most creative moment. Lay out the colored pieces of fabric and canvas next to each other - this is how your pencil case will look from the outside (see photo). Then sew along all the pieces with an open seam.

2. Place a piece of fabric next to it, intended for lining. The stitched fabric on the "outer" side should be exactly the same size as the lining. Line them up and pin them together, then sew along one side.

3. Turn the sewn fabric inside out and attach the zipper so that the clasp is on the right and the zipper itself is completely hidden by the fabric (see photo). The stripes on the fabric should be perpendicular to the zipper. Fasten with pins, and then sew on a typewriter through all three resulting layers (fabric, lining, zipper - on its “right” side, when viewed from the side of the lock).

4. "Separate" the fabric into the lining and the outer part. Bend each of them so that the free edge touches the other, unsewn edge of the zipper - respectively, on both sides. Fasten with pins, and then sew on a typewriter (all three layers again). You should get an open cylinder of fabric with a zipper.

5. Open the zipper and turn your pencil case inside out. Lay it so that there is the same amount of fabric to the right and left of the zipper, pin the open ends of this “cylinder” with pins. Overlock or zigzag on a typewriter, be sure to flash the zipper tape.

Cut off the excess part of the zipper, if there is one (the end without a lock; it is on this side, if you did everything correctly, that an extra piece of tape should remain - in the event that, of course, if it was originally longer than 17 cm).
Since the pencil case is made of fabric without any frame, it is flat and takes up exactly as much space as the things lying in it take up. But it can also be quite roomy. The perfect item for a school backpack!

Video: how to make a pencil case with your own hands
In such a pencil case, not only pens with pencils will fit, but also scissors with a square.
You will need:
2 types of fabric (for the outside and for the lining);
Zipper 25 cm long or a little more;
A pair of stationery clips;
pins;
Scissors;
Sewing machine and thread.
Work sequence:
1. Cut out 2 pieces of each type of fabric measuring 25x16 cm each.

2. Lay one of the lining pieces face up on your work surface. Lay the zipper face up on top. From above - a detail from the main fabric inside out. Pin with pins, grabbing all layers of fabric and zipper tape, as shown in the photo.

3. Sew.

4. Lay the second piece of lining face up on your work surface. Place the parts with a partially sewn-in zipper on top, as shown in the photo. Then - a detail from the main fabric inside out. Pin the two layers of fabric and the zipper tape between them with pins.

5. Lay out a line.

6. Straighten the details and iron.
7. Run stitches along the zipper.

8. Open the zipper. Fold and chop the parts as shown in the photo. Direct the zipper towards the lining, and the allowances towards the main parts, and secure with clips.

9. Sew along the perimeter, leaving a hole, as shown in the photo above.

10. Cut off the corners, retreating a couple of millimeters from the seam.

11. Turn out the pencil case. To turn the corners well, you can use a stick.

12. Sew up the remaining hole.

13. It remains to fill the lining inside - and you're done. Finally, you can put a name tag on the clasp.

Photo and source: thediydreamer.com
2. Fabric pencil case with lining and front closure: a master class

Due to the reinforcement with interlining and a zipper in the front, such a pencil case keeps its shape well. Another plus is its capacity. If you want a smaller pencil case, resize the details and use a shorter zipper.
You will need:
2 types of fabric, main and lining (you can also use a patch of a third color to finish the zipper);
Adhesive one-sided interlining;
Zipper length 30 cm or more;
Water-soluble glue (glue stick is suitable);
Scissors;
Sewing machine and thread.
Work sequence:
1. Cut out the details of the pencil case. You need 1 rectangle from the main fabric measuring 30x35 cm, 1 the same rectangle from the lining fabric, 1 the same from non-woven fabric. Also - two rectangles 2.5x7.5 cm.

2. Glue the part from the main fabric with interlining.

3. Fold both small rectangles in half, as shown in the photo, inside out, and secure the folds with an iron.

4. Open the zipper half way. Glue the rectangles to the ends of the zipper as shown in the photo.


5. Lay the line along the folds of the rectangles, as shown in the photo. Tie at the beginning and end of the stitch.


6. Now glue the rectangles as shown in the photo and cut the zipper tails on both sides.


7. Fold the lining and main fabric pieces face to face and place the zipper between them as shown in the photo. Peel off with pins.


8. Lay a line, stepping back 0.5 cm from the edge.


9. Unscrew the parts, as shown in the photo, and secure with an iron.


10. Wrap the parts, forming a pencil case, fold as shown in the photo, and pin with pins.


11. Lay a line, stepping back from the edge of 0.5 cm, and turn the pencil case inside out.


12. Sew off the seams.


13. Fold the pencil case so that about 2.5 cm remains from the zipper on top, and fix the folds with an iron.

14 . Lay the lines on the sides, stepping back from the edge of 1.5-2 cm, then trim the edges with scissors.


15. Turn the pencil case inside out, straighten the corners well. Lay the side stitches as shown in the photo.
Many people think that a pen case and other stationery is an accessory for schoolchildren and students. In fact, it is needed in any apartment. It is convenient and practical to store pens and pencils in a place specially designated for them.
The stores offer a wide selection of accessories, but you can also sew the product yourself. Moreover, there are such models that do not require the use of a needle and thread in the manufacture.
Do-it-yourself pencil case
After about the first year, stationery and art supplies begin to appear in children: multi-colored pens, felt-tip pens and paint brushes. Moms have more housework, so it will be especially interesting for them to learn how to make a pencil case with their own hands.
 Parents of toddlers will need a pencil case. Firstly, the child will like to put products in bright containers. Secondly, this is a great chance for mommy to practice and improve her creative abilities.
No need to start with complex models. It will be enough to sew a regular bag-case with a drawstring. The work will take some of your time. A fabric bag can be decorated with braid, buttons, rhinestones or beads. Such pencil cases for children will be a real find, because they can be bright and interesting.
Before proceeding to the creation, it is worth considering the model of your pencil case, calculate its size, capacity and stability. All these points must be considered before you start sewing the product, because it will be sad if the supplies for work or painting are not included in the bag.
One of the lightweight models is a one-section cover with a zipper. At correct work such a bag is modified. Then the internal space will be divided into two or three auxiliary departments, each of which can be closed with a zipper.
Bags vary in shape and size. They can be in the form of a cylinder, a parallelepiped, an animal, such as a cat. Experienced needlewomen can knit a fantasy pencil case with knitting needles, but it is better for beginners to choose simple models and the following fabrics:
- Synthetic
- Dense and non-slip, for example, a piece of unnecessary jeans or colorful cotton fabric (chintz, calico, satin).
- Jacket, raincoat, upholstery.
We sew a shark bag
An original handbag in the form of a shark will create good mood you and your child. For its manufacture it is necessary:

How to make a shark pencil case step by step


Felt cover
 Pencil cases made of felt are considered very original and easy to manufacture.
This material is malleable and requires processing, because its sections will not crumble, the inner and front seams only need to be overcast by hand, and to make the elements more beautiful, they are cut out with special scissors with serrated blades.
This method is also applicable to natural and faux leather, suede.
Model without a pattern
All you need for such a pencil case is a rectangular piece of material, a ruler, a pencil or chalk and sharp scissors.
In the fabric piece, you need to create small notches that will serve as loops for brushes, pencils and pens. The holders are made along almost the entire length of the workpiece, with the exception of the front side, into which the color roll will be wrapped. In order for the bag not to open, from the side where there are no cuts, it is necessary to attach a braid or ribbon of sufficient length. Wrapped around the product, it will perfectly fix everything that is laid out inside and decorate the thing.
Attention, only TODAY!
Making a pencil case for a school with your own hands is not only a budget option, but also an opportunity to show creativity and your design abilities. Sewing a pencil case will be an exciting pastime for spending time with your child, and later it will become a cute little thing in everyday school life. Master classes on creating pencil cases will help you create an identical version of the pencil case or come up with your own completely new one.
Plastic bottle pencil case
Necessary materials:
- 2 plastic bottles(bottles must be taken of the same type, type, volume and from dense plastic);
- colored zipper with slider;
- glue gun (hot glue) or Moment glue;
- scissors.
We decide on the length of the future pencil case and cut off the top of each bottle. To determine, you need to take a pencil or pen so that it fits freely into the body of the pencil case. From the bottles you need to make two parts (long - the body of the pencil case, short - the lid).

The pencil case will be fastened with a zipper. The length of the zipper must be calculated based on the diameter of the bottle. You need to take a zipper and wrap it around the bottle. For convenience, it is worth leaving a margin for a diameter of 1-1.5 centimeters. The excess part of the castle must be cut off from the side of the slider.

To glue the zipper, you need to unzip it.

You need to start gluing the zipper from the inside of the future pencil case.

It is worth considering the moment that the slider should move freely along the zipper, when gluing, you need to step back a little from the edge. First you need to glue the zipper to one part of the pencil case.

Check if the zipper is fastened. The slider should move freely and freely connect the zipper without leaving any gaps.

Glue the second part of the zipper to the other bottle.

For the aesthetic appearance of the pencil case, it is necessary to avoid getting glue on the outside of the zipper and the bottle itself.
We put pens and pencils into the bottle, fasten the zipper and the budget, creative version of the pencil case is ready.

Pencil case
Necessary materials:
- 2 cardboard cylinders (sleeves) from toilet paper;
- stationery knife or scissors;
- felt fabric of the desired color of the future pencil case;
- lightning;
- cardboard;
- needle;
- thread for sewing;
- Scotch;
- glue.

One sleeve must be cut into two parts in a ratio of 1: 3. To do this, you can use scissors, but it is more convenient to do this with a clerical knife.

Most of the sleeve must be glued to the whole cardboard cylinder using adhesive tape.

Prepare 2 pieces of felt fabric according to the size (length and diameter) of the glued cylinder and the remainder of the cut (this is the cover of the pencil case). Sew a zipper to the fabric, thereby connecting both parts of the felt.

The resulting rectangle of felt with a lock must be folded in half lengthwise, right side inward. Accurately chop off the folded edges with pins and stitch.

Turn out the stitched part. Lubricate cardboard parts with glue and put in a felt case.

From thick cardboard, two identical circles. The diameter of the circle is equal to the diameter of the sleeve.

For the density of the pencil case, several cardboard boxes can be used in such a base.
From felt you need to cut out circles equal to cardboard. For convenience, you can put a cardboard circle on the felt and circle it.

The felt must be glued with a cardboard circle and sewn to the main part of the pencil case (top and bottom).

pencil case book
Necessary materials:
- two pieces of leatherette or A4 leather;
- long zipper with slider;
- 2 large needles;
- a sheet of paper or cardboard;
- dublerin;
- thick nylon thread;
- scissors;
- hammer;
- knitted elastic band;
- glue "Moment";
- lighter;
- ball pen;
- ruler;
- iron;
- marker;
- decorative materials or colored pieces of leather.
Draw a rectangle measuring 245 by 195 millimeters on a piece of paper. Round the corners equally with the help of improvised round objects.

Attach the pattern to the skin and translate it, taking into account allowances of + 1-1.5 centimeters for the outer part of the pencil case. For the inside, allowances are not needed.


The skin needs to be strengthened with dublerin. Cut out 2 parts, according to a paper pattern, from dublerin without allowances. Attach dublerin to the skin with the sticky side. Smooth the skin through dense fabric, with a hot iron, from the side of the dublerin.

On the outer part of the pencil case (on the skin), you need to make, using a ruler, decorative markings with a ballpoint pen.

Sew markings with a sewing machine different colors threads (fields, lines, cells). It is necessary to ensure that all ends of the thread are on the wrong side of the skin and are carefully knotted or glued.

From colored pieces of leather, you can make the design of a pencil case. You can also decorate the pencil case with ready-made purchased decorative details. At this stage, you need to make figured triangular cuts at the corners of the leather part.

Lubricate triangular cuts and edges-allowances with glue. The glue needs to dry a bit to set quickly. Wrap the part with a cloth and carefully tap the edge with a hammer. The edge should stick together and the part around the perimeter should be even.

Mark the center of the pencil case. Open the zipper and paste over the leather part around the perimeter with it. You need to start pasting the lightning from the center from the top with the slider. Glue the zipper in a circle, and then cut off the excess part. Singe or sheathe the edges of the zipper.

Decorate the inside of the pencil case. Take a second piece of leather and sew rubber bands to it to hold pencil pens, rulers, erasers, and more.

The edges of the elastic must be tucked into wrong side, singe and stick to the skin.

Lubricate both leather parts (outer and inner) with glue from the inside and connect, pressing firmly for a long time (you can put it under a book).

The end result should look like this:


Denim pencil case
Necessary materials:
- two pieces of denim measuring 26x12 centimeters;
- two pieces of plain fabric, for lining, measuring 26x12 centimeters;
- a piece of batting or thin insulation measuring 26x12 centimeters;
- soap, chalk or wax pencil for marking;
- scissors;
- needle;
- sewing thread;
- zipper 25 centimeters long;
- sewing machine;
- ruler;
- decorative elements (buttons, beads, flowers).
For an unusual type of pencil case, you need to quilt the outer denim and batting. To do this, you need to make a markup, as in the photo.

Fold the jeans and batting evenly together and pin them between the marking lines. Via sewing machine stitch the fabric along the marked lines.

In the same way, you need to quilt the second piece of denim.

You can immediately sew decorating elements on the outer sides of the pencil case.


Stitch the lining fabric to the wrong side of the zipper.

At this stage, you should get 4 pieces of fabric stitched to the zipper from different sides (jeans with batting, lining, jeans, lining).

Unzip and lay out the fabrics in different directions, as they should be (jeans with batting - lining, jeans - lining), on the wrong side. Sew along the perimeter of the lining and denim parts separately. Turn out the pencil case, put the lining inside.