Simple ideas for manicure at home. Simple, beautiful manicure at home: tips, features, ideas (51 photos) Interesting manicure at home
A business card of a woman is beautiful, well-groomed hands. To get a manicure, it is not necessary to go to the salon, you can carry out the procedure at home. The main thing is to acquire the necessary tools and follow the recommendations.
Home manicure technique
Mastering the subtleties of manicure is easy. First pick your tools:
- Knipser with sharpened blades. He easily "bites off" his nails.
- Cuticle nippers to create a trim manicure. Choose small-sized models that fit comfortably in your hand and do not cause discomfort during operation.
- (another name is a trimmer). More often double-sided, made of a metal alloy. On the one hand - a spatula for pushing back the cuticle. The other edge is pointed, with its help they remove dirt from under the nails or a thin layer of cuticle adhered to the nail plate.
- Nail scissors. Straight lines are designed to shape the length and shape of the nails, and rounded ones are designed to remove the cuticle.
- Orange sticks made of soft, but at the same time dense material. With their help, you can easily remove the cuticle without damaging the surface of the nail.
- 180 grit nail file ideal for shaping natural nails. And - a nail file for polishing with different grain sizes. You need to start polishing the nail from the largest, ending with the smallest. Do not get carried away with polishing. For owners healthy nails Enough 1-2 times a month.
Photo gallery: necessary tools for the procedure
Using a nail clipper, you cut the nail at an angle of 90°, preventing it from splitting.  The tool must be of high quality, durable and lightweight. Buy pushers made of hypoallergenic steel. They are comfortable and last a long time.
  Give preference to medical steel nail scissors
  The material from which orange sticks are made has antiseptic properties.
  Grit should be displayed on the surface of the file
You will also need a deep bowl, a towel, nail polish remover, cotton wool, moisturizing oil. If you want to do an unedged manicure, then buy a cuticle softener.
Now you need to select a form. By choosing it correctly, you can make the nail visually longer, and the fingers more elegant. Remember that all nails must be the same length, otherwise it will be conspicuous.
Features of trimmed manicure
Wash your hands with soap and remove old polish from your nails. Spread a towel on the table, put a bowl of warm water. If desired, add some liquid soap to the water. Now start the process:
- If you are right-handed, start the manicure on the left hand. Dip your hand into the bowl and hold for a few minutes.
- Remove your little finger from the water, wipe it dry with a towel, use a trimmer to move the cuticle to the base of the nail.
- Clear nail plate from rough skin. Cut the cuticle carefully with cuticle nippers or special nail scissors.
- Repeat the same procedure with the rest of the fingers (start with the little finger and end with the thumb).
After processing the left hand, change the water. Dip your right hand into it. Carry out the manipulations that were done on the left. After that, polish your nails and apply cuticle oil, rubbing thoroughly into each finger.
If you do not want to use colored polish, then apply a base coat or a clear coat to protect the nail surface from harmful effects. detergents and powders.
Video: do-it-yourself trimmed manicure
Features of the unedged version
In beauty salons, hardware unedged manicure is done. If you do not have a special device, it does not matter. Making it unedged is pretty easy.
The essence of the method is that the cuticle is not cut off, but softened and pushed back. To soften the cuticle, a remover is used - a product based on alkali or acid. Acid-based remover should not be left on the cuticles for more than two minutes. Alkaline removers are more gentle, but the effect of them is noticeable only after 15-25 minutes.
Advantages of unedged manicure:
- The action of the remover takes 1.5 - 20 minutes, depending on the composition. In any case, there is no need to wait for the skin and nails to dry, as is the case with softening baths.
- The ease of execution of such a manicure also makes it popular. With the application of the remover and the subsequent removal of the cuticle, even a beginner can handle it, even on his own hands.
However, there are also disadvantages:
- There is a risk of damaging the nail plate. Remover is a definite chemical composition, which, in addition to keratinized skin, can also corrode the nail plate at the base, and this is dangerous.
- Tissue burns and plate splitting are possible. Therefore, at home, it is not recommended to use potent drugs containing aggressive acids.
Before the procedure, wash your hands and wipe dry. You don't need to soak your brushes in water. Steps during the procedure:
- apply cuticle remover;
- starting with the little finger, with a special ceramic hoof or orange stick, move the skin and clean the nail plate;
- remove the softened skin, give the nails the desired shape;
- wash your hands, and wipe the nails themselves with a piece of cotton wool with an alcohol solution to degrease the nail plate;
- apply regular or clear varnish.
The main advantage of an unedged manicure is that during its implementation there is no pain associated with cutting the cuticle, and also minimizes the risk of infection.
Video: unedged manicure at home
Secrets of sustainable coverage
When doing a manicure, every woman dreams that he would last as long as possible. It has long been observed that unedged manicure cosmetical tools They last longer on nails than when cut.
On polished and degreased nail plates, the varnish lays down better and lasts longer. The main thing is not to be zealous when polishing your nails so as not to damage them.. Degrease with alcohol solutions. Dampen a cotton pad with rubbing alcohol and wipe each nail thoroughly.
The quality of the varnish is also important. It is better to buy products from well-known companies. If you bought a polish that lasts a long time, store it in a dark and preferably cool place, such as a refrigerator.
Do not shake the bottle before applying nail polish. The coating will lie unevenly on the surface and upset the appearance of bubbles. It is best to roll the bottle between your palms before opening.
One layer of varnish is not enough, but three or more is already too much. The best option is two layers. Before painting with varnish, coat your nails with a protective coating or base. When it dries, apply varnish. Cover with the second layer not earlier than after 5-10 minutes; let the first coat dry, otherwise there is a risk of wrinkling. If something went wrong and defects appeared, then the varnish must be erased and everything must be started anew.
At the finish, apply a fixative to the nails. Let the polish dry for 15 minutes before doing your daily activities. Do not rush - and then everything will work out.
Do your homework with gloves. This will prolong the duration of the manicure, as well as protect the skin of the hands from the harmful effects of detergents.
To make the manicure look fresh, cover it with a layer of fixative every few days.
Video: how to make the varnish stay on the nails for a long time
Design Ideas
The easiest way to apply varnish is to apply a single color coating on all nails. If you want variety, paint each nail with varnish different color or select only some fingers.
Appeared in the middle of the last century, it quickly gained popularity among women of all ages. It is not necessary to limit yourself to white varnish, bright colours also suitable for french.
You can easily make a chess manicure at home that looks original. You will need black and gold varnishes, paper tape and a fixative. First coat your nails with black polish, let it dry. Using adhesive tape, close the nail so that only a quarter remains free, on which gold varnish is applied. When it dries, do the same manipulations with the second quarter.
Lunar manicure looks luxurious. For him, you will also need paper tape, as well as a thin brush for manicure.
Using a thin manicure brush, you can apply a spectacular polka dot manicure.
Your nails will be admired if you cover them with multi-colored peas of medium size.
Draw a simple pattern on your nails. First, practice on paper, and then start drawing on the nails. Try to put a picture not on all nails, but select only a few.
Do not forget to cover the varnish with a fixative at the end to keep the manicure for a long time.
Modern manicure has become a work of art. But even simple, neatly painted monophonic varnish nails are admirable. sticking to simple recommendations, you will make a high-quality manicure that will please you for a long time.
(1
people already rated)
It is difficult to imagine the nails of a modern woman without an original manicure. Today, women of fashion only do what they compete in who has the most fashionable and original manicure.
But often, we simply do not have enough time to go to the salon and get a manicure.
We offer you several options for an original manicure for all occasions, which you can do yourself at home using simple tools at hand.
But you should be patient, because. Not everything can work out the first time.
All you need in order to become the owner of beautiful nails is multi-colored varnishes, special manicure brushes that can be purchased at any cosmetics store or other improvised means. More on this later.
1. So, let's start with the simplest.
As for me, the easiest version of a manicure is a manicure with peas or a dot. Such a manicure is easy to do. All you need is a special brush with a ball on the end, or you can use a regular pen. Here is a good example. 


2.Ombre manicure.
Popular and trendy ombre manicure, i.e. gradation from dark to lighter color and vice versa can be easily done at home. All you need is a few polishes and a sponge or a piece of foam rubber.
There are two options gradient manicure. The first and easiest option is to paint each nail with a single-color varnish with a color gradation from dark to light. Of course, if you have five varnishes of different shades of the same color, then the task is greatly facilitated.
You can also make such a manicure using only two varnishes - any colored varnish and white.
![]()
The second version of the ombre manicure is a little more complicated, but still it can and even needs to be done. Apply several strips of varnish of different colors to the sponge and quickly apply to the nail, carefully painting over the entire surface of the nail with horizontal movements. Gently remove any remaining lacquer with cotton swab.


3. Negative space.
The now popular manicure called “negative space” is also within the power of every girl to do on her own. To do this, you need to purchase various stickers for manicure in advance. These can be stencil stickers for a jacket or strips of foil for a manicure. What pattern to create is already a flight of your imagination. And we offer you several schemes-options.


4.Geometric manicure.
In general, depict various geometric figures, stripes are always up to date. And by the way, it's not very difficult. For this manicure, use special stickers or regular tape.


5. Manicure "Frame".
Manicure frame is today's trend. You can do it in two ways. First: paint the nail in one color. This must be done very carefully, carefully painting over all corners of the nail. Let the varnish dry. And then paint the nail with the second color. Do this in such a way that the bottom and sides of the nail remain unpainted.

DIY frame manicure
And the second option: paint the nail in one color, and then, using a thin brush, circle the nail around the edges.

DIY frame manicure
Another option for a frame manicure is to simply glue the nail on the sides with round beads or make polka dots with varnish.

6.Leopard.
Doing a leopard manicure on your own is also not difficult, for those who really want it.
![]()
DIY leopard manicure
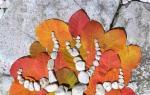
7. One more original idea for manicure is a manicure using feathers. If you have beautiful feathers, then feel free to use them to create an amazing manicure.

do-it-yourself feather manicure
8. Manicure in the grid.
A manicure in a small mesh will look very original. To do this, you need to find a dense fine mesh and proceed.

do-it-yourself manicure with a mesh
9. Caviar manicure.
The so-called caviar manicure is also very popular now. There are special varnishes, and it can also be made using special small beads for manicure. All you need to do is paint over the nail and “roll” in beads.


Many daily urgent matters often do not leave time for self-care. Manicure won't take away a large number time, especially for this it is not necessary to go to the salon. You can take care of the handles at home, allocating a little time a couple of times a week. For a well-groomed look, you can limit yourself to just a plain bright coating. And you can set aside a little more time for yourself and choose fashion design for independent manicure. Most stylish simple ideas for manicure are available not only for professional performance, they can be easily mastered by both schoolgirls and ladies of retirement age.
Coating with rare brush decor
This design will look great both in a restrained office range and in rich contrasting shades. This manicure is performed very simply - in just three or four steps.
- First you need to cover the nails with a base color and wait until it dries completely. You can choose a delicate pastel tone or a bright neon color. If necessary, the base coat can be repeated to achieve greater coverage.
- Next, you need to take the second color and drop a drop of varnish on some piece of paper or film. Then you need to dip the very tip of the brush into the varnish and carefully make vertical stripes on the nail plate.
- After that, you need to wait until the varnish dries and repeat the manipulation with another additional varnish.
- If you want an even more interesting manicure, then you can take the third color and make another layer of stripes.

It is important to remember that before using each new color, the brush must be cleaned of the remnants of the previous varnish with a special liquid. If this is not done, then the manicure can turn out to be dirty and sloppy.
Decor with a cocktail tube
This design method will especially appeal to young people who are fond of graffiti and punk rock culture. Materials for this decor are inexpensive and can be found in every home.
To create a fashionable manicure you will need:
- 1 cocktail tube, which needs to be cut into several pieces;
- base varnish for the main coating;
- 2-3 bright varnishes for decor (varnishes must be new and not thickened);
- some duct tape (optional)
- sheet of paper or napkin.
Design step by step:
- First you need to cover the nails with a light color, it is best to take a dense white varnish. The skin around the nail can be covered with adhesive tape so as not to stain.
- Next, you need to take a piece of a cocktail tube, squeeze one end and dip it in a bottle of varnish or drip a little on a piece of paper.
- Then the varnish from the tube must be shaken off onto the nails or blown into the tube from the other end. You don’t need to be too careful - the more splashes and the smaller they are, the more interesting the effect will be.
- You can repeat the previous paragraph with a different color without waiting for the first layer to dry.
When the drawing is ready, it must be dried and then covered with a layer of a colorless top coat with a glossy effect. Stylish manicure ready!

Graphic style manicure
For this design, you will need a couple of bright saturated varnishes. The selected colors must necessarily contrast with each other so that the design looks the most advantageous. To create this manicure, you will also need adhesive tape and a top coat.

Order of execution:
All nails must be covered with the main varnish - it can be any of the selected shades.
- After the first layer has completely dried, it is necessary to stick thin ribbons of adhesive tape on the nails in different directions - along, across and diagonally. Thus, geometric shapes are formed from the strips - rectangles, squares and triangles. The drawing can be made not only symmetrical, the lack of symmetry also looks very dynamic and stylish.
- All places of the nail plate free from adhesive tape must be covered with the rest of the varnishes in contrasting shades. When they are completely dry, you need to carefully peel off the strips of adhesive tape so as not to damage the pattern. Top coat with a layer of transparent fixing varnish.
A few tips for beginners from professional manicure masters:
- For short nails, a pattern of lines directed vertically or diagonally is best, they visually lengthen the nail;
- The square shape of the nails goes well with a straight vertical or horizontal strip;
- For decoration in graphic style it is better to choose dense creamy textures of varnishes without sparkles and mother-of-pearl effect;
Do not avoid contrasting colors, bright and catchy combinations are very popular now. Orange and turquoise, red and beige are perfectly combined with each other, as well as the unchanging classics - black and white.

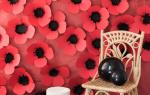
Stripe print manicure
The strip is one of the most best ideas for manicure on short nails. To easily make such a manicure yourself, you need to purchase special strips for decoration. Like many other materials for nail design, they are sold in specialized stores of manicure supplies.
- Manicure strips are very easy to use. With their help, you can create not only a striped coating on your nails, but also geometric shapes, ornaments and patterns. First you need to apply a base layer of varnish on the nail plate, which will serve as a background for the decor. It is best to take white.
- After waiting for the background to dry completely, you can begin to form a striped pattern with ribbons. It can be made absolutely anything - wide or narrow, horizontal, vertical or diagonal. You can fantasize and come up with new ideas endlessly! But you can stop, cut off the extra edges of the ribbons and cover the finished manicure finishing varnish. And you can not touch the ribbons protruding beyond the edge of the nail and cover the nail on top with blue or blue varnish. After this layer has dried, carefully peel off the strips. It turns out a neat beautiful strip in nautical style resembling a vest.
- You can complement such a manicure by depicting small details over a blue-white strip with red varnish. It can be hearts or stars. And with black varnish, you can draw a small anchor in the continuation of the marine theme.
- After drying, fix the pattern with a top coat.
- Also, with the help of a manicure tape, you can create a "quilted" manicure. For it, you need to stick the strips crosswise on the base varnish-base and cover it with a contrasting color. After removing the strips, a quilted pattern is obtained, as on a warm outerwear. color scheme can also be matched to your winter wardrobe.

Matte finish at home
Another easy way to create a trendy manicure for which you do not need to buy any additional coatings. To create a matte effect you will need:
- The usual dense varnish without sparkles and mother-of-pearl;
- water vapor;
- Nail polish remover.
First you need to apply varnish on your nails. If necessary, you can make two or three layers so that the color is dense. Then, without waiting for drying, put your hands palms up over the steam for a couple of minutes. To avoid burns, a distance of 15 cm must be observed.

Another option matte manicure using the stripes we wrote about above:

Drawings with a thin brush
In stores for manicure masters, you can find special varnishes with a thin brush, designed for painting on nails. Or you can buy a brush separately there. With its help, it is very easy to create original and unusual drawings. You can take as a basis the ideas presented below, or you can create your own author's works, which no one else can find.

Simple drawing with a needle
If there was no brush or special varnish at hand and nowhere to buy them, then this is not a reason to deny yourself a painted manicure. An ordinary toothpick or sewing needle will serve worthy replacement professional brushes. It is enough to practice a little and with the help of these simple tools that everyone has at home, you can create very beautiful and subtle drawings on the nails.

These designs can be drawn on the nails with a regular needle:

A few more design ideas in the video:
Lace nail design
This manicure is very elegant and festive, it will perfectly complement any solemn image. This design can be easily done on your own, with it the nails look very feminine and gentle.
For this manicure you will need:
- Small pieces of very fine lace with a small pattern;
- Lacquer light beige or pink;
- fixing coating;
- Scissors and toothpicks.
Execution steps:
- First you need to cut ten pieces of lace in the thinnest place according to the size of each nail. All nails must be covered with a base light varnish, it should have a dense creamy texture.
- Next, you need to carefully attach the lace blank to the nail and smooth it with a toothpick. First of all, the lace detail is applied to the center of the nail plate, and then it must be distributed along the edges.
- Then you need to apply a colorless fixing coating over the lace. It is better to make several layers until the nail plate is completely smooth, after carefully drying the previous ones.
- Sometimes the lace blank cannot be adjusted exactly to the size of the nail plate. In this case, the parts of the lace that protrude beyond the edges of the nail can simply be cut off with nail scissors after the varnish has dried.

You can also draw lace with a brush or use stamping:

Stylish manicure with dots
The point design looks very stylish, but at the same time restrained. It is well suited for school, university or office and is very easy to implement. If there is no time left for a complex design, but you want to look fashionable, then this design will suit you perfectly.
All nails should be varnished in a calm shade - beige, light pink or pale blue. And then just put a few dots on the dried coating with a dark varnish, using a thin brush.

The points can be positioned in different ways- in the corner of the nail or in the form of a strip in the center. The combination of several black dots with one red one looks very original.
Beginners should not be upset if some design did not work out the first time. In manicure, it is very important to be patient and try again every time. You need to start with the implementation of the simplest ideas. Skill will come with experience and then even the most complex drawings will be obtained, which at first seemed impossible.
Every girl should have beautiful and well-groomed hands. Since doing a manicure at home is very simple, in order to always be neat, absolutely no costs are required.
Nail preparation
The first step is to prepare the nail plate and cuticle for further processing. To get started you will need:
- Tweezers, trimmer;
- Scissors;
- File;
- Scrub, oils, cream;
- Degreaser (you can take alcohol or face lotion).
To learn how to do a cool European manicure, you need to remember that the most important part is preparation. On this tapa, the old coating is removed, the cuticle is trimmed, the nails are filed and their surface is leveled. For the procedure, you can use special apparatus or several nail files and hand tools (they must be sharpened before use).
Step-by-step instruction how to prepare nails for manicure at home:
- The old varnish is peeling off. Immediately after this, the nails are soaked in the bath. We recommend adding a little to the water sea salt and iodine - then the plate will become thicker and stronger;
- After 5 minutes of “soaking” the nails, you need to get one finger at a time and check the cuticle. If it is easily deformable, then it can be cut. Gently with a file or a special stick, the skin is brought to the hole itself, after which it is cut off. Depending on experience, you can use a trimmer (for professionals) or tweezers (for beginners). The action is repeated with each nail;
- After trimming, you need to lubricate the cuticle with oil. Most often, spas use cocoa or shea for this purpose, which have excellent antimicrobial and regenerating properties;
- Further, the plate is leveled and the nails are given the desired shape. For rough processing - shaping, rigid tools are selected. For example, with diamond or mineral coating. For soft - cleansing the nail from growths and bumps, more gentle - silicone or wood;
- When the treatment is completely over, it remains only to degrease the surface and the hole, remove the remaining oil from the cuticle;
- If everything is done, then sterilization of instruments is mandatory. If it is performed, that is, the main work is carried out by machines, then they are disassembled and washed in a special solution. Hand tools are rinsed in Chlorhexidine.
 Photo - Preparation for manicure
 In exactly the same way, trimmed pedicure is carried out at home at home. After that, you can start designing.
An unedged or European manicure is carried out without tools - it is easiest to do it yourself. The plate is cleaned of varnish and fat, then a special gel is applied to the cuticle. It is noteworthy that when using unedged equipment, You don't need to soak your nails.
After applying the softener, several minutes should pass, then you simply move the skin closer to the hole. The cuticle is very supple and soft. To remove it, you do not need to use any trimmers or scissors. It is removed even with an orange stick. It remains to wipe the plate with a remover and cover with a base for further staining.
Simple edged manicure with ordinary varnish
At home, it is easiest to do a manicure on short nails with your own hands. In addition, it is on small plates that it will look most advantageous. All points are performed in the same way as it is written in the section above. After giving the desired shape and degreasing, the plate is covered with a base - it will fill the cracks and become a solid and even base for the paint.
Can be done with normal varnish different kinds manicure:
- On the water;
- Gradient;
- Art design and many others.

Let's dwell on the most common coating - it is very easy to do it yourself and it does not require a lot of time. After the base has dried, a layer of colored varnish is applied on top of it. It must also dry completely. If the shade is not bright enough, then the surface is repainted.
In order for the manicure to last longer, a professional fixer is used. It performs several functions: it gives accuracy, strengthens the plate, helps to remove delamination and prolongs the life of the varnish. The fixative is often enriched with various vitamin and mineral supplements.
Video: do trimming manicure yourself
Learning to do French manicure
It is very simple to do a French manicure correctly, it does not require any special skills or tools, so it is often done at home. The only thing is that it is recommended to buy a white varnish with a thin brush. Of course, at home you can work with the help of stencils, but any professional master will say that only when drawing with a brush can you give the desired and nice shape nail.


Instructions on how to make a simple French manicure step by step at home:

Video: easy way creation french manicure
Lunar manicure with gel polish or shellac
The original moon manicure is becoming more and more popular, which is easily done with both shellac and ordinary varnish. Of course, if we talk about convenience, then it is best to do it with a gel - it lasts longer and it is easier for them to draw holes. By appearance, lunar is the complete antipode of French. If in the jacket only the tips of the nails are shaded with white (or another color), then in the lunar one - the holes.
To make it professional moon design, you need to prepare a manicure kit: these are trimming accessories, gel tools (removers, primers, etc.), an ultraviolet lamp.


Fashion manicure gel polish with rhinestones at home in stages:

In order for this unusual manicure to look interesting and stylish, you need to carefully select varnishes. Experts advise using paints in contrasting colors, for example, black and white, green and yellow. But, if you work in pastel colors (pink and white, brown and beige), you will get a more delicate design.
Video: 4 ways to draw a hole for moon manicure
Matte and mirror for short nails
IN Lately many girls began to create a design on their nails that does not shine at all. Some even use varnishes that harden after application and become powder.
Matte manicure or velvet at home can be done in three ways:
- Use regular varnish, and during drying, hold the nails over the steam for a few seconds;
- Use a special matte varnish;
- Work with special sand coatings. It is they who, after application, dry out and turn into texture varnishes.
To make interesting matte design, no special training required. It is enough just to buy varnish without gloss - they are sold in any cosmetic store.


step by step technology:

But the easiest and fastest manicure that can be done at home is with foil. In order for the nails to be shiny and glossy, they are glued with special stickers. To do this, they work with colored foil, on which patterns can be applied, or with simple stickers that repeat the mirror coating.
How is artistic mirror manicure with foil at home:

Similarly, a luminous manicure is performed at home - either luminescent varnish or foil is also used here.
Video: foil manicure
Water manicure in stages
Despite the apparent simplicity, water manicure or water design is quite difficult to perform. They can make the most unusual drawings, patterns, but for this you need to gain experience and purchase high-quality varnishes. To work, you will need a container with warm water (preferably disposable, because after nail art it will be damaged), glue, a needle, varnishes of the desired color.


Instructions on how to make a beautiful water manicure at home in stages:

The drawings obtained with the help of water manicure are very original and interesting, but they require a lot of time. Therefore, most often it is much faster and easier to make them with acrylic paints.
Video: we make drawings on the water for water manicure
Newspaper and ombre
The color gradient design is popular for its simplicity. If in the salons it is performed with a special airbrush, then at home it can be done even with a simple sponge. This is ideal for New Year, birthday or any other holiday.
flickr.comSo that after removing red or other bright varnish, the skin around the nails does not look like you have killed someone or have been poking around somewhere, apply a greasy cream to your hands before the procedure.
2. Remove the remnants of varnish from the skin
 flickr.com
 If you did not use the previous advice and the skin around the nails is stained, adhesive tape will help eliminate stains. Duct tape perfectly collects the remnants of varnish, especially silver.
3. We erase the varnish quickly

In the manicure departments of cosmetic stores they sell various means for quick polish removal. They are bubbles with a sponge soaked in cleansing liquids. You do not need to run a cotton swab over your nails: just dip your fingernail into the bottle and wait a bit.
Such a tool can be made independently. Take a small glass jar, place a cut-to-size sponge in it and soak it with nail polish remover. The principle of operation is the same.
4. Remove glitter polish

Soak cotton pads in nail polish remover, place them on your nails, and wrap each finger in foil. After 10 minutes, the varnish will come off easily, despite the sparkles.
5. Whiten nails

Sometimes colored varnish is absorbed into the nail plate, leaving behind an ugly yellowness. You can get rid of it with a whitening toothpaste. Take an old brush and clean your nails with it.
But to prevent such incidents from happening at all, do not forget to use a base coat before applying the main varnish.
6. Save a broken nail
You will need a tea bag and clear nail polish. Apply the latter to the damaged nail, and then place a patch cut from a tea bag over the crack. Cover the nail again with colorless varnish.
7. We store varnishes conveniently

If you store polishes in an opaque box, label their caps with the appropriate shades. So you do not have to get all the bubbles in search of the right one.
8. We make varnishes ourselves
If you don’t have enough varnishes or you can’t find the right shade in the store, you can do what you want yourself. You will need colorless varnish and mineral shadows. They are perfectly soluble in varnish, while you can adjust the saturation of the color.
You can also add various glitters to homemade varnish.
9. Opening a bottle of varnish without difficulty

If the cap of the varnish is glossy, tightly twisted and does not lend itself in any way, they will help to cope with the problem. By wrapping them around the lid, you will get the right grip and easily open the varnish.
10. We extend the life of a manicure

If you want the varnish to last longer, before applying it and applying the base, the nail plate must be thoroughly degreased. To do this, wipe your nails with a cotton swab dipped in white wine vinegar.
11. Paint your nails the right way
 flickr.com
 The accuracy of manicure largely depends on the technique of applying varnish. How to paint nails correctly, read this.
12. Create an even finish
 flickr.com
 One thick layer will never lie as evenly and neatly as several thin layers. Just be patient: let each layer dry.
13. Make a matte finish
 flickr.com
 Matte lacquers are very popular lately. But if you don’t have one, then just mix light loose powder with transparent varnish. In this case, mix as shown in tip number 8.
14. Make polish brighter
 flickr.com
 Many girls know that if you apply shadows on the base, they lie more evenly and the color is richer. It's the same with varnishes.
If colored nail polish looks faded, use white matte polish as a base. You will get a bright manicure and will be able to avoid multilayer application.
15. Apply glitter correctly
This video shows how to apply large glitter polish so that it adheres well to the nail and does not bulge.
16. Protect the skin

Applying a stamping or gradient to your nails can make the skin around it very dirty. We already wrote that in this case a special one will save. But if you don’t have one, use PVA glue: it also forms an easily removable film.
17. Eliminate manicure flaws

It is quite difficult to paint nails and not stain the skin around them, especially on the right hand. But it doesn't matter if it happened.
Take a thin brush, soak it in nail polish remover and wipe off the blemishes. Unlike a cotton swab, the brush does not cling to the varnish and does not leave lint.
18. Draw patterns on nails
 flickr.com
 If your eyeliner is dry or just doesn't work for you, don't rush to throw it away. Her excellent elastic brush - as a rule, there are just such - can be used in nail design to draw fine lines.
Some girls adapt even ordinary stationery markers for nail art.
19. How to Create an Animal Print on Your Nails

If you cut the eraser on a pencil like this, you get a homemade stamp: dip it in black varnish and make leopard prints on your nails.
20. Making blanks for nail art
Add varnishes of different colors alternately to the water. Use a toothpick to create a pattern. Remove the resulting film and cut blanks from it for.
21. Making sliders for design
The principle is the same as in the previous case. Only here you need to make a film of transparent varnish and already apply drawings on it. For example, with the help of dots.
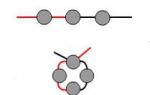
22. Replace dots

Dots is a stick with a metal ball tip. With it, you can create various patterns on the nails.
If you do not have dots, use improvised tools. For example, safety pins, toothpicks, empty ballpoint pens etc.
23. French Manicure
French manicure looks feminine and suitable for almost any occasion and. But not everyone can draw a smile line for a jacket. The video shows several ways to do it neatly.
In addition, you can highlight the tips of the nails using a regular stationery gum.

Just pull it around your finger and apply white polish. This is a budget alternative to custom vinyl stencils.
24. Masking the roughness of the jacket

If, despite all the tricks, you can’t get even stripes, you can go for a trick. Draw a line under the white part with a shiny varnish. Sequins will hide flaws, and you will get an original design.
25. Making stencils from electrical tape
This irreplaceable thing can be used in nail art. For example, for all the same rendering of a jacket.
Also, excellent stencils are obtained from electrical tape, which, unlike adhesive tape, do not stick tightly and do not peel off dried varnish.
26. Dry your nails quickly

Photostockman/Depositphotos.com
To protect freshly painted nails from small villi and dust, drop cuticle oil on top.
28. Save a Manicure

If you smeared a manicure you just made, do not rush to wash everything. Just wet your finger with water and gently rub the affected area. The varnish has not yet hardened and will easily return to the desired position.
29. Shake the polish properly

What do you do before opening a nail polish bottle? Shake it well so that it is less viscous? Fine! Just do it right: put the bubble between your palms and roll it.
If you shake and turn the varnish, then when applied, it may bubble up.
30. Save thickened varnish

Favorite varnish began to thicken and already poorly fits on the nails? Place it in the refrigerator for 10-15 minutes and then shake well.
If you have your own manicure difficulties, be sure to share them in the comments.